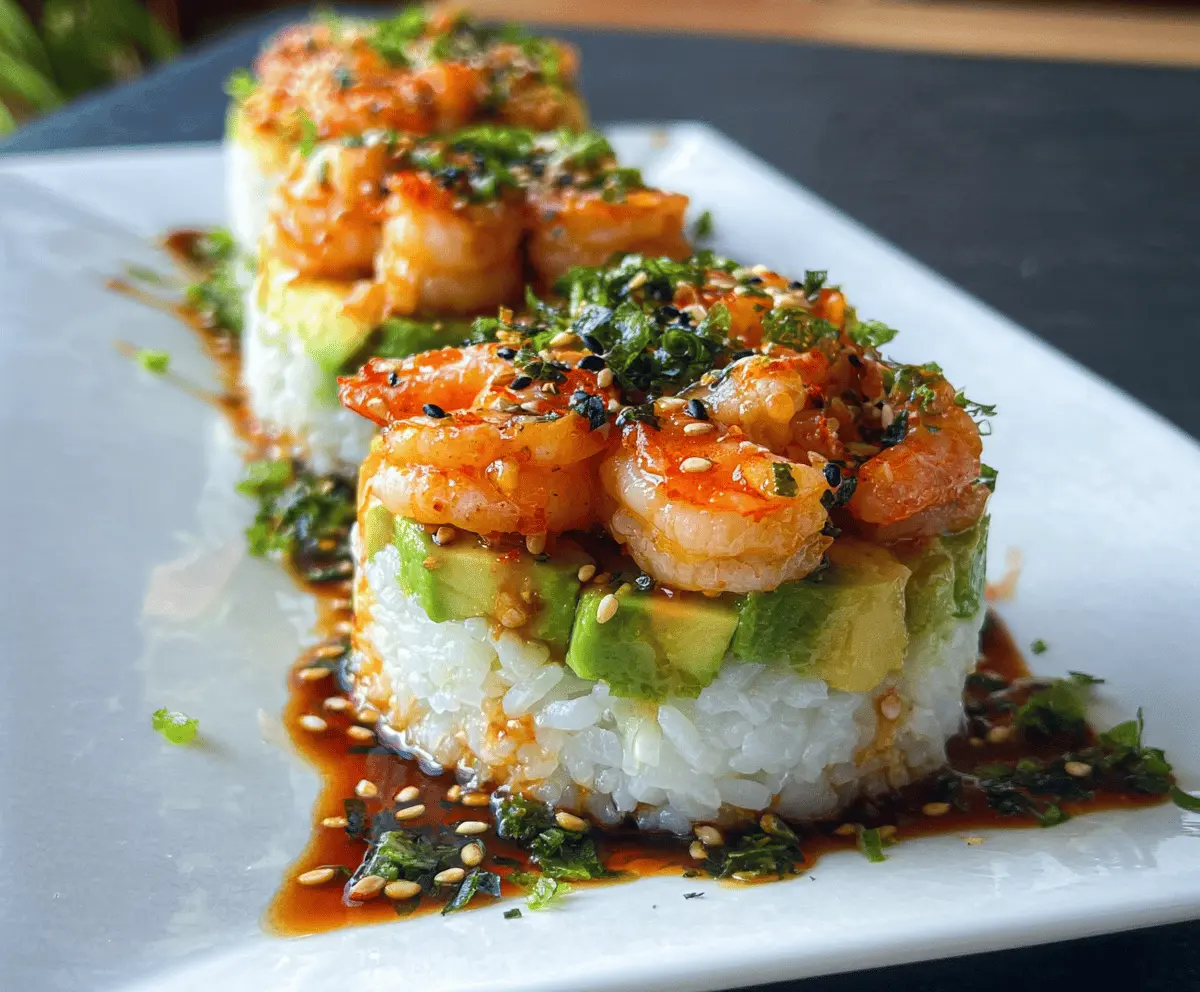
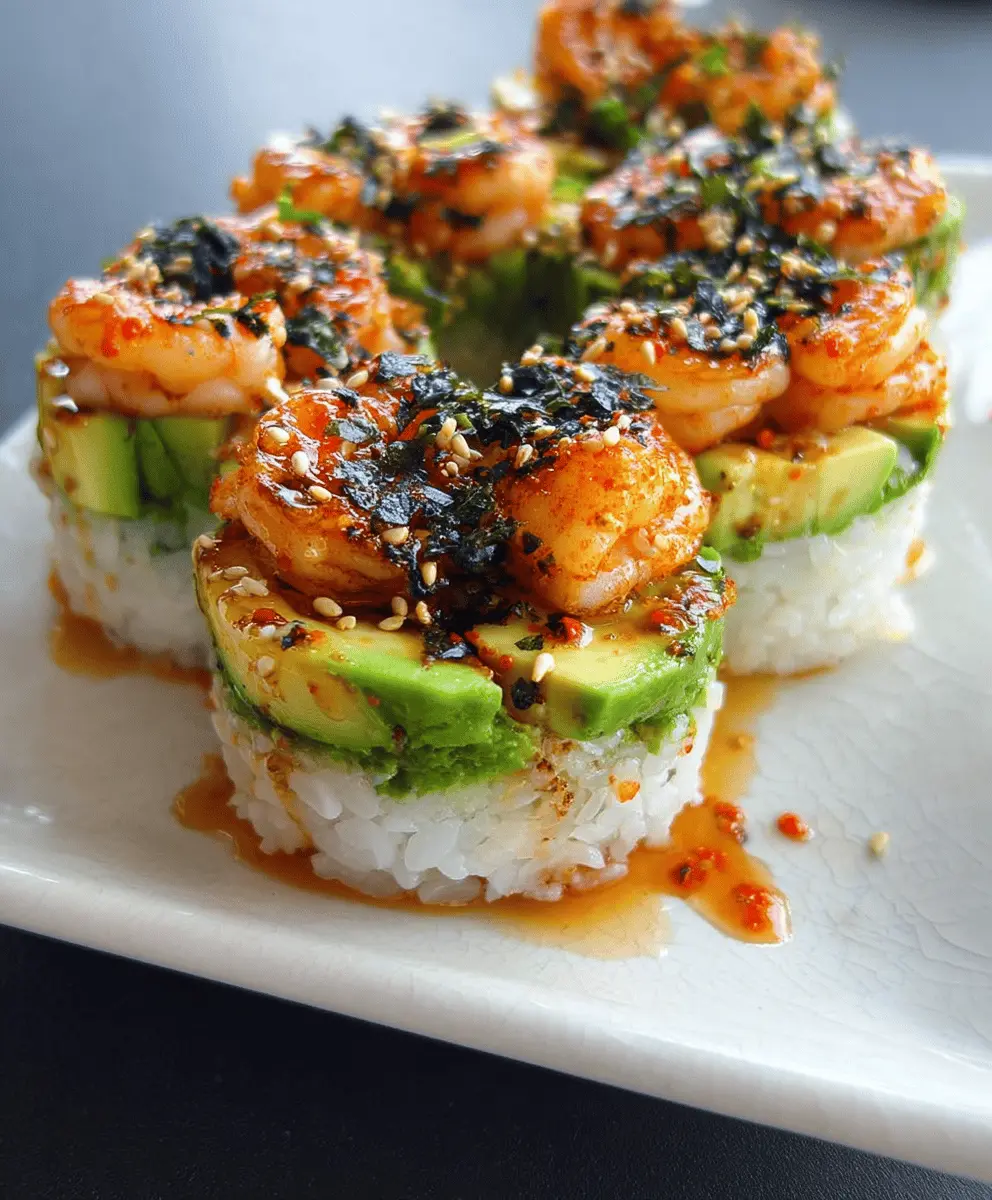
This fun sushi stack brings a spicy twist with flavorful shrimp, seasoned rice, and fresh veggies. It’s like having a sushi roll without all the fuss!
I love making these stacks for a quick lunch or dinner. Plus, who doesn’t enjoy building their own little sushi tower? It’s super Instagram-worthy too! 📸
Key Ingredients & Substitutions
Sushi Rice: Sushi rice is essential for the right texture. If you can’t find it, you can substitute with short-grain rice. It may not have the same sticky quality but will work in a pinch.
Shrimp: I use cooked shrimp for convenience, but you can also sauté raw shrimp with garlic and a bit of oil. Use any shellfish or even tofu for a vegetarian option!
Sriracha: This sauce gives a spicy kick. If you prefer a milder flavor, use less or substitute with a chili garlic sauce. You can even use mayonnaise without the sauce for a creamier topping.
Avocado: Fresh avocado adds creaminess. If you need a substitute, try mashed tofu or even a bit of guacamole for a similar texture.
Nori: While nori adds an authentic touch, you can skip it if you don’t have any. It’s still delicious without it, or you could use crushed rice crackers for a crunch!
How Do I Get My Rice Just Right for Sushi Stacks?
Getting the rice to the perfect consistency is key for sushi stacks. Rinsing it removes excess starch, which helps it become sticky when cooked. Here’s how to do it:
- Rinse the rice under cold water until the water runs clear—this usually takes about 3-4 times.
- For cooking, use a rice cooker or pot with 2 1/2 cups of water for 2 cups of rice.
- Once cooked, mix in the rice vinegar, sugar, and salt while the rice is still warm. Allow it to cool completely before using to prevent it from becoming mushy in your stacks.
Press the rice down gently when layering it in the molds. This way, it holds its shape when you stack it up!
Easy Spicy Shrimp Sushi Stacks
Ingredients You’ll Need:
- 2 cups sushi rice
- 2 1/2 cups water (for cooking rice)
- 1/4 cup rice vinegar
- 1 tablespoon sugar
- 1 teaspoon salt
- 1/2 pound cooked shrimp, chopped into bite-sized pieces
- 1-2 tablespoons sriracha sauce (adjust to spice preference)
- 1 tablespoon mayonnaise (preferably Japanese mayo or regular)
- 1 avocado, peeled and diced
- 1/2 cucumber, diced
- 1/4 cup chopped green onions
- 1 teaspoon soy sauce
- Toasted sesame seeds (black and/or white), for garnish
- Nori strips or crushed nori flakes, for garnish
How Much Time Will You Need?
This recipe takes about 45 minutes total. You’ll spend around 20 minutes on prep, which includes cooking the rice and preparing the ingredients. The assembly will take around 15 minutes, and then you can enjoy your delicious stacked sushi!
Step-by-Step Instructions:
1. Prepare the Sushi Rice:
Begin by rinsing the sushi rice under cold water until the water runs clear. This step is important to remove excess starch. After rinsing, combine the rice with 2 1/2 cups of water in a rice cooker or pot. Cook according to the rice cooker instructions or bring to a boil, then lower the heat, cover, and let it simmer for about 15 minutes until the rice is tender.
2. Season the Rice:
In a small bowl, mix the rice vinegar, sugar, and salt until dissolved. Once the rice is cooked, transfer it to a large bowl and gently fold in the vinegar mixture to season the rice. Let it cool to room temperature as you prepare the other ingredients.
3. Make the Spicy Shrimp Filling:
In another bowl, combine the chopped shrimp with sriracha sauce and mayonnaise to create your spicy shrimp topping. Mix well, adjusting the amount of sriracha based on your preferred spice level.
4. Prepare the Vegetables:
In a separate bowl, add the diced avocado, cucumber, and chopped green onions. Drizzle with soy sauce and gently toss to ensure they are well mixed.
5. Assemble the Sushi Stacks:
To assemble your sushi stacks, place a round food mold or ring mold on a serving plate. Start by filling the bottom with a layer of prepared sushi rice, pressing it down gently but firmly to create a solid base.
6. Add Layers:
Next, add a layer of the avocado and cucumber mixture on top of the rice, again pressing it down gently to hold its shape. Then, spoon the spicy shrimp mixture on top, pressing lightly to form a cohesive stack.
7. Final Touches:
Carefully remove the mold to reveal your beautiful sushi stack. Garnish with toasted sesame seeds and nori strips or crushed nori flakes for an extra touch of flavor and presentation.
8. Serve and Enjoy:
Serve your sushi stacks immediately alongside soy sauce, pickled ginger, and wasabi if desired. Enjoy this delightful and visually stunning dish with family and friends!
These Easy Spicy Shrimp Sushi Stacks will surely impress your guests and make sushi night a fun and enjoyable experience!
FAQ for Easy Spicy Shrimp Sushi Stacks
Can I Use Frozen Shrimp for This Recipe?
Absolutely! If you’re using frozen shrimp, make sure to thaw them completely before cooking. You can thaw shrimp overnight in the refrigerator or place them in a sealed bag and run cold water over it. Pat them dry before chopping to avoid extra moisture in the dish.
Is It Possible to Make This Recipe Vegetarian?
Yes, you can easily make this dish vegetarian by substituting the shrimp with diced tofu or tempeh. You can also add more vegetables like shredded carrots, bell peppers, or even mushrooms to enhance the flavors and textures!
How Should I Store Leftovers?
If you have any leftovers, store the components separately in airtight containers in the refrigerator. The rice and shrimp mixture can last up to 2 days, but it’s best to eat them fresh. The avocado should be stored without the skin, and it’s recommended to eat it the same day to prevent browning.
Can I Prepare the Rice Ahead of Time?
Yes! You can prepare the sushi rice a day in advance. Simply cool it to room temperature, then store it in an airtight container in the fridge. Before using, let it sit at room temperature for about 30 minutes, or gently warm it in the microwave while taking care not to dry it out.