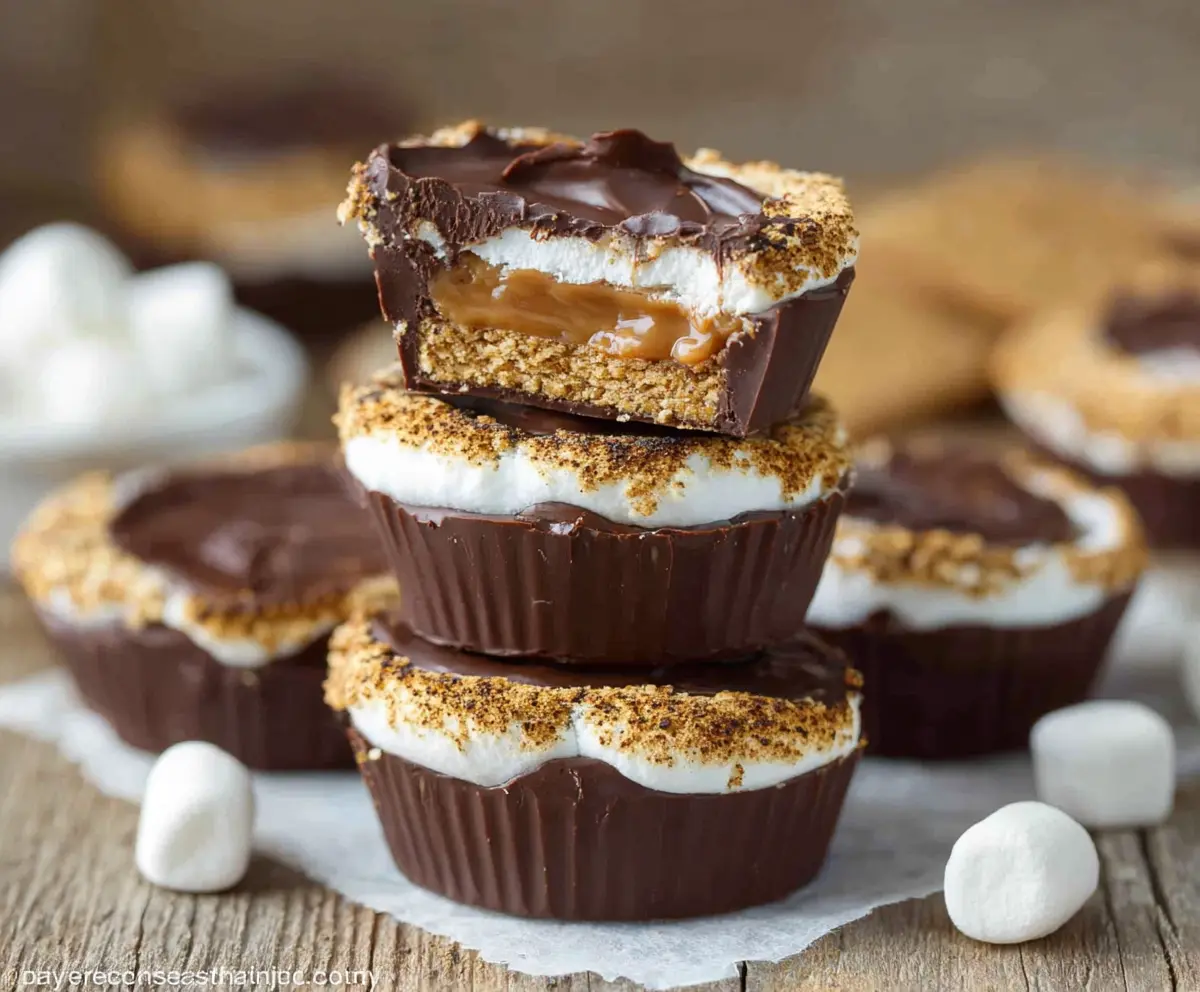
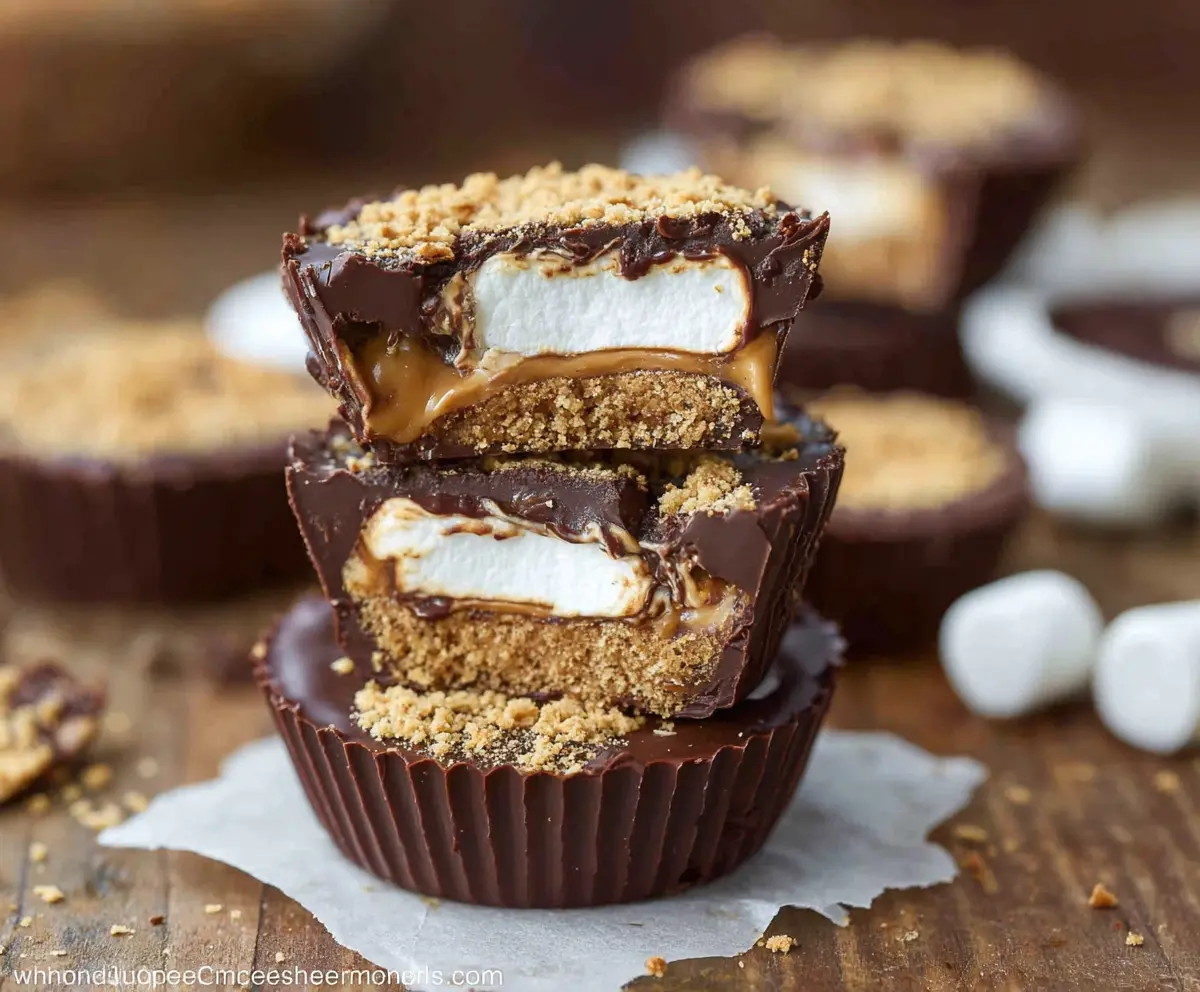
These S’mores Peanut Butter Cups are a fun twist on the classic treat! With a creamy peanut butter filling, crunchy graham cracker bits, and fluffy marshmallow all wrapped in chocolate, they’re hard to resist.
Making these feels like a mini adventure in the kitchen! I love sharing them during movie nights—everyone can’t get enough, and I get to play the hero for bringing the snacks! 🍫✨
Key Ingredients & Substitutions
Semi-sweet chocolate chips: These are the main component for the outer layer. If you prefer a sweeter taste, milk chocolate might be a good substitute. For a dark chocolate flavor, opt for dark chocolate chips. Enjoy experimenting with different chocolate types!
Creamy peanut butter: This is essential for the filling’s rich texture. You can substitute with almond butter or sun butter if you’re avoiding peanuts or want a different flavor profile. Just make sure it’s creamy for the best consistency.
Powdered sugar: This adds sweetness and helps bind the peanut butter layer. If you’d like a healthier option, try using honey or maple syrup, but keep in mind it might alter the texture slightly.
Graham cracker crumbs: For that classic S’mores flavor, these are key! If you need a gluten-free option, crushed gluten-free graham crackers or even crushed up gluten-free cookies work well!
Mini marshmallows: These give the squishy element and classic S’mores look. If you can’t find mini marshmallows, you can use cut-up larger marshmallows instead. For a vegan option, look for plant-based marshmallows!
How Do I Melt Chocolate Without Burning It?
Melted chocolate can easily seize or burn, so take it slow. Using a microwave is the quickest method. Here’s my step-by-step guide:
- Start with short bursts of 30 seconds at medium power.
- Stir the chocolate after each interval to distribute heat evenly.
- Continue until it’s almost fully melted; stir until completely smooth.
This way, you’ll avoid overheating and ruining the chocolate! Enjoy the smooth texture in your S’mores Cups!
What’s the Best Way to Toast Marshmallows on Top?
Toasting marshmallows adds a delightful flavor and finish to your treats. Here’s a simple breakdown:
- Use a kitchen torch carefully, holding it a few inches away and rotating the cups for even toasting.
- If you don’t have a torch, simply set your cups under the broiler for 1-2 minutes.
- Watch closely to avoid burning! You want a golden brown color for that perfectly toasted flavor.
This touch makes your S’mores Peanut Butter Cups not just tasty, but also visually appealing!
How to Make S’mores Peanut Butter Cups
Ingredients You’ll Need:
For the Chocolate Shell:
- 1 1/2 cups semi-sweet chocolate chips or chocolate baking chips
For the Peanut Butter Filling:
- 1 cup creamy peanut butter
- 1/4 cup powdered sugar
- 1 cup graham cracker crumbs (about 6 full crackers crushed)
For the Marshmallow Layer:
- 1 1/2 cups mini marshmallows (or large marshmallows cut into smaller pieces)
- Graham cracker crumbs for sprinkling on top (optional)
How Much Time Will You Need?
This delightful recipe takes about 20 minutes of active prep time, plus around 1 hour to chill in the fridge. You’ll enjoy assembling the layers of chocolate, peanut butter, and marshmallows, then just let them set in the fridge before digging in!
Step-by-Step Instructions:
1. Prepare the Chocolate Base:
Start by melting 1 cup of chocolate chips in a microwave-safe bowl. Heat in the microwave for 30 seconds at a time, stirring after each interval until the chocolate is smooth and fully melted. Be careful not to overheat!
2. Line the Muffin Tin:
Grab a standard muffin tin and line it with paper cupcake liners. This will help you remove the cups easily once they’re set.
3. Make the Peanut Butter Layer:
In a mixing bowl, combine 1 cup of creamy peanut butter and 1/4 cup of powdered sugar. Stir until you have a smooth mixture. Then, fold in 1 cup of graham cracker crumbs until the mixture is slightly thick and crumbly.
4. Form the Chocolate Cups:
Spoon about 1 tablespoon of the melted chocolate into the bottom of each lined muffin cup. Use the back of a spoon to spread the chocolate and coat the bottom and a little up the sides, creating a shell. Pop the tin in the freezer for about 10 minutes to set the chocolate.
5. Add the Peanut Butter Filling:
Once the chocolate shells are firm, take them out of the freezer and add roughly 1 tablespoon of the peanut butter mixture into each cup. Press the mixture down lightly to flatten it.
6. Top with Marshmallow:
Now it’s time for the marshmallows! Distribute the mini marshmallows evenly on top of the peanut butter layer in each cup. Make sure they’re spread well!
7. Cover with Chocolate:
Next, melt the remaining 1/2 cup of chocolate chips and spoon the melted chocolate over the marshmallows, ensuring they are completely covered.
8. Toast the Marshmallow Tops (Optional):
This step is optional but gives a nice touch! Use a kitchen torch to carefully toast the marshmallow topping until it’s golden brown. If you don’t have a torch, you can use the broiler. Place the cups under it for 1-2 minutes, keeping a close eye to prevent burning!
9. Chill to Set:
Cover the muffin tin with plastic wrap and refrigerate the cups for at least 1 hour. This will help them firm up and make them easier to remove from the liners.
10. Serve:
Once set, carefully remove the S’mores Peanut Butter Cups from the muffin liners and enjoy these delightful treats! They’re perfect for sharing or keeping all to yourself!
This recipe yields about 12 delicious peanut butter cups that combine the delightful flavors of chocolate, marshmallows, graham crackers, and peanut butter. Enjoy every bite!
Can I Use Dark Chocolate Instead of Semi-Sweet?
Absolutely! Dark chocolate will give your S’mores Peanut Butter Cups a richer, more intense flavor. Just make sure to adjust the sweetness if needed, as dark chocolate is less sweet than semi-sweet.
Can I Make These Vegan?
Yes, you can! Use dairy-free chocolate chips, natural nut butter, and ensure your marshmallows are vegan-friendly. You might need to check the ingredients since some marshmallows contain gelatin.
How Should I Store Leftovers?
Store any leftovers in an airtight container in the refrigerator for up to a week. You can also freeze them for longer storage—just let them thaw in the fridge before enjoying them again!
Can I Add Other Ingredients?
Definitely! Feel free to customize by adding other mix-ins like chopped nuts, toffee bits, or even drizzling some caramel sauce inside for an extra sweet treat. The possibilities are endless!