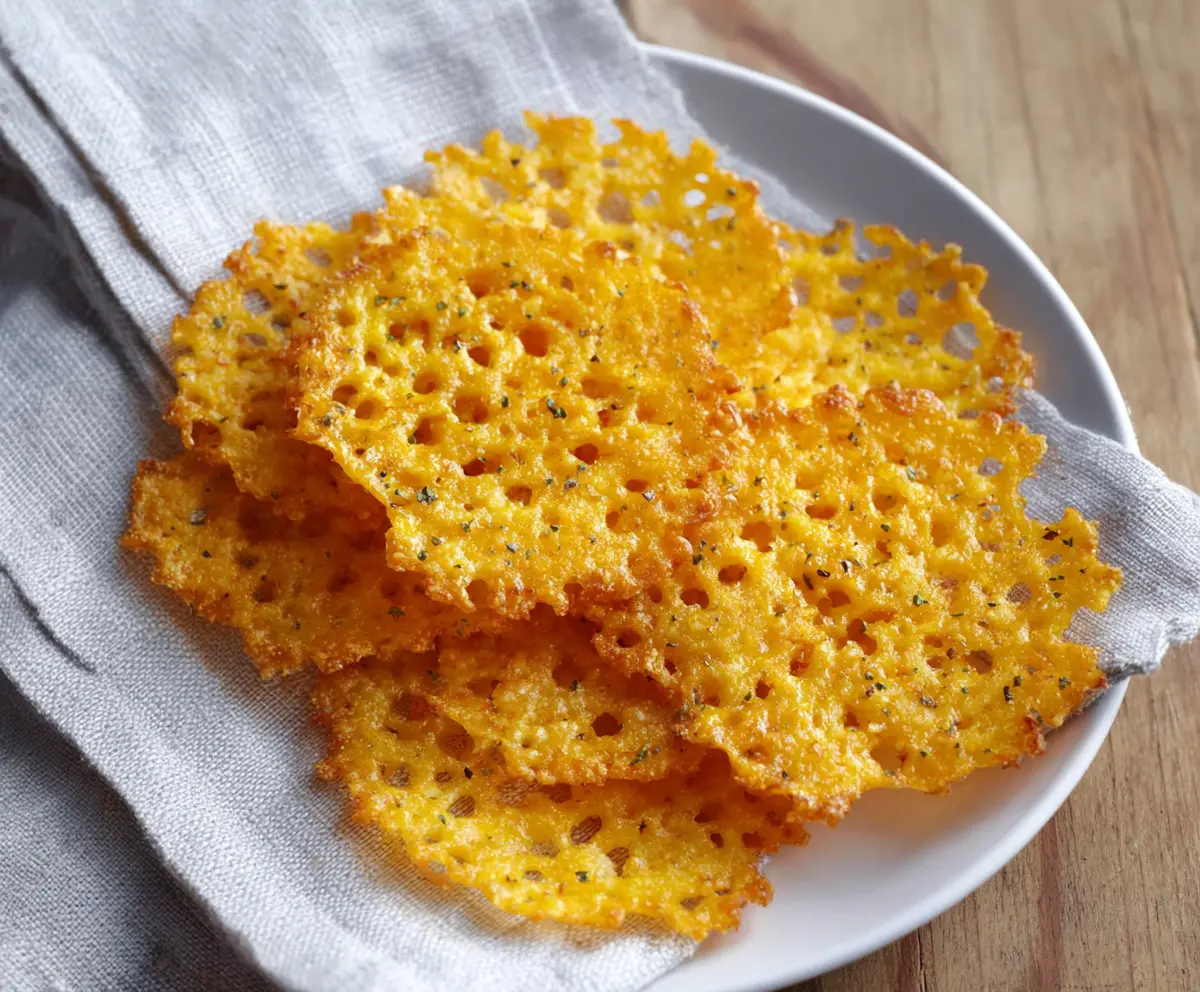
These Cheddar Cheese Crisps are super cheesy and crunchy snacks that are perfect for munching! Made with just cheese, they’re gluten-free and totally addictive.
Honestly, they disappear fast at my house! I love pairing them with my favorite dip or just enjoying them on their own. Who knew cheese could be this fun? 😄
Key Ingredients & Substitutions
Sharp Cheddar Cheese: Freshly shredded is best for these crisps. It melts beautifully and gives that great cheesy flavor. You can also use other cheeses like Gouda or Parmesan for different tastes. Just remember, the more aged the cheese, the more intense the flavor!
Garlic Powder: This is optional but adds a nice depth of flavor. If you prefer, you can use fresh minced garlic, but it may burn faster, so use a little less or add it midway through baking.
Dried Parsley/Italian Seasoning: These are great for adding some herbal notes. If you don’t have them, feel free to skip or even try dried oregano or thyme for a slightly different twist.
Black Pepper: A sprinkle adds a little heat. For a kick, consider using cayenne pepper or crushed red pepper flakes instead!
How Do You Ensure Your Cheese Crisps Turn Out Perfectly Crunchy?
The key to making great cheese crisps is all in the preparation and baking process. Start with a hot oven and the right baking method.
- Make sure to space the mounds of cheese apart on the baking sheet. They spread out as they cook, and you don’t want them to stick together.
- Flatten them a bit before baking. This helps them cook evenly and get that nice, thin texture.
- Keep an eye on them while baking! Ovens can vary, so check around the 5-minute mark. Once they turn golden, they’re ready.
- Letting them cool on the baking sheet is vital. They will crisp up as they cool down!
With these tips, you’re set to create delicious, crunchy cheese crisps that are perfect for snacking or as a topping for your favorite dishes!

How to Make Cheddar Cheese Crisps
Ingredients You’ll Need:
- 1 cup sharp cheddar cheese, freshly shredded
- 1/4 teaspoon garlic powder (optional)
- 1/4 teaspoon dried parsley or Italian seasoning (optional)
- Freshly ground black pepper, to taste (optional)
How Much Time Will You Need?
This Cheddar Cheese Crisps recipe takes about 10 minutes of prep time and about 7 minutes to bake, making it a quick and tasty snack. In total, you’ll be enjoying these cheesy treats in about 20 minutes!
Step-by-Step Instructions:
1. Prepping the Oven and Baking Sheet:
Start by preheating your oven to 400°F (200°C). While the oven is heating, prepare your baking sheet by lining it with parchment paper or a silicone baking mat. This will prevent the cheese from sticking and help with easy cleanup!
2. Mixing the Ingredients:
In a medium bowl, combine your freshly shredded cheddar cheese with the garlic powder, dried parsley or Italian seasoning, and freshly ground black pepper, if you’re using them. Mix everything together until it’s well combined. The cheese is the star here, so make sure it’s the right kind and freshly shredded!
3. Mounding the Cheese Mixture:
Spoon tablespoon-sized mounds of the cheese mixture onto the prepared baking sheet. Make sure to leave some space between each mound because the cheese will spread as it melts.
4. Flattening the Mounds:
Next, take the back of your spoon and gently flatten each mound a little to form thin circles. This will help create those perfect crispy edges!
5. Baking Time:
Place the baking sheet in your preheated oven and bake for about 5-7 minutes. Keep a close eye on them! You want the edges to turn golden brown and crispy. It may take a bit longer if your oven runs cool, so check them around the 5-minute mark.
6. Cooling the Crisps:
After baking, remove the baking sheet from the oven. Let the crisps cool completely on the baking sheet because they will continue to firm up and become extra crunchy as they cool down!
7. Serving and Storing:
Once the crisps are cool, carefully peel them off the parchment paper or silicone mat. Serve them up as a snack, or use them as a flavorful garnish on salads or soups. Any leftovers can be stored in an airtight container at room temperature for up to a week. Enjoy your delicious Cheddar Cheese Crisps!
Can I Use Pre-Shredded Cheese for This Recipe?
Yes, you can, but it’s best to use freshly shredded cheese for optimal melting and crispiness. Pre-shredded cheese often contains anti-caking agents that can prevent the cheese from melting properly.
Can I Add Other Seasonings to the Cheese Crisps?
Absolutely! Feel free to experiment with different seasonings like smoked paprika, cayenne pepper for a kick, or even chipotle powder for a smoky flavor. Just be careful not to add too much, as it could overpower the cheese.
How Can I Make These Cheese Crisps Dairy-Free?
For a dairy-free option, try using vegan cheese shreds made from nuts or coconut, but be aware that the texture and flavor may vary. Look for brands that melt well for the best results.
What Should I Do If the Cheese Crisps Are Soft After Baking?
If the crisps are soft, they might need a bit more baking time. Put them back in the oven for an additional minute or two until they’re golden and crisp. Ensure they’re cooled completely before serving, as they will firm up as they cool.