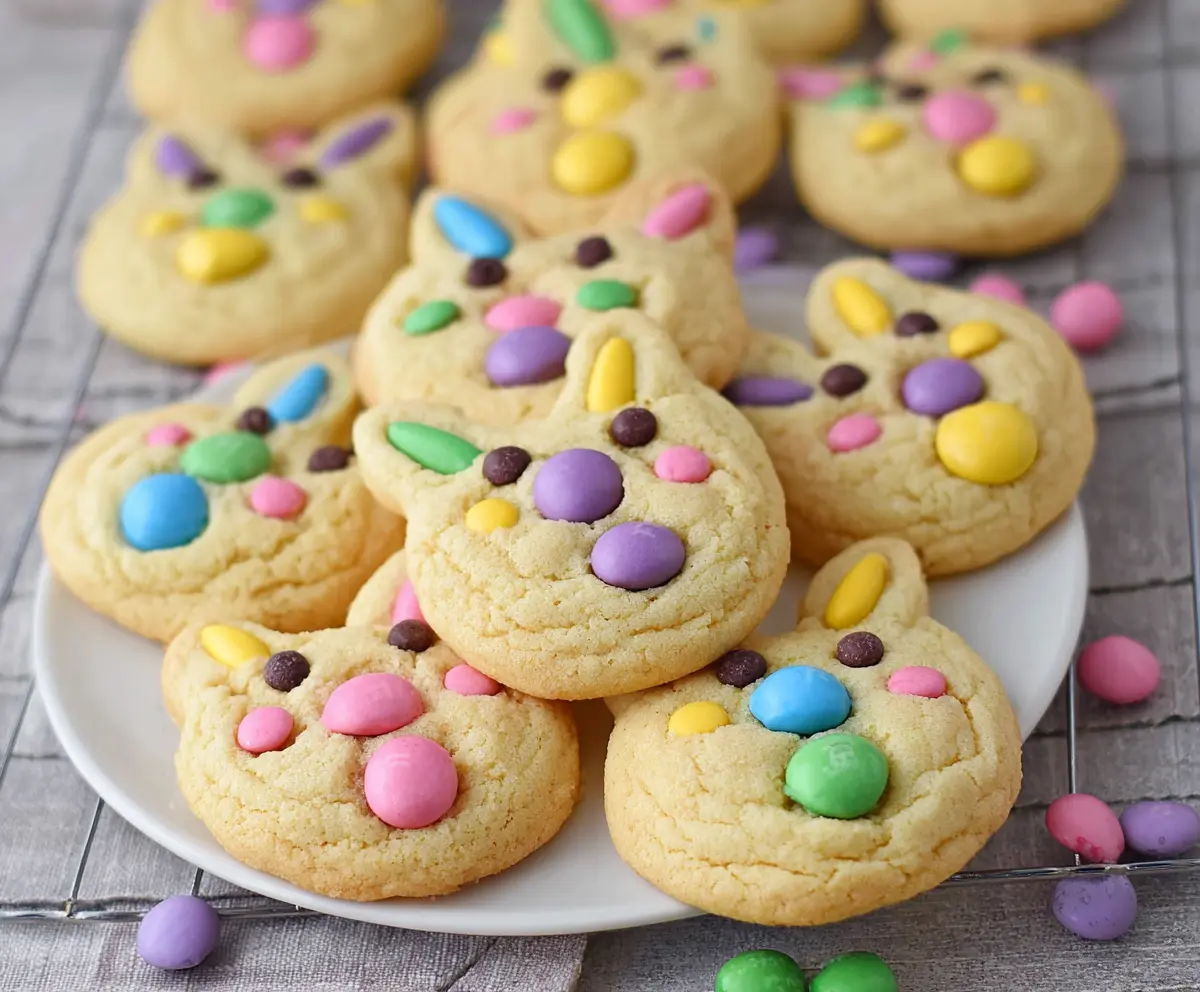
These fun Easter Bunny M&M’s Cookies are soft, chewy, and loaded with colorful candy! They’re perfect for celebrating the holiday with a sweet twist.
Kids (and adults) will love spotting the bunny faces in each cookie. I like to bake a batch to share with friends and family — they disappear faster than you can say “Easter!” 🐰
Key Ingredients & Substitutions
All-Purpose Flour: This is the base for your cookies. If you’re gluten-free, try an all-purpose gluten-free blend to keep the texture similar. Personally, I’ve had great results with almond flour, but it may give a different texture.
Butter: Unsalted butter helps control the saltiness of your cookies. If you’re out of butter, coconut oil or even margarine work as substitutes, though the flavor won’t be quite the same. My tip? Use the freshest butter you have for the best taste!
Granulated & Brown Sugar: The mix of these sugars gives depth to your cookies. If you need a healthier option, consider using coconut sugar instead of brown sugar. It has a nice caramel flavor that complements the cookies well.
M&M’s: While pastel colors are great for Easter, any chocolate candy can work. Try substituting with chocolate chips or even chopped-up chocolate bars for a fun twist. I sometimes add a mix of milk chocolate and peanut butter chips!
Why Is It Important to Beat the Butter and Sugars Together?
Beating the butter with sugar is where the magic begins! This step creates air pockets that help your cookies rise and become fluffy. Be sure to beat until the mixture is creamy and light in color.
- Use an electric mixer on medium speed for about 2-3 minutes.
- Scrape down the bowl halfway through to incorporate all the ingredients evenly.
Don’t rush this step! Properly creamed butter and sugar make a big difference in the final texture of the cookies.
How Can I Shape the Bunny Faces with M&M’s Smoothly?
Shaping the bunny faces adds an adorable touch to your cookies! Here are some easy steps to make it simple:
- Scoop the cookie dough and place it on the baking sheet, then flatten it slightly before adding candies.
- For ears, use two oval pastel M&M’s at the top, really pressing them in so they stay put.
- Use round M&M’s for cheeks and press them gently into the dough so they don’t roll away.
- For the nose, a single candy in the center works perfectly. You can also use a small piece of a jellybean for extra fun!
Feel free to get creative with your designs! Each cookie can be a little unique, just like little bunnies in the garden.
How to Make Easter Bunny M&M’s Cookies
Ingredients You’ll Need:
For the Cookie Dough:
- 2 1/4 cups all-purpose flour
- 1/2 teaspoon baking soda
- 1 cup unsalted butter, room temperature
- 1/2 cup granulated sugar
- 1 cup light brown sugar, packed
- 1 teaspoon salt
- 2 teaspoons vanilla extract
- 2 large eggs
For the Decoration:
- 1 1/2 cups M&M’s candies (pastel/Easter colors preferred), divided
How Much Time Will You Need?
This cookie recipe takes about 20 minutes to prepare and an additional 10–12 minutes to bake. After baking, you’ll want to let them cool for about 5 minutes before they’re ready to be transferred to a wire rack. In no time, you’ll have delicious, festive cookies for Easter!
Step-by-Step Instructions:
1. Preheat and Prepare:
Start by preheating your oven to 350°F (175°C). While that’s warming up, take a moment to line your baking sheets with parchment paper. This will help prevent the cookies from sticking and make cleanup a breeze!
2. Mix Dry Ingredients:
In a medium-sized bowl, whisk together the all-purpose flour and baking soda until well combined. Set this bowl aside for later. You want to mix them well so your cookies have the perfect rise!
3. Cream the Butters and Sugars:
Grab a large mixing bowl and beat the room temperature butter, granulated sugar, brown sugar, and salt together. Use a mixer or a sturdy whisk until the mixture is creamy and smooth—a perfect light color is what you’re looking for!
4. Add Eggs and Vanilla:
Now it’s time to add the vanilla extract and eggs to the butter mixture—do this one egg at a time. Beat well after each addition until everything is fully combined and fluffy. This step gives your cookies their delicious flavor!
5. Combine Dry and Wet Ingredients:
Gradually add your flour mixture to the wet ingredients, mixing just until combined. Be careful not to overmix; we want the cookies to be soft and chewy!
6. Scoop and Shape:
Using a cookie scoop or a tablespoon, scoop out dough balls and place them on your prepared baking sheets, giving each cookie about 2 inches of space to spread while baking.
7. Decorate with M&M’s:
Here comes the fun part! Take your M&M’s and press them into the tops of each cookie. For a cute Easter bunny face, use two oval M&M’s for ears, two round ones for cheeks, and a small candy for a nose in the center. Get creative!
8. Optional Bunny Details:
If you want to bring the bunny face to life, use a toothpick or a small tool to gently make little indentations for eyes and a mouth. This adds a charming touch to your cookies!
9. Bake to Perfection:
Place the baking sheets in the preheated oven and bake for 10–12 minutes. You’re looking for a lightly golden edge while keeping the center soft. The smell will be wonderful, and you’ll know they are close!
10. Cool and Serve:
After baking, let the cookies cool on the baking sheet for about 5 minutes. This helps them firm up a bit. Then, carefully transfer them to a wire rack to cool completely. Once cooled, they’re ready to be enjoyed!
11. Enjoy Your Festive Cookies!
Serve these delightful Easter bunny cookies at your gathering, or keep them for yourself (no judgment here!). Enjoy the festive flavors and colors as you celebrate!
Can I Use Different Types of Sugar?
Absolutely! While the recipe calls for granulated and brown sugar, you can substitute coconut sugar for brown sugar for a healthier twist. Just keep in mind that this will slightly alter the flavor and texture.
What Can I Use Instead of Butter?
If you’re in need of a dairy-free option, coconut oil works well as a substitute for butter. Just make sure it’s melted and slightly cooled before mixing it in. Margarine can also be used, but stick to unsalted for the best results.
Can I Prepare the Dough Ahead of Time?
Definitely! You can prepare the cookie dough in advance and store it in the refrigerator for up to 2 days. Just wrap it tightly in plastic wrap to keep it fresh. When you’re ready to bake, scoop and bake as directed, adding a minute or two to the baking time if the dough is cold.
What’s the Best Way to Store Leftover Cookies?
To store your cookies, place them in an airtight container at room temperature for up to 5 days. If you want to keep them fresh longer, you can freeze the cookies for up to three months. Just layer them with parchment paper to prevent sticking!