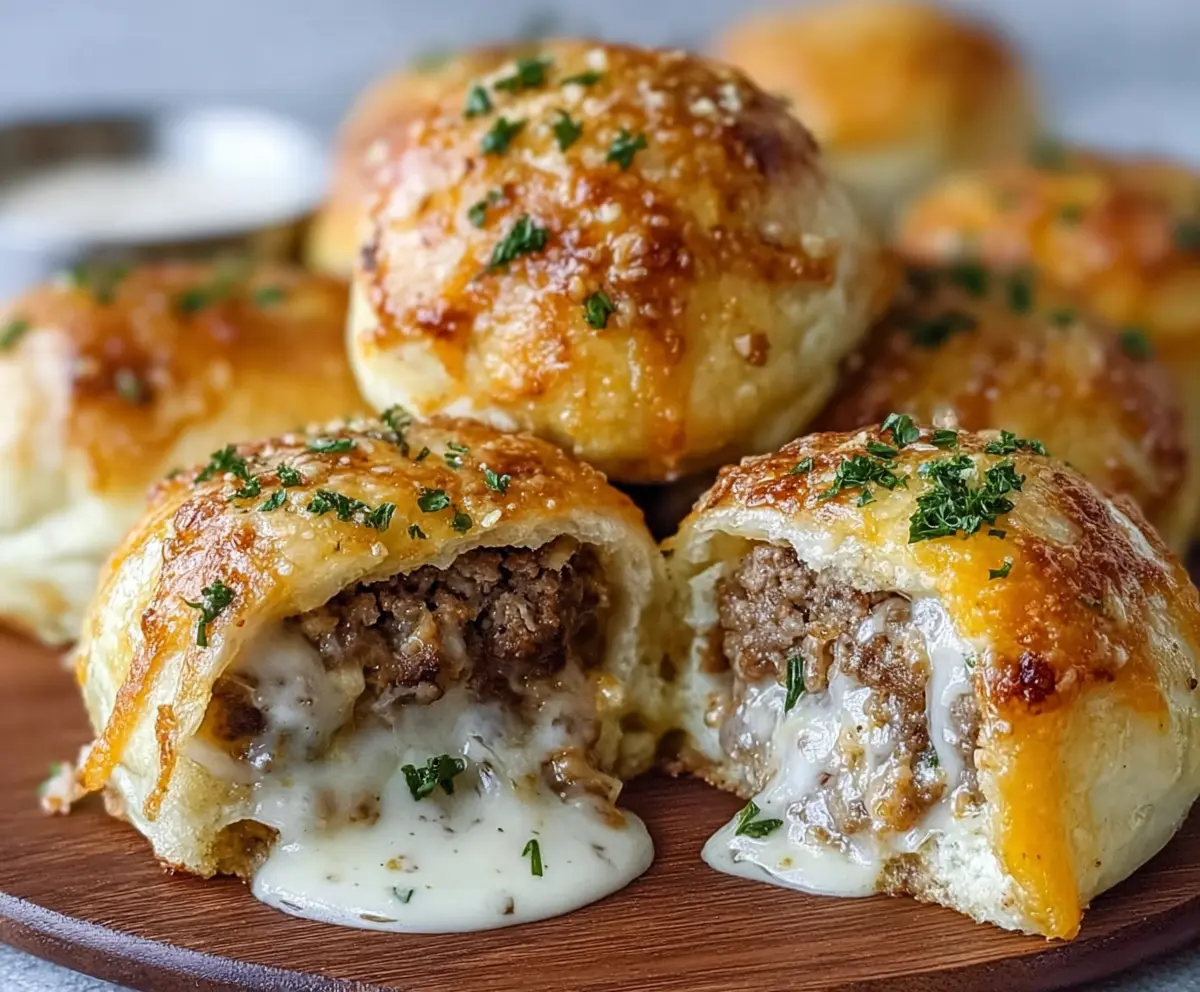
These Garlic Parmesan Cheeseburger Bombs are a yummy treat! They combine juicy beef, gooey cheese, and a flavorful garlic Parmesan coating, all wrapped up in a soft, golden dough.
Just picture biting into one and getting that cheesy goodness! I like to serve them with a side of marinara sauce for dipping. Trust me, they won’t last long on the plate! 😋
Key Ingredients & Substitutions
Ground Beef: Lean ground beef (80/20) works best for flavor and juiciness. If you prefer, you can substitute with ground turkey or chicken for a lighter option, though the flavor might be slightly different.
Onion: A sweet onion or yellow onion adds great flavor. If you’re short on time, try using onion powder as a quick substitute, but fresh onions give a better taste.
Dough: While biscuit dough is standard, pizza dough or even crescent roll dough can be a fun twist! Just remember, different dough types might change the baking time slightly.
Cheeses: I love the blend of mozzarella and cheddar for creaminess and flavor, but feel free to mix it up! Pepper Jack adds a nice kick, or you can go for a milder cheese like Monterey Jack.
How Do I Ensure the Dough is Perfectly Sealed?
Sealing the dough properly is essential to keep the filling inside. Here are some tips:
- Flatten the dough evenly to avoid thin spots that can tear when folding.
- Place a generous but not overstuffed amount of filling in the center, about 2-3 tablespoons.
- Moisten the edges of the dough slightly with water before sealing to help it stick.
- Pinch the edges firmly, ensuring no gaps, then roll it to form a smooth ball for best results.
If any filling escapes during baking, don’t worry too much—it’ll still taste great!
How Can I Achieve a Golden Brown and Crunchy Top?
For that appealing golden crust, follow these steps:
- Brush the tops with melted butter; this provides flavor and helps with browning.
- Don’t skip the Parmesan sprinkle; it adds a delightful crunch and enhances the flavor.
- Keep an eye on them while they bake. If they’re not golden after 15 minutes, give them a few extra minutes, but avoid overbaking to keep them soft inside.
You’ll end up with delicious, golden bombs perfect for sharing (or keeping all to yourself!)

Garlic Parmesan Cheeseburger Bombs
Ingredients You’ll Need:
For the Filling:
- 1 lb ground beef
- 1/2 small onion, finely diced
- 2 cloves garlic, minced
- Salt and pepper, to taste
- 1 cup shredded mozzarella cheese
- 1 cup shredded cheddar cheese
For the Dough:
- 1 package (about 8 oz) refrigerated biscuit dough (or pizza dough)
For Topping:
- 1/4 cup grated Parmesan cheese
- 2 tbsp butter, melted
- 1 tbsp fresh parsley, chopped (for garnish)
- Optional: 1 tsp Italian seasoning or dried oregano
How Much Time Will You Need?
This tasty recipe takes about 10 minutes of prep time and 15-20 minutes of baking time for a total of around 30-35 minutes to get these Garlic Parmesan Cheeseburger Bombs ready to serve! Quick and delightful for any meal or snack!
Step-by-Step Instructions:
1. Preheat and Prep:
Start by preheating your oven to 375°F (190°C). While the oven is heating, lightly grease a baking sheet or line it with parchment paper to prevent sticking.
2. Cook the Filling:
In a skillet, heat over medium heat and add the ground beef along with the finely diced onion. Cook until the beef is browned and the onion is soft. In the last minute of cooking, add in the minced garlic. Season your mix with salt, pepper, and Italian seasoning if you like! Once done, drain any excess grease and let the mixture cool slightly.
3. Prepare the Dough:
Open your biscuit dough and gently separate it into individual biscuits. Flatten each biscuit into a round, aiming for about 3-4 inches in diameter to create enough space for the filling.
4. Fill the Dough:
Place a spoonful of the cooled beef mixture in the center of each round. Top this with a mix of shredded mozzarella and cheddar cheese to get that gooey texture you’ll love!
5. Seal the Bombs:
Carefully fold the dough over the filling and pinch the edges tightly to seal, forming a nice ball shape. Make sure they are well sealed to keep all the yummy filling inside!
6. Arrange on Baking Sheet:
Place your stuffed dough balls seam-side down on the prepared baking sheet to ensure they don’t open while baking.
7. Brush and Sprinkle:
Brush the tops of each bomb with melted butter for that golden finish. Then sprinkle grated Parmesan cheese evenly over the top for extra flavor!
8. Bake:
Now, pop them in the oven and bake for 15-20 minutes, or until the dough is golden brown and cooked through. Keep an eye on them towards the end for perfect browning!
9. Cool and Garnish:
Once baked, remove from the oven and sprinkle with chopped parsley for a fresh pop of color. Let them cool for a few minutes to avoid burns from the hot cheese inside!
10. Serve and Enjoy:
Serve warm, and if you like, pair them with marinara or your favorite dipping sauce for an extra treat. Get ready for everyone to ask for seconds!
Enjoy your delicious Garlic Parmesan Cheeseburger Bombs with melty cheese oozing out and a savory garlic-Parmesan crust! Perfect for game day, parties, or a cozy night in!
Can I Use Ground Turkey Instead of Beef?
Absolutely! Ground turkey is a great lean alternative. Just keep in mind that it may be a bit drier, so consider adding a touch more seasoning or some olive oil to keep the filling moist.
What If I Don’t Have Biscuit Dough?
No problem! You can use pizza dough or even crescent roll dough instead. Just make sure to adjust the baking time slightly, as different doughs may cook at different rates.
How Should I Store Leftovers?
Store any leftovers in an airtight container in the fridge for up to 3 days. To reheat, simply pop them in the microwave or warm them up in the oven at 350°F (175°C) for about 10 minutes until heated through.
Can I Prepare These Ahead of Time?
Yes! You can make and assemble the bombs ahead of time. Just keep them in the fridge until you’re ready to bake. If you want to prep even further, assemble them and freeze them on a baking sheet before transferring to a freezer bag for up to a month. Bake them from frozen, adding a few extra minutes to the cooking time!