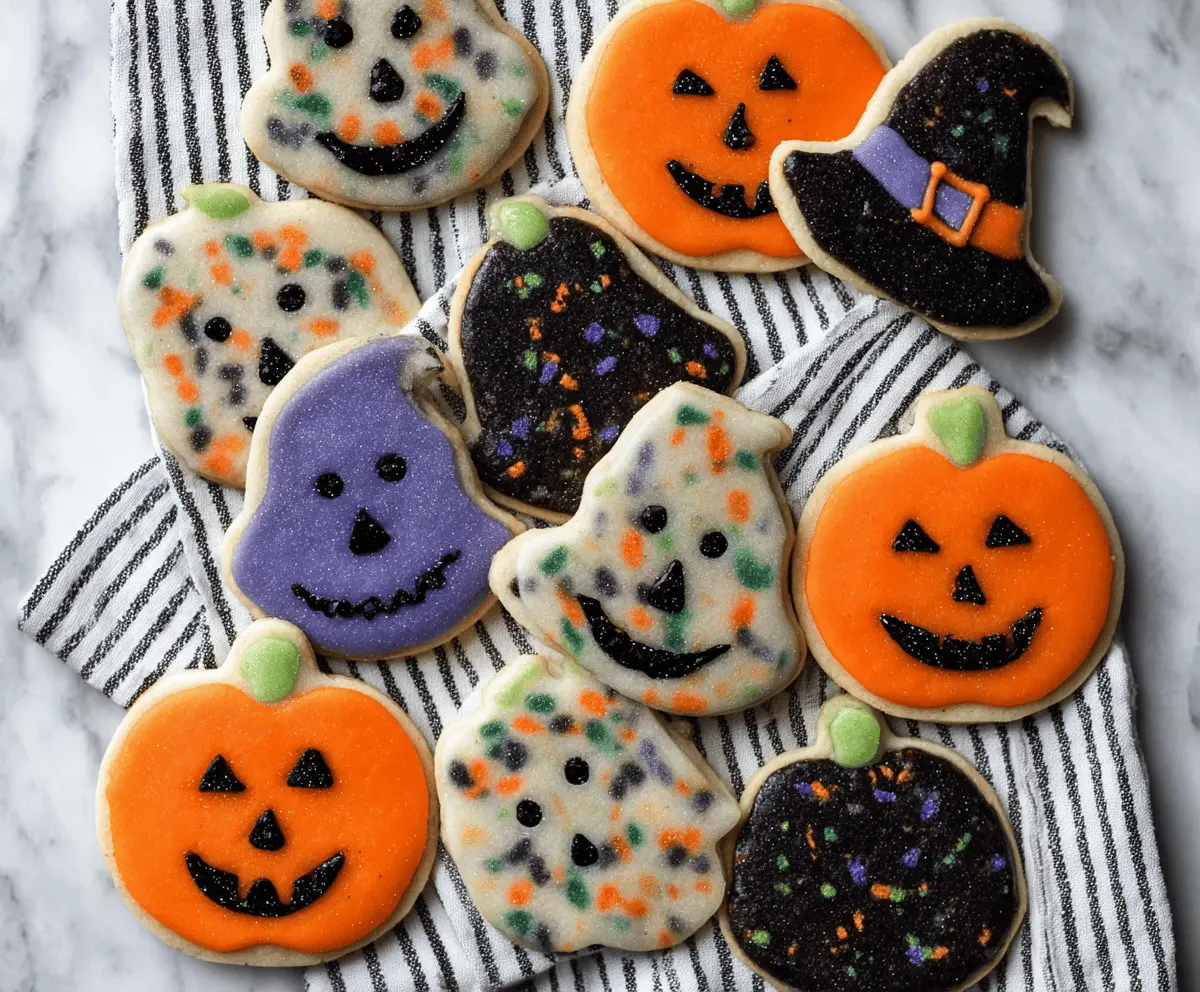
These Halloween Shortbread Cookies are just adorable! With their buttery taste and fun spooky shapes, they’re perfect for celebrating the season.
Kids and grown-ups alike will love decorating them with colorful icing and sprinkles. I usually make a batch to share at parties—everyone gets excited to see all the spooky designs! 🎃
Key Ingredients & Substitutions
Butter: Unsalted butter is ideal for these cookies as it gives you control over the salt level. If you’re in a pinch, you can use margarine, but the flavor won’t be as rich. I always stick with real butter whenever I can!
Sugar: Granulated sugar gives the cookies a nice sweetness. For a slightly healthier option, you can use coconut sugar or even a sugar substitute like Stevia, though this may change the texture a bit.
All-Purpose Flour: This is your go-to flour for shortbread. If you need a gluten-free option, you can substitute it with a gluten-free flour blend. The texture might be a little different, but they’ll still be yummy!
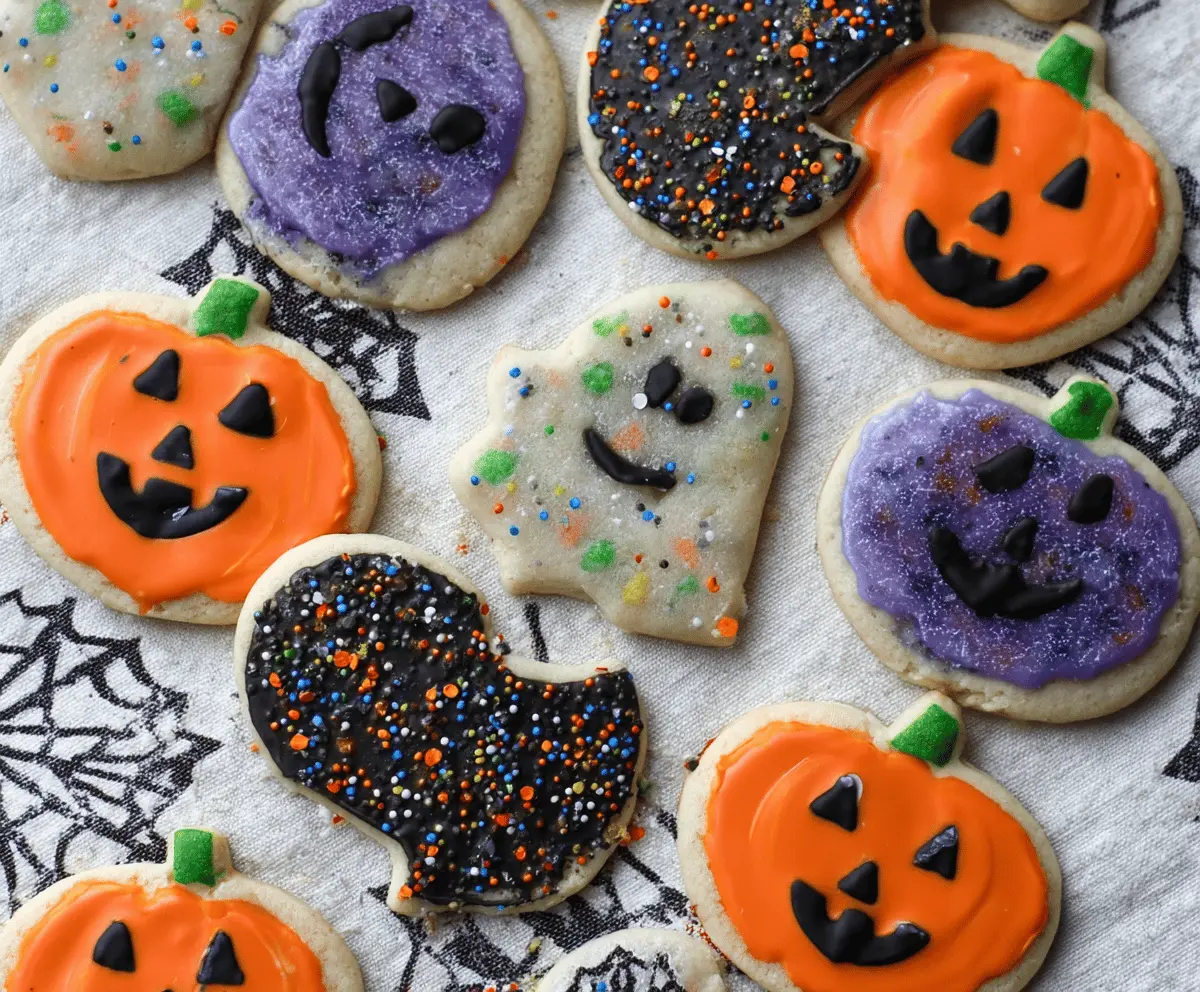
Food Coloring: While I love the traditional orange and black for Halloween, feel free to get creative! You can mix colors to create unique shades or even use natural colors like beet juice for a fun twist.
Decorating Gel: Black decorating gel is used for details, but if you want to keep it simple, melted chocolate works just as well! Plus, it adds a nice chocolatey taste.
How Can I Get Perfectly Rolled Cookies Every Time?
Rolling out cookie dough can be tricky, but there are a few tips to make it easier! First, ensure your dough is chilled before rolling. This keeps it from sticking and helps maintain shape.
- Lightly flour your surface and rolling pin to prevent sticking.
- Roll the dough evenly, aiming for about 1/4-inch thickness, which is perfect for baking.
- Keep your cookie cutters floured as well to make cutting easier.
If the dough gets too soft, pop it back in the fridge for 10-15 minutes before continuing. This will help maintain those cute spooky shapes!
Halloween Shortbread Cookies
Ingredients You’ll Need:
- 1 cup (2 sticks) unsalted butter, softened
- 3/4 cup granulated sugar
- 1/2 teaspoon vanilla extract
- 2 1/4 cups all-purpose flour
- 1/4 teaspoon salt
- Food coloring (orange, purple, black, green)
- Black decorating gel or black icing
- Colored sprinkles (Halloween themed)
- Edible glitter (optional)
Time Needed:
This delightful recipe takes about 20 minutes to prep and 15-18 minutes to bake, with additional time for cooling and decorating. In total, you should plan for about 1 hour if you include the decorating time. It’s a fun activity to get in the Halloween spirit!
Step-by-Step Instructions:
1. Preheat and Prepare:
Start by preheating your oven to 325°F (165°C). While that heats up, line your baking sheets with parchment paper to prevent the cookies from sticking. This will make cleanup a breeze!
2. Cream the Butter and Sugar:
In a large mixing bowl, cream the softened butter and granulated sugar together. Use a hand mixer or stand mixer to mix them until the mixture is light and fluffy. This usually takes about 2-3 minutes. Then, mix in the vanilla extract for that yummy flavor!
3. Combine the Dry Ingredients:
Next, gradually add in the all-purpose flour and salt. Mix just until a dough forms. Be careful not to overmix, as this can make the cookies tough. You want a nice, soft dough that you can roll out easily!
4. Roll Out the Dough:
On a lightly floured surface, roll out the dough to about 1/4-inch thickness. This is the perfect thickness for a crispy-on-the-outside, soft-on-the-inside cookie. If the dough is too soft, you can chill it in the fridge for about 15-20 minutes before rolling.
5. Cut the Cookies:
Use Halloween-themed cookie cutters (think pumpkins, ghosts, bats, etc.) to cut shapes from the rolled dough. Carefully transfer the shapes to your prepared baking sheets, leaving about 1 inch of space between each cookie.
6. Bake:
Bake the cookies in your preheated oven for 15-18 minutes or until the edges start turning golden brown. Keep an eye on them, as oven times can vary!
7. Cool Down:
Once baked, remove the cookies from the oven and let them cool completely on wire racks. This is important so that the frosting doesn’t melt when you decorate!
8. Get Creative with Decorating:
When the cookies are cool, it’s time to have fun! Divide your frosting into separate bowls and tint them with your chosen food coloring. Spread the colored frosting on the cookies as you like (orange for pumpkins, purple for ghosts, etc.).
9. Add the Finishing Touches:
Now, take your black decorating gel or icing and pipe on spooky faces or details for an extra festive touch! Don’t forget to sprinkle on those fun Halloween-themed sprinkles and edible glitter if you’re feeling extra festive!
10. Let it Set:
Allow the decorated cookies to sit out until the frosting is set before serving or storing them in an airtight container. And there you have it! Delicious Halloween Shortbread Cookies to share (or keep for yourself!). Enjoy!
Can I Use Margarine Instead of Butter?
Yes, you can use margarine as a substitute for butter, but keep in mind that it may change the flavor and texture slightly. For the best results, stick with unsalted butter if possible for that classic rich taste!
How Should I Store the Cookies?
Store your Halloween Shortbread Cookies in an airtight container at room temperature for up to one week. If you’ve layered them, place parchment paper between the layers to prevent sticking.
Can I Freeze the Dough or Cookies?
Absolutely! If you want to make the dough ahead of time, shape it into a disk, wrap it tightly in plastic wrap, and freeze for up to 3 months. Thaw it overnight in the fridge before rolling out. You can also freeze baked cookies—just ensure they are completely cool, then layer them with parchment in an airtight container for up to 2 months.
What If I Don’t Have Halloween Cookie Cutters?
No problem! You can use any cookie cutter you have on hand, or even a knife to cut the dough into fun shapes. You can also roll the dough into balls for round cookies—just flatten them slightly before baking!