Loaded nachos hit the table fast, and the good ones disappear just as quickly. The best version has chips that stay crisp around the edges, a blanket of melted cheese that clings to every bite, and toppings that bring salt, heat, freshness, and creaminess without turning the whole pan soggy. When the layers are built right, you get a platter people gather around instead of picking at one chip at a time.
This version works because the cheese goes on in two rounds. A little under the toppings helps anchor everything, and the rest melts over the top so the beef and beans stay put. The broiler finishes the job in minutes, which keeps the chips from overbaking. The real trick is adding the cold toppings after the pan comes out, while the cheese is still hot enough to soften them slightly.
Below, I’ll show you how to keep the nachos from slipping into a greasy pile, which toppings hold up best, and how to adapt the pan for different eaters without losing the crunch.
The cheese melted evenly over the chips and the beef stayed in place instead of sliding off. I added the toppings right at the end and the bottom layer still had a nice crunch.
Love the melty cheese pull and crisp edges on these loaded nachos? Save this pan for game day, movie night, or the next time you want a fast appetizer that disappears in minutes.
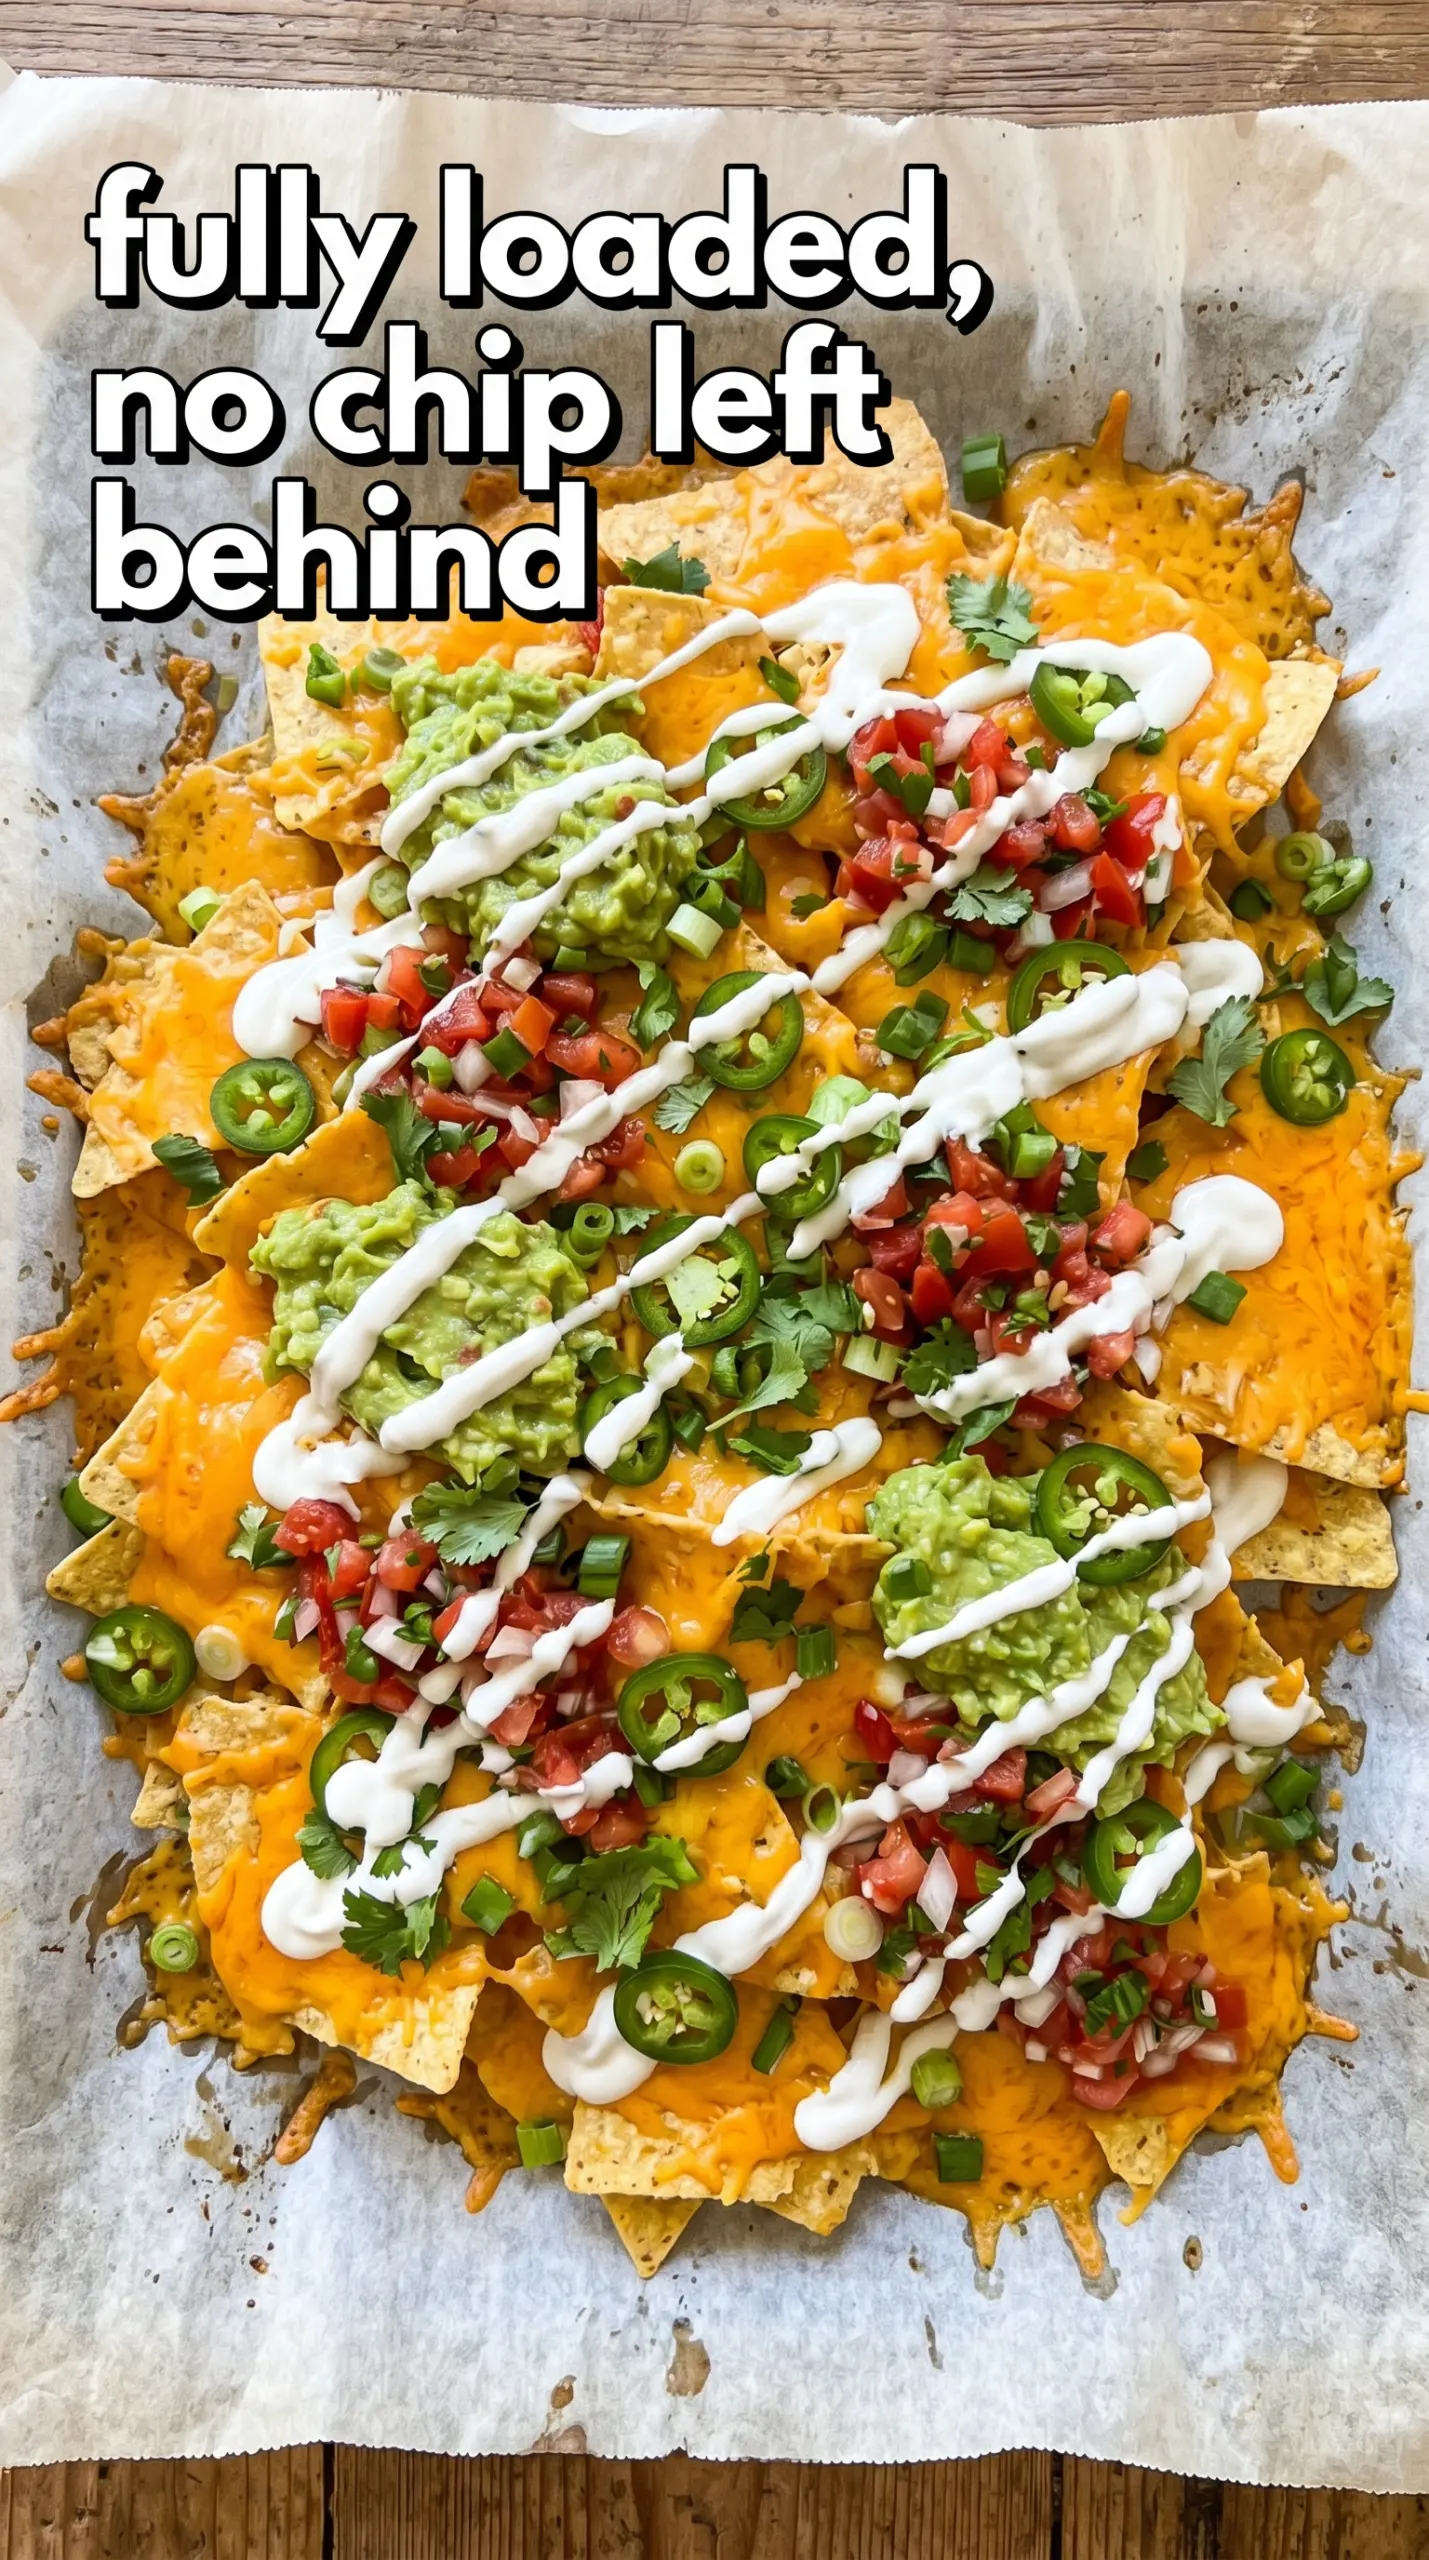
The Part That Keeps Nachos Crisp Instead of Soggy
Most nacho problems start with too much moisture in the wrong place. Wet toppings buried under the cheese turn the chips soft fast, and a crowded pan traps steam instead of letting the top crisp. The fix is simple: use the broiler for a short blast, then add the cold, wet toppings after the cheese has melted.
Layering matters too. Chips need room to breathe, so spread them in an even layer instead of piling them into a hill. A thin first layer of cheese helps hold the beef and beans in place, and the second layer gives you that stretched, bubbly top people expect from a proper nacho platter.
- Tortilla chips — Use sturdy chips, not the thinnest bagged chips you can find. Thicker chips carry the toppings better and hold up under the broiler without burning at the edges.
- Mexican cheese blend — This melts smoothly because it usually includes a mix of cheeses with good meltability. Pre-shredded is fine here, though freshly shredded melts a little more evenly.
- Ground beef — This adds heft and salt, which keeps the nachos from tasting like melted cheese on chips. Drain excess grease after browning so the platter doesn’t get slick.
- Black beans — They add body and a soft, creamy bite. Rinse and drain them well so they don’t bring extra liquid onto the chips.
- Taco seasoning — This gives the beef its backbone in one move. If you use homemade seasoning, keep the cumin and chili powder front and center so the meat still tastes like taco filling.
What Each Layer Is Doing Before It Hits the Broiler
The first layer of chips is the foundation, so use enough to cover the sheet pan in a loose, even layer. If the chips overlap too deeply, the bottom ones never get a chance to crisp, and you end up with a soft center under all that cheese.
The beef should be seasoned and cooked before it goes on the chips. Raw taco seasoning sprinkled over the top won’t distribute evenly, and the beef can steam the chips if it’s still greasy or wet. Black beans are there for texture and extra substance, not bulk for bulk’s sake, so don’t skip draining them.
The fresh toppings are the finishing layer, and that’s where the contrast comes from. Tomatoes, sour cream, guacamole, salsa, and cilantro all bring coolness and brightness, but they need to sit on top of the melted cheese so they don’t seep into the chips before serving.
Building the Pan in the Right Order
Cooking the Beef First
Brown the ground beef in a skillet until it loses its pink color and starts to pick up some browned edges. Drain off any excess fat, then add the taco seasoning with the amount of water the packet calls for and cook it until the mixture turns glossy and thick. If the meat looks soupy, it will slide off the chips and make the whole pan heavy.
Setting Up the Chip Layer
Spread the tortilla chips across a large baking sheet in a single layer with only a little overlap. You’re building surface area here, not height, because the more chips exposed to the cheese, the better the pan holds together. If you pile them too high, the center stays dry and the toppings never reach every bite.
Melting the Cheese Under and Over the Filling
Scatter half the cheese over the chips first, then add the beef, black beans, and jalapeños. Finish with the remaining cheese so it melts into the filling and seals everything in place. Broil for 3 to 5 minutes, watching closely the whole time, because the line between melted and burnt is short under a broiler.
Finishing with Fresh Toppings
The second the cheese is bubbly, pull the pan and top it right away with tomatoes, olives, sour cream, guacamole, salsa, cilantro, and lime wedges. The heat from the pan softens the toppings just enough without cooking them down. Serve immediately, because nachos wait for no one once the broiler comes out.
Ways to Adjust the Pan Without Losing the Crunch
Make It Vegetarian
Skip the beef and double the black beans, or swap in seasoned crumbled tofu or plant-based ground. The key is keeping the filling dry and well-seasoned, because bland or watery swaps make nachos taste flat fast.
Make It Gluten-Free
Use certified gluten-free tortilla chips and check the taco seasoning packet for hidden wheat-based fillers. The rest of the ingredients are naturally gluten-free, so this is one of the easier swaps to make without changing the finished texture.
Make It Spicier
Add extra jalapeños, a pinch of cayenne to the beef, or a spoonful of hot salsa over the top at the end. Heat works best when it’s layered, not dumped all in one place, so every bite gets a little kick instead of one scorched corner.
Storage and Reheating
- Refrigerator: Store leftovers up to 3 days, but expect the chips to soften as they sit under the toppings.
- Freezer: Nachos don’t freeze well once assembled. If you want to prep ahead, freeze the cooked beef separately and build the nachos fresh later.
- Reheating: Reheat the beef on its own, then assemble fresh chips with cheese and broil again. Microwaving the whole tray turns the chips limp and the cheese rubbery.
Questions I Get Asked About This Recipe

Easy Nachos
Ingredients
Equipment
Method
- Brown the ground beef in a skillet over medium-high heat until no longer pink, then add the taco seasoning and cook according to package directions.
- Continue cooking until the mixture is evenly coated and heated through, so the beef can layer cleanly on the chips.
- Spread the tortilla chips on a large sheet pan in an even layer.
- Sprinkle half the shredded Mexican cheese blend over the chips so it melts into the top layer.
- Add the seasoned beef, black beans, and sliced jalapeños over the chips in an even distribution.
- Sprinkle the remaining cheese over everything to fully cover the surface.
- Broil for 3-5 minutes until the cheese is melted and visibly bubbly with browned spots at the edges.
- Remove the sheet pan from the oven and immediately top with diced tomatoes, sliced black olives, sour cream, guacamole, and salsa.
- Finish by garnishing with fresh cilantro and serve with lime wedges.