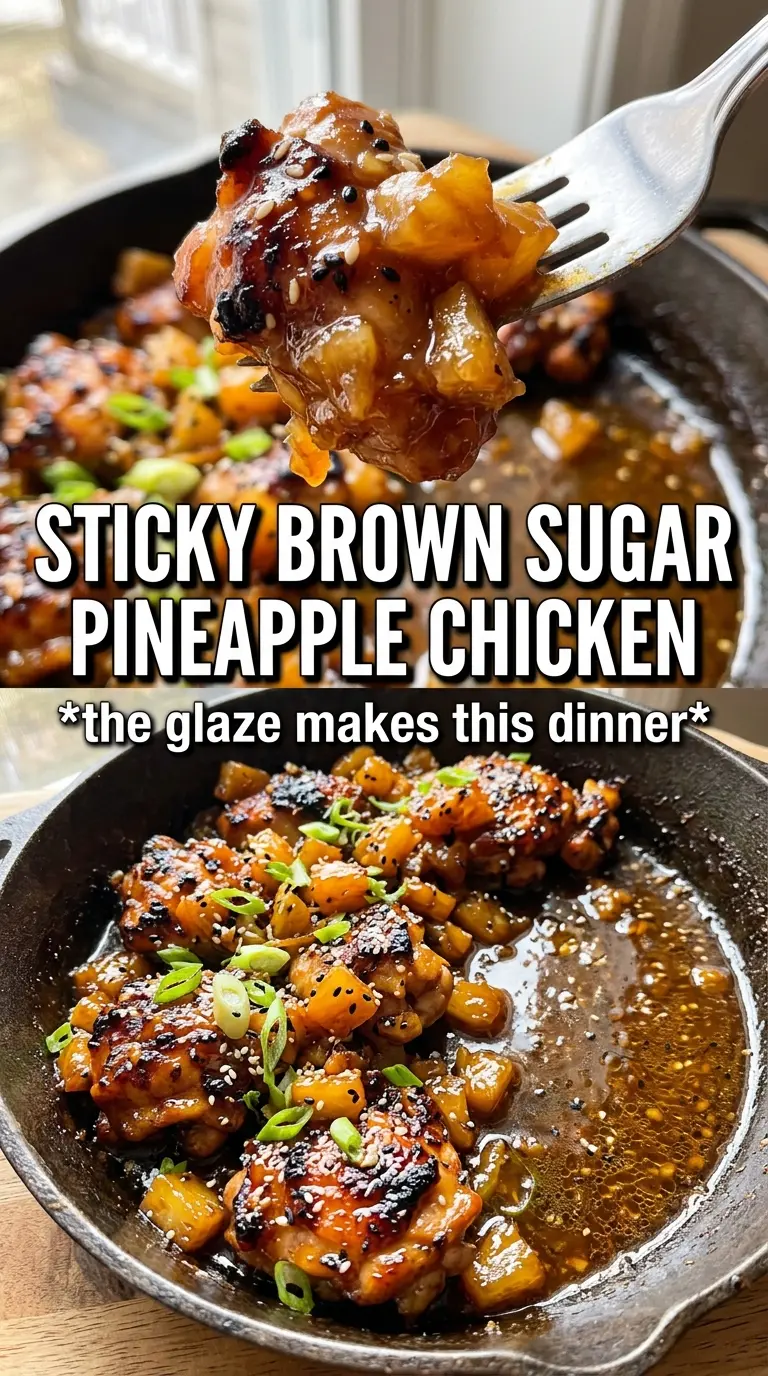
Sticky, glossy brown sugar pineapple chicken hits the pan with sweet heat, tangy fruit, and a caramelized edge that clings to every bite. The chicken stays juicy, the glaze turns lacquer-thick, and the pineapple chunks soften just enough to taste jammy without falling apart. It’s the kind of skillet dinner that looks like you worked harder than you did.
What makes this version work is the order. The chicken gets a hard sear first so you build flavor in the pan, then the sauce goes into that same skillet to pick up every browned bit left behind. Cornstarch thickens the glaze at the end, not the beginning, which keeps it smooth instead of muddy. The pineapple juice gives the sauce its brightness, while the brown sugar and ketchup round it out into something sticky and balanced instead of just sweet.
Below, I’ll walk through the one searing detail that keeps the chicken tender, the ingredient swaps that still give you a proper glaze, and a few variations if you want to adjust the dish for different diets or make it with what’s already in the pantry.
The glaze thickened up exactly when you said it would, and the chicken stayed juicy instead of getting tough. I served it with rice and there wasn’t a spoonful of sauce left in the pan.
Save this brown sugar pineapple chicken for the nights when you want a sticky skillet glaze without standing over the stove for long.
The Part That Keeps the Glaze Sticky Instead of Thin
The biggest mistake with pineapple chicken is rushing the sauce before the pan has done its job. If the chicken goes in and out without a real sear, you lose the browned bits that give the glaze depth, and the sauce ends up tasting flat even if it thickens. The other common problem is cranking the heat too high once the pineapple juice hits the skillet. That can make the sugars taste harsh and can tighten the glaze before the garlic and ginger have had time to soften into the sauce.
This recipe avoids both problems by building the sauce in the same pan after the chicken comes out. That means the glaze starts with flavor already stuck to the bottom of the skillet, then the cornstarch slurry brings it to the right thickness without turning it gummy. You’re looking for a sauce that coats the back of a spoon and leaves a clean line when you drag a spatula through it.
What Each Ingredient Is Actually Doing in This Skillet
- Chicken breasts — They stay lean and slice cleanly after a short rest, which makes them a good fit for a fast skillet glaze. If your chicken breasts are very thick, pound them to an even thickness so the outside doesn’t overcook before the center reaches 165°F.
- Pineapple juice — This is the backbone of the sauce. Fresh or bottled both work, but canned juice is often the easiest route and gives you steady sweetness. Don’t swap in pineapple syrup here; it’s too heavy and can make the glaze cloying.
- Brown sugar — It gives the sauce that dark, sticky finish and helps the glaze caramelize a little as it simmers. Light or dark brown sugar both work; dark brown sugar will give you a deeper molasses note.
- Soy sauce — This keeps the glaze from tasting one-note sweet. Use low-sodium if that’s what you keep around, especially since the chicken is seasoned separately.
- Ketchup — It sounds simple, but it adds body, acidity, and a little tomato richness that rounds out the pineapple. If you leave it out, the sauce can taste a little thin and sharply sweet.
- Cornstarch slurry — This is what turns the liquid into a true glaze. Stir it in only after the sauce is simmering; if you add it too early, it won’t thicken evenly and can turn slightly chalky.
- Pineapple chunks — They give you pockets of juicy fruit in the finished skillet. Drain them well if they’re canned so extra liquid doesn’t loosen the glaze at the end.
Getting the Chicken and Glaze to Meet at the Right Moment
Searing the Chicken First
Season the chicken generously, then cook it in the olive oil over medium-high heat until the outside is golden and the center reaches 165°F. Don’t crowd the skillet, or the chicken will steam instead of brown. If the chicken sticks at first, leave it alone for another minute; once the crust forms, it will release on its own. Pull it out to rest while you build the sauce so the juices stay in the meat instead of running into the glaze.
Cooking the Pineapple Glaze
Use the same skillet and pour in the pineapple juice, brown sugar, soy sauce, ketchup, garlic, and ginger. As the mixture comes to a simmer, scrape up the browned bits from the bottom of the pan. That’s where the depth comes from. Once it’s bubbling evenly, stir in the cornstarch slurry and keep it moving for a couple of minutes until it turns glossy and thick enough to coat a spoon.
Finishing the Skillet
Add the pineapple chunks after the glaze has thickened so they warm through without breaking down. Return the chicken to the pan and spoon the sauce over the top until every piece is lacquered. Two more minutes in the skillet is enough to bring everything together. Finish with sesame seeds and green onions while the glaze is still hot so they stick instead of sliding off.
How to Adapt This for Different Tables and Different Pantries
Make It Dairy-Free Without Losing the Finish
This recipe is already dairy-free as written, which is one reason it works so well for a quick weeknight dinner. Keep the olive oil, and don’t add butter at the end unless you want a richer, heavier glaze. The sauce stays bright and sticky without it.
Use Chicken Thighs for a Juicier Skillet
Boneless skinless thighs give you a little more forgiveness and a richer bite. They need a few extra minutes in the pan, but they hold up well against the sweet glaze and stay tender even if they sit in the sauce a minute longer than planned.
Make It Gluten-Free
Swap in a gluten-free soy sauce or tamari and the recipe stays just as glossy and balanced. The cornstarch is already gluten-free, so the rest of the sauce doesn’t need any changes.
Stretch It for More Servings
Double the sauce if you’re serving a crowd or want extra for rice. The chicken only needs enough space to sear well, so it’s better to cook it in batches than to pack the skillet full and lose the browning.
Storage and Reheating
- Refrigerator: Store leftovers in an airtight container for up to 4 days. The glaze will thicken as it chills.
- Freezer: It freezes well for up to 2 months, though the pineapple may soften a little after thawing. Freeze in portions with plenty of sauce so the chicken doesn’t dry out.
- Reheating: Warm gently on the stove over low heat with a splash of water or pineapple juice. High heat can make the chicken tough and can cause the glaze to tighten too much before the center is hot.
Answers to the Questions Worth Asking
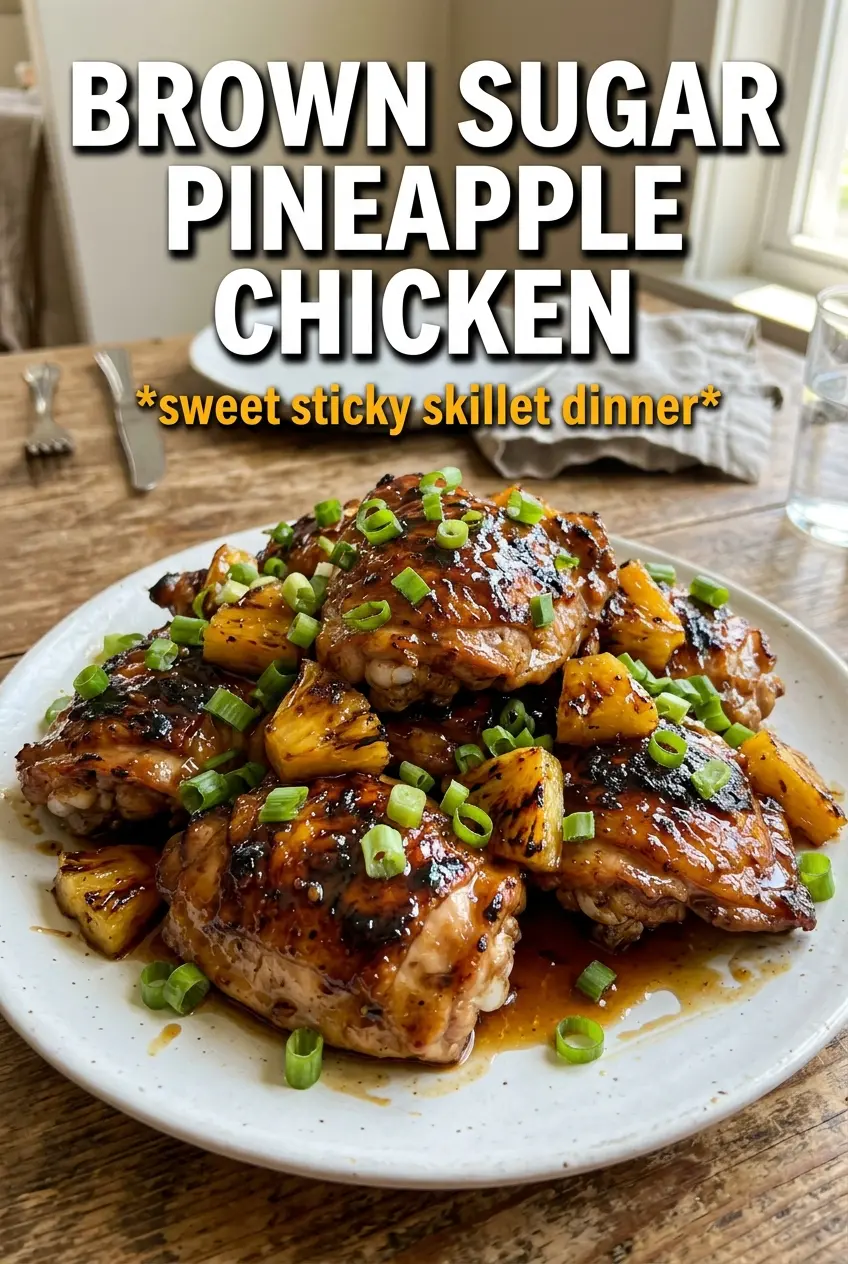
Brown Sugar Pineapple Chicken
Ingredients
Equipment
Method
- Season the chicken breasts with salt, pepper, garlic powder, and smoked paprika. Arrange them in the skillet and let them sit for 20 minutes to marinate.
- Heat olive oil in a large cast iron skillet over medium-high heat, then sear the chicken for 5-6 minutes per side until golden. Cook until each breast reaches 165°F, then remove to a plate.
- Whisk pineapple juice, brown sugar (packed), soy sauce, ketchup, minced garlic, and grated ginger in the same pan. Bring the mixture to a simmer over medium heat, scraping up browned bits.
- Stir in the cornstarch slurry and cook for 2-3 minutes until the sauce thickens into a glaze. Add the pineapple chunks so they become visible throughout the amber sauce.
- Return the chicken to the pan and turn to coat in the glaze. Cook for 2 more minutes to caramelize the surface and help the sauce cling.
- Garnish with sesame seeds and sliced green onions. Serve the brown sugar pineapple chicken over steamed rice.