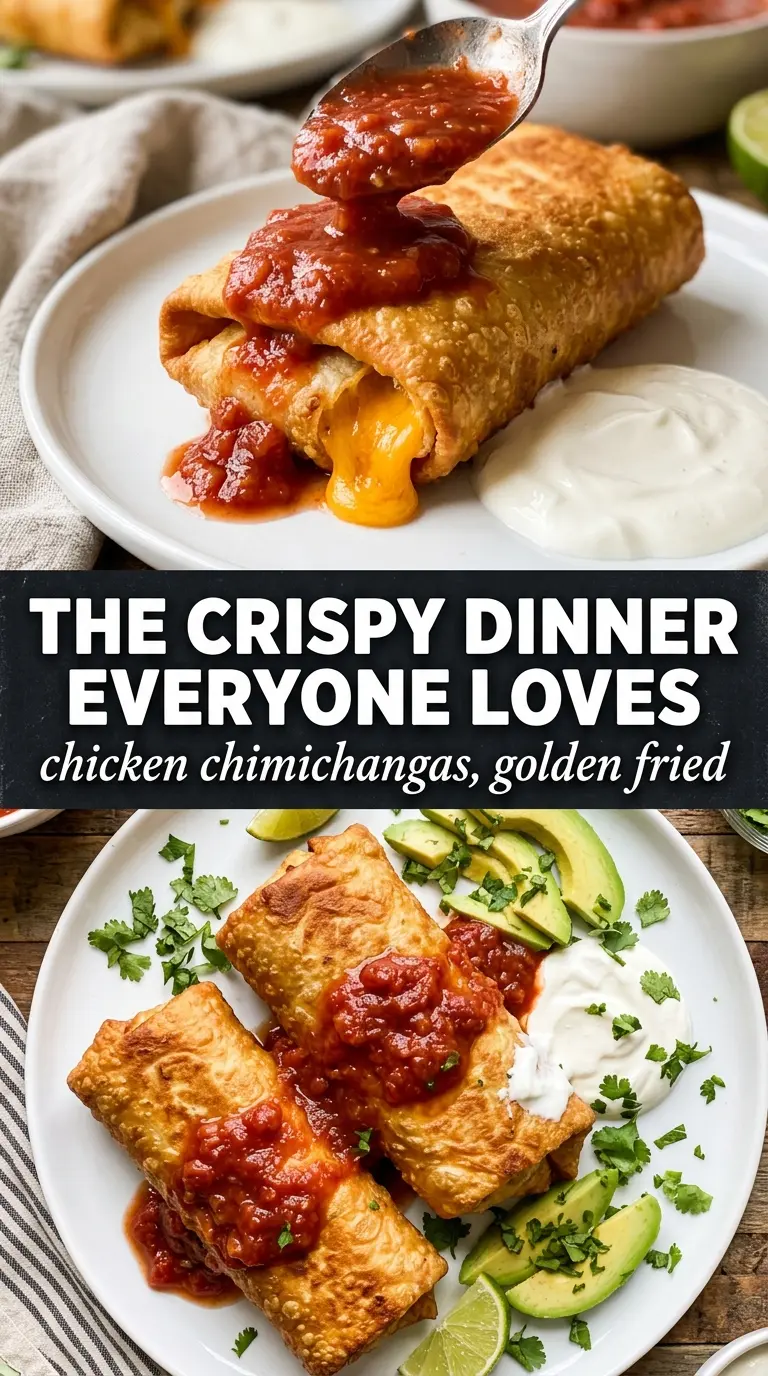
Chicken chimichangas earn their place in the rotation because they give you that shattering crisp shell with a hot, savory filling that still tastes fresh, not heavy. The outside turns deeply golden and crackly, while the inside stays packed with seasoned chicken, rice, beans, and melted cheese. Every bite has contrast, which is exactly what makes them worth frying instead of just rolling into another burrito.
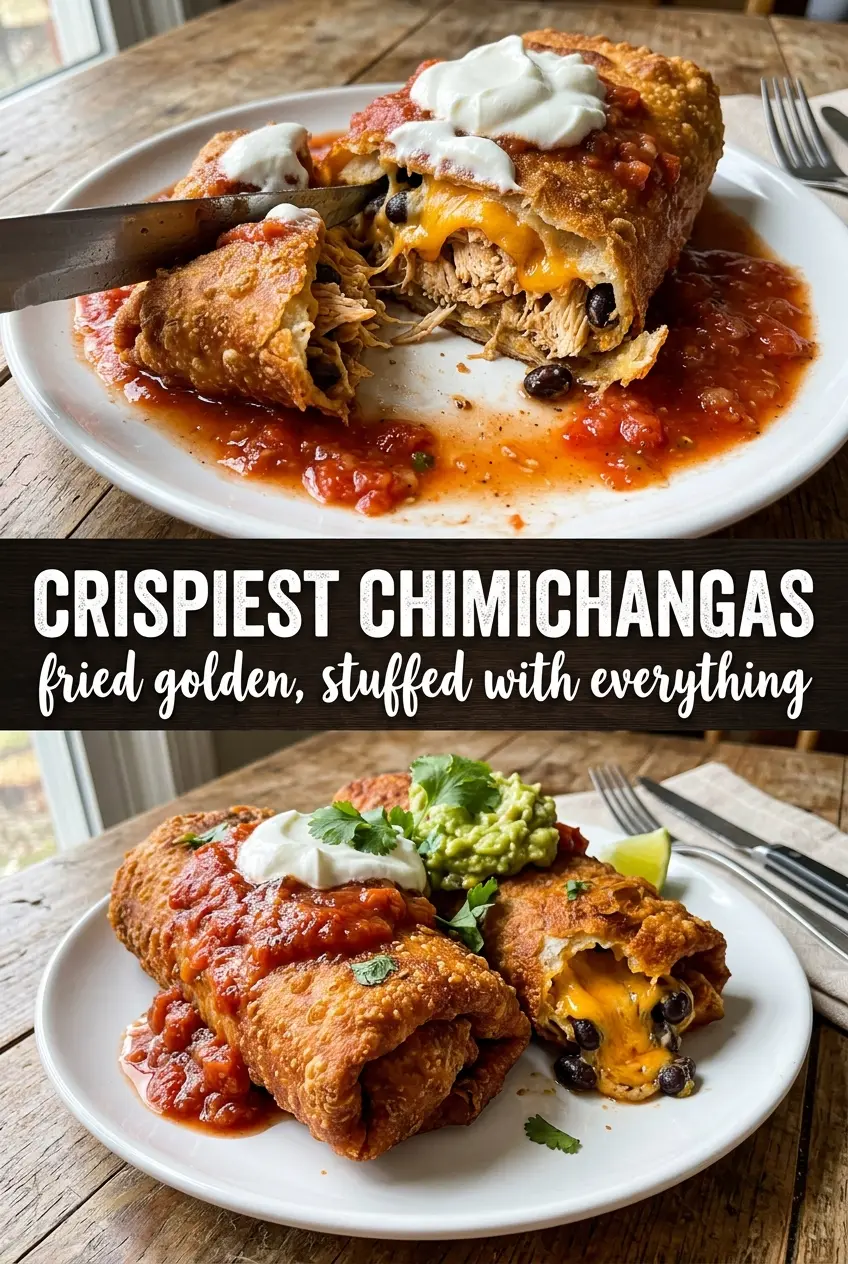
This version works because the filling is thick enough to hold together without leaking, and the tortillas are rolled tightly so the seam can seal as soon as they hit the oil. A little salsa loosens the chicken just enough for flavor, but not so much that the tortillas turn soggy. The black beans and rice stretch the filling in a way that still feels satisfying, and Monterey Jack melts cleanly without getting greasy.
Below, I’ve included the detail that matters most for a crisp chimichanga shell, plus the baked option for when you want the same Tex-Mex dinner with a little less cleanup.
The filling stayed put, and the tortillas fried up crisp instead of greasy. I loved that the seam sealed right away, and the melted cheese with the beans made every bite taste like a proper restaurant chimichanga.
Craving that crispy chicken chimichanga shell? Save this one for the nights when you want a golden, filled-to-the-brim Tex-Mex dinner.
The Trick to a Chimichanga That Stays Sealed and Crispy
The biggest chimichanga mistake is overfilling the tortilla. Once the filling has nowhere to go, the seam pops open in the oil and the whole thing starts leaking. Keep the filling in a tight mound, leave a clean border, and roll it firmly so the tortilla has enough surface contact to hold its shape.
The other issue is wet filling. Salsa adds the flavor you want, but too much liquid softens the tortilla before it can crisp. That’s why this version uses just enough to coat the chicken, not enough to puddle in the bowl. If your chicken mixture looks loose, let it sit for a few minutes before rolling so the rice and beans absorb some of the moisture.
- Flour tortillas — The 12-inch burrito size gives you enough room to wrap a generous filling without tearing. Smaller tortillas are harder to seal and more likely to split in the fryer.
- Cooked chicken — Rotisserie chicken works well here because it’s already seasoned and tender. Shred it finely so the filling packs tightly instead of rolling into a lumpy log.
- Monterey Jack cheese — This melts smoothly and gives you that stretchy interior without turning oily. Pepper Jack is a good swap if you want a little heat.
- Black beans and Mexican rice — These two ingredients give the chimichangas body. If you skip them, the filling becomes too meat-heavy and harder to keep contained.
What Each Ingredient Is Actually Doing in This Chicken Dish
- Chicken (pat dry for browning) — Room temperature cooks more evenly. Even pieces ensure uniform doneness.
- Oil or butter (the browning medium) — High-heat oil essential for proper searing. Creates pan flavor.
- Seasonings (salt, pepper, spices) — Apply generously. Chicken carries the entire flavor profile.
- Aromatics (garlic, ginger, herbs) — Cook with fat to bloom flavors. Become the foundation.
- Sauce or braising liquid (if using) — This keeps chicken moist. Balance richness with acid.
- Vegetables (if using) — Layer by cooking time so everything finishes together.
- Acid (vinegar, wine, lime, or pineapple) — This brightens and prevents one-dimensional flavor.
- Proper doneness (165°F internal temperature) — Use thermometer for accuracy. Overcooked is dry.
How to Get the Shell Golden Before the Filling Has Time to Leak
Mix the Filling Until It Holds Together
Stir the chicken, taco seasoning, and salsa until every shred is coated, then fold in the rice, beans, and cheese. The mixture should look thick and scoopable, not saucy. If you can press it into a mound and it stays put, you’re in the right place. If it sloshes around, the tortillas will soften before the crust can set.
Roll Tightly and Start Seam-Side Down
Lay the filling in the center of each tortilla, fold the sides in first, then roll it forward as tightly as you can without tearing the tortilla. A tight roll matters more than a perfect shape. When the chimichanga hits the oil, start seam-side down so the folded edge seals immediately and helps hold the whole bundle closed.
Fry Until the Color Goes Deep Gold
Heat the oil to 375°F and don’t rush this part. If the oil is too cool, the tortillas soak it up and turn greasy; if it’s too hot, the outside browns before the cheese melts. Fry until the shell is a deep golden color and sounds crisp when tapped with tongs, then drain it on paper towels for a minute before serving.
Bake When You Want a Lighter Finish
For the baked version, brush every exposed side with oil so the tortilla can brown instead of drying out. Flip halfway through for even color. Baked chimichangas won’t crackle quite like fried ones, but they still give you a crisp exterior if you use enough oil and a hot oven.
Small Changes That Still Give You a Proper Chimichanga
Baked Chimichangas for Less Mess
Brush the rolled chimichangas with oil and bake them on a sheet pan until the tortillas turn golden and the seams look set. You’ll lose a little of the blistered fry texture, but you keep the same filling and much less cleanup.
Make It Spicier Without Changing the Structure
Use Pepper Jack instead of Monterey Jack, or stir a spoonful of chopped pickled jalapeños into the chicken mixture. That adds heat without making the filling wetter, which keeps the chimichanga easier to seal.
Gluten-Free With the Right Wrap
Use large gluten-free tortillas that are flexible enough to roll, then warm them briefly so they don’t crack. They won’t fry with the same stretch as standard flour tortillas, so handle them gently and keep the filling compact.
Vegetarian Filling That Still Feels Substantial
Swap the chicken for extra black beans plus sautéed peppers and onions. The key is to cook off the vegetables first so the filling doesn’t turn watery and split the tortilla.
Storage and Reheating
- Refrigerator: Store leftovers for up to 3 days. The shell softens as it sits, but the flavor stays good.
- Freezer: Freeze the rolled, uncooked chimichangas on a tray, then wrap them tightly and store for up to 2 months. Fry or bake from frozen after adding a few extra minutes to the cook time.
- Reheating: Reheat in a 400°F oven or air fryer until the outside crisps again. The microwave makes the tortilla leathery, which is the one mistake that ruins leftovers here.
Answers to the Questions Worth Asking
Chicken Chimichangas
Ingredients
Equipment
Method
- Mix shredded chicken with taco seasoning and salsa until well combined, so every piece is evenly coated.
- Lay tortillas flat and pile rice, beans, seasoned chicken, and cheese in the center of each.
- Fold sides in and roll tightly like a burrito, securing with a toothpick to keep the seam closed.
- Heat 2 inches of oil to 375°F in a deep skillet.
- Fry chimichangas seam-side down for 2-3 minutes until golden, then turn.
- Fry another 2-3 minutes until all sides are crispy, then drain on paper towels.
- Alternatively, brush chimichangas with oil and bake at 425°F for 20-22 minutes, flipping halfway, until golden.
- Remove toothpicks and serve immediately with sour cream, guacamole, and pico de gallo.