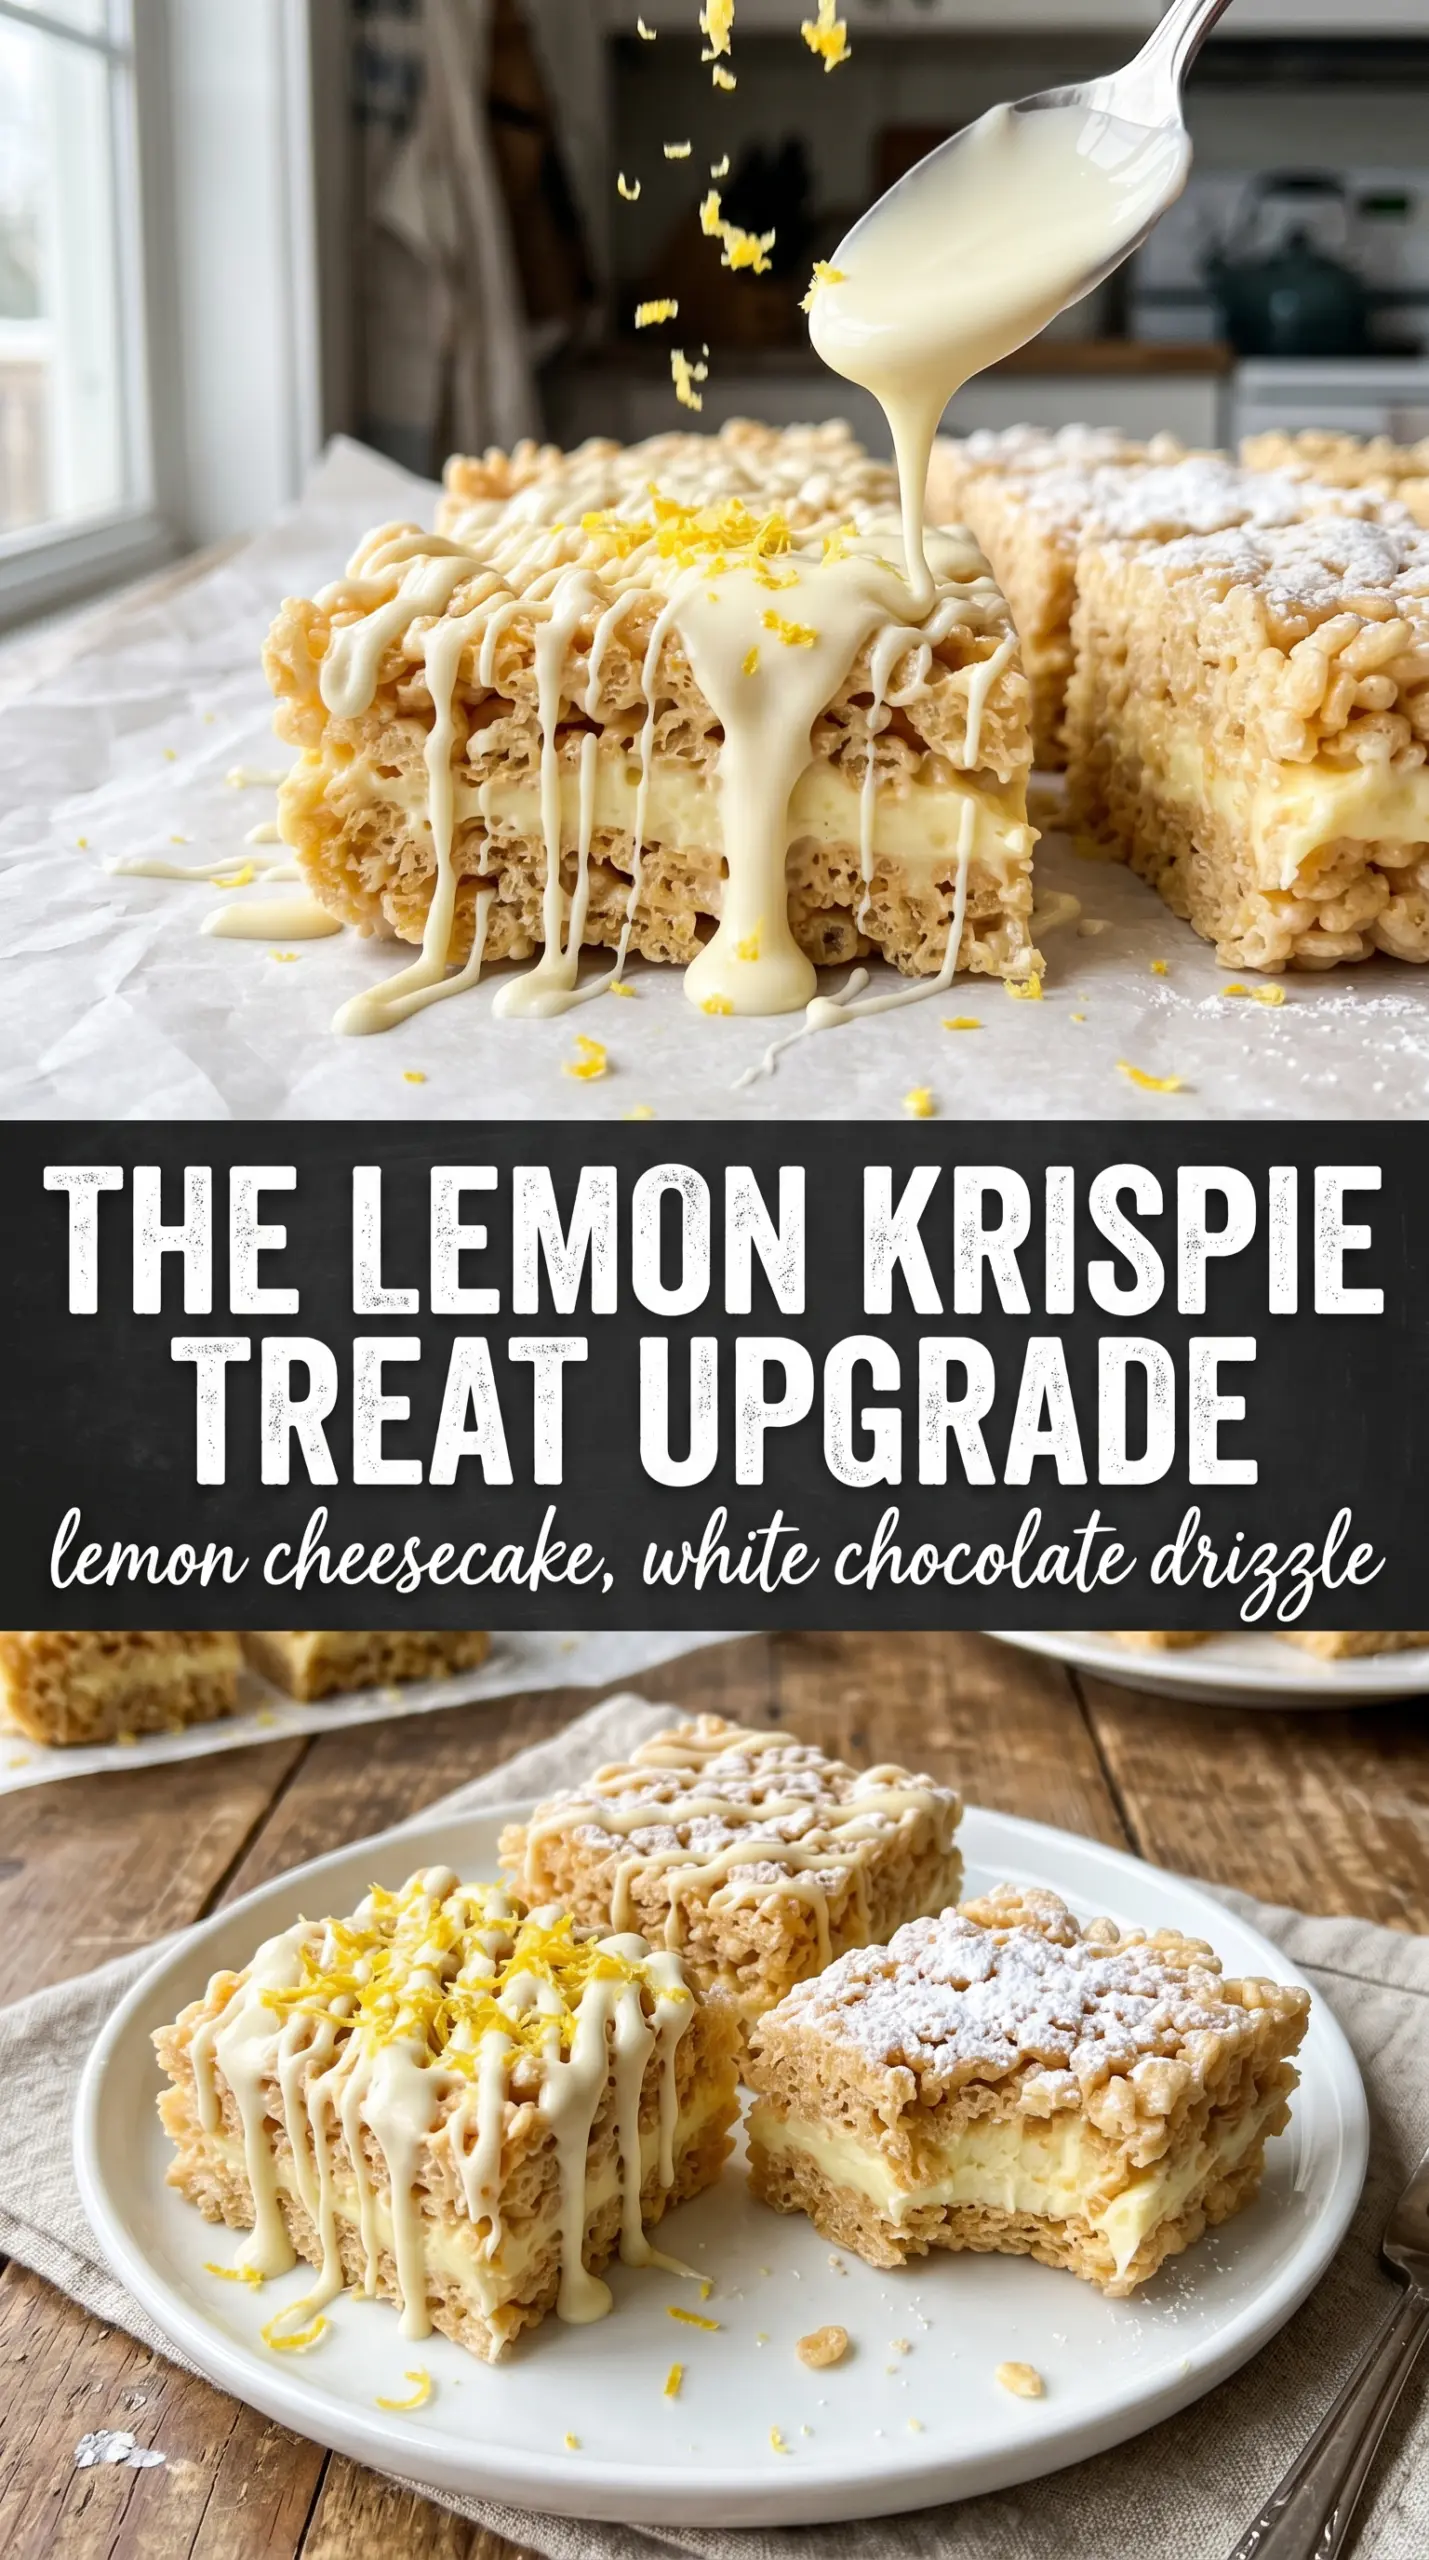
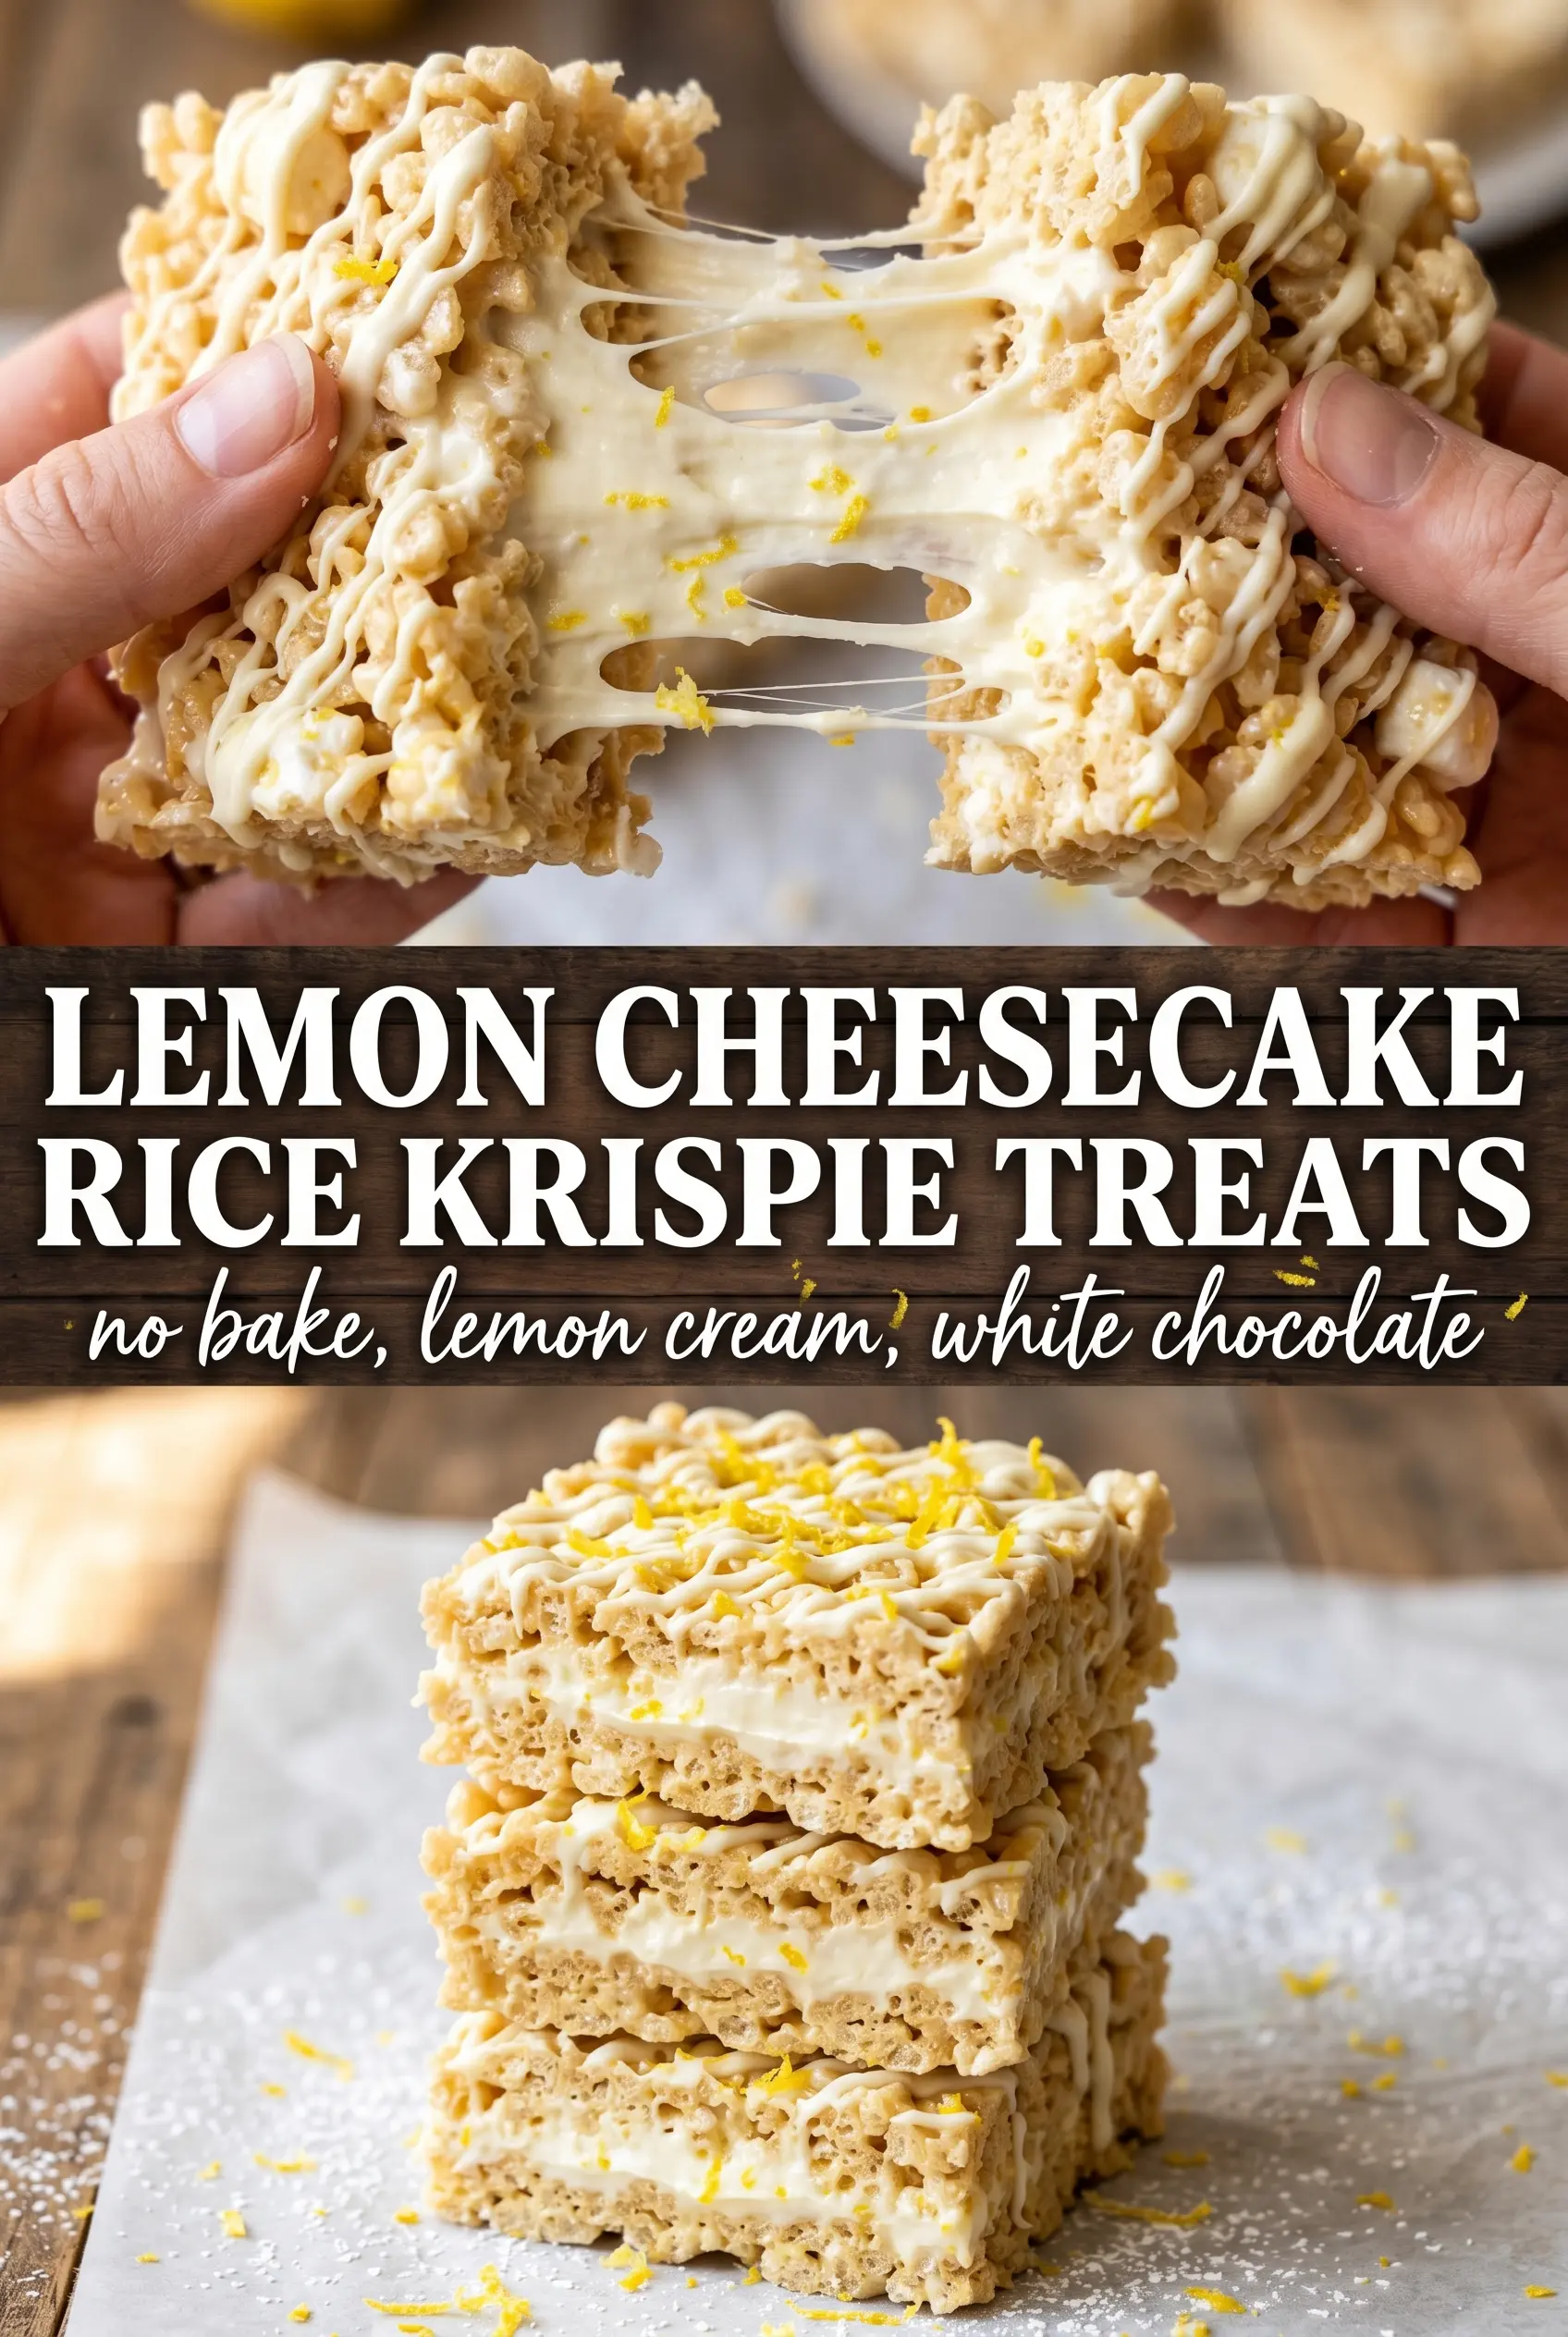
These lemon cheesecake Rice Krispie treats hit the sweet spot between chewy, creamy, and bright. The base stays soft and marshmallowy with a clean lemon note, then the cheesecake layer on top cools into a thick, tangy layer that tastes much more deliberate than a standard bar cookie. The white chocolate drizzle gives each square a little snap, and the zest on top keeps the whole thing from tasting flat or overly sweet.
What makes this version work is balance. The lemon goes into both layers, but in different forms: zest for perfume, juice for tang, and just enough vanilla to round out the cream cheese. The marshmallows are melted gently so the cereal stays crisp instead of turning hard, and the cheesecake layer gets folded with whipped topping so it spreads easily without feeling heavy once chilled.
Below, I’ve included the little details that matter most — how to keep the base from getting dense, what the cheesecake layer should look like before it goes on, and a few smart swaps if you need to adjust the recipe without losing that lemon cheesecake vibe.
The lemon zest in the base made these taste fresh instead of just sweet, and the cheesecake layer set up thick and smooth after chilling. I cut them after an hour and the squares held their shape without squishing.
Love the creamy lemon topping and chewy marshmallow base? Save these lemon cheesecake Rice Krispie treats for the next time you want a no-bake dessert bar with a bright citrus finish.
The Marshmallow Base Stays Chewy When You Treat It Gently
The fastest way to ruin Rice Krispie treats is to cook the marshmallows too hard. Once the mixture gets hot and stiff, it starts setting before you even hit the pan, and the bars turn dense instead of tender. Low heat and a quick stir are enough here. You want the marshmallows just melted, glossy, and fully combined with the butter, then the cereal goes in right away.
Lemon zest goes into the warm marshmallow mixture, which wakes up the whole base without adding extra liquid. That matters because lemon juice would loosen the structure and make the bars softer than you want. Press the mixture into the pan firmly, but don’t pack it like concrete. A light, even press gives you bars that hold together and still bite cleanly.
What Each Ingredient Is Actually Doing in This Recipe
- Primary ingredient (the star) — Quality matters most. Choose the best you can find.
- Cooking medium (oil, butter, or broth) — This carries flavors and prevents dryness.
- Seasonings (salt, pepper, spices, herbs) — Layer flavors so nothing overpowers. Build depth gradually.
- Aromatics (garlic, onion, herbs) — Cook with fat to bloom flavors. Become the foundation.
- Supporting ingredients — Complement the main ingredient without overpowering it.
- Sauce or liquid (if applicable) — Brings flavors together. Balance richness with acid.
- Acid (lemon, vinegar, wine, or other) — Brightens and prevents flat-tasting results.
- Final finish (garnish, glaze, or sauce) — Prevents one-dimensional taste and adds visual appeal.
What the Cheesecake Layer Needs to Set Up Smoothly
- Cream cheese — This is the backbone of the topping, so it needs to be softened before mixing. Cold cream cheese leaves little lumps that never fully disappear, even after beating. Full-fat cream cheese gives the cleanest tang and the best set.
- Powdered sugar — This sweetens the layer and thickens it without any graininess. Granulated sugar won’t dissolve the same way, and the filling can feel gritty. If you want a less sweet finish, don’t cut the sugar too much or the layer turns loose instead of sliceable.
- Fresh lemon juice and zest — Juice brings the tang, zest brings the lemon aroma. You need both for a layer that tastes bright instead of flat. Bottled lemon juice works in a pinch, but fresh juice gives a cleaner finish.
- Whipped topping — This lightens the cream cheese mixture so it spreads easily over the bars without tearing the base. Fold it in gently; beating it hard knocks out the air and makes the topping heavier. If you’d rather use whipped cream, whip it to medium peaks first so it still holds once chilled.
Getting the Bars Layered Without Crushing the Base
Melting the Marshmallows
Set the butter over medium-low heat and let it melt before the marshmallows go in. Stir until the marshmallows are just melted and smooth, then pull the pot off the heat and add the zest. If the mixture looks stiff or starts bubbling hard, the heat is too high and the finished bars will set up tough.
Pressing the Cereal Base
Fold in the Rice Krispies quickly while the marshmallow mixture is still warm and loose. As soon as the cereal is coated, tip it into the pan and press it into an even layer. A lightly greased spatula or parchment over the top helps keep the mixture from sticking to your hands. Don’t compact it too much or the bars lose that soft, chewy bite.
Mixing the Cheesecake Topping
Beat the cream cheese, sugar, lemon juice, lemon zest, and vanilla until the mixture looks smooth and airy. Scrape the bowl so no pockets of cream cheese stay hidden at the bottom. Fold in the whipped topping with a spatula, not the mixer, or you’ll deflate it and the topping will spread more like frosting than cheesecake cream.
Finishing and Chilling
Spread the topping over the cooled base in an even layer, all the way to the corners. Drizzle the white chocolate in zigzags, then scatter the extra zest before the chocolate sets. Chill for the full hour so the layers firm up enough to cut cleanly. If you slice too early, the cheesecake layer will drag and the base will slump.
How to Adapt These Lemon Cheesecake Rice Krispie Treats
Gluten-Free Version
Use certified gluten-free crisp rice cereal and check that your marshmallows and white chocolate chips are labeled gluten-free. The texture stays nearly the same, since the crunch comes from the cereal itself. This is the easiest swap in the recipe and doesn’t change the filling or finish.
Dairy-Free Version
Use plant-based butter, dairy-free cream cheese, and a dairy-free whipped topping. The base still sets well, but the cheesecake layer will taste a little softer and less tangy than the original. Choose a dairy-free cream cheese that’s made for baking or spreading, not a thin tub-style version.
Extra Lemon Punch
Add another half tablespoon of zest to the cheesecake layer if you want the lemon to come through harder. I wouldn’t add more juice unless you’re willing to soften the set a little, since the filling needs enough body to sit cleanly on the cereal base. More zest gives you stronger lemon flavor without changing the texture.
Storage and Reheating
- Refrigerator: Store in an airtight container for up to 4 days. The cereal base softens a little over time, but the bars still slice cleanly.
- Freezer: Freeze cut bars between layers of parchment for up to 1 month. Thaw in the refrigerator; freezing works, but the cheesecake layer may lose a bit of its creamy texture.
- Reheating: Don’t reheat these. They’re meant to be served cold or chilled, and warming them melts the topping and makes the base sticky.
Answers to the Questions Worth Asking
No-Bake Lemon Cheesecake Rice Krispie Treats
Ingredients
Equipment
Method
- Line a 9x13 pan with parchment paper and spray lightly so the bars lift out cleanly later.
- Melt the butter in a large pot over medium-low heat until glossy, about 2 minutes, stirring to prevent browning (visual cue: smooth melted butter).
- Add the mini marshmallows and stir continuously until fully melted, about 2–3 minutes, then remove from heat (visual cue: no unmelted lumps).
- Stir in the lemon zest and mix until evenly distributed, about 30 seconds (visual cue: bright specks throughout the sticky mixture).
- Fold in the Rice Krispies cereal and stir until completely coated, then press the mixture firmly into the prepared pan (visual cue: even, compact layer).
- Cool the Krispie base until set to the touch, about 10 minutes (visual cue: less sticky and holds shape when pressed gently).
- Beat the cream cheese, powdered sugar, lemon juice, lemon zest, and vanilla until smooth, about 2–3 minutes (visual cue: thick, glossy, lump-free cream).
- Fold in the whipped topping until no streaks remain, about 1 minute (visual cue: lightened texture with consistent color).
- Spread the lemon cheesecake layer evenly over the cooled Krispie base using a spatula (visual cue: level top with no gaps).
- Melt the white chocolate chips and drizzle in a zigzag pattern over the top (visual cue: thin lines that sit on the surface).
- Scatter extra lemon zest over the drizzle, then refrigerate for 1 hour (visual cue: set layer that firms up for clean cutting).
- Cut into 16 bars only after chilling, using straight pressure for tidy squares (visual cue: defined layers).