Tuna rice balls are a fun and tasty snack that are super easy to make! They are filled with yummy tuna and rice, rolled into cute little balls, perfect for munching.
Making these is a breeze! Just mix tuna with your favorite seasonings, scoop out some rice, and roll them up. You’ll be surprised how quickly they vanish at snack time!
Key Ingredients & Substitutions
Sushi Rice: This short-grain rice is essential because it sticks together well. If you can’t find sushi rice, you can use jasmine rice, but be aware that the texture will be different.
Tuna: Canned tuna is convenient for this recipe. You can swap it out for canned salmon or even shredded chicken if you prefer. Just make sure it’s drained well.
Mayonnaise: For creaminess, any mayonnaise works, but you can substitute Greek yogurt for a healthier version. It will change the taste a bit, but still delicious!
Nori: This seaweed adds flavor, but if you don’t have any, you can use a bit of dried seaweed snack sheets or even skip it entirely.
Panko Breadcrumbs: These add a nice crunch. If you’re looking for a gluten-free option, use gluten-free breadcrumbs or crushed rice crackers instead.
How Do I Shape the Rice Balls Without Them Falling Apart?
Shaping rice balls might seem tricky, but with the right technique, it’s easy! Use wet hands to mold the rice, as this prevents sticking and helps shape the balls without tearing them apart.
- Take a small handful of rice and flatten it a bit in your palm.
- Place a spoonful of the tuna mixture in the center, then fold the rice over it.
- Roll it gently into a ball, making sure it’s compact. The key is to apply just enough pressure.
Perfectly shaped rice balls will hold together nicely while frying, giving you that crispy exterior and yummy filling. Enjoy your cooking!
How to Make Delicious Tuna Rice Balls
Ingredients You’ll Need:
- 2 cups cooked sushi rice (short-grain rice)
- 1 can (5 oz) tuna in water, drained and flaked
- 2 tbsp mayonnaise
- 1 tbsp soy sauce
- 1 tsp toasted sesame oil
- 1 sheet nori (seaweed), chopped into small pieces
- 1/2 cup panko breadcrumbs
- 1 egg, beaten
- Salt and pepper, to taste
- Cooking oil for frying (vegetable or canola oil)
- Lemon wedges, for serving
- Optional: chopped fresh parsley, for garnish
How Much Time Will You Need?
This recipe takes about 15 minutes of prep time and around 10 minutes for frying. Once you’re done, you’ll have these delicious tuna rice balls ready to enjoy in no time!
Step-by-Step Instructions:
1. Prepare the Tuna Mixture:
In a bowl, combine the flaked tuna, mayonnaise, soy sauce, toasted sesame oil, and a pinch of salt and pepper. Mix everything well until it’s combined and creamy. This will be the tasty filling for your rice balls!
2. Mix the Rice:
In another bowl, take your cooked sushi rice and mix in the chopped nori evenly. The nori adds flavor and helps hold the rice together.
3. Shape the Rice Balls:
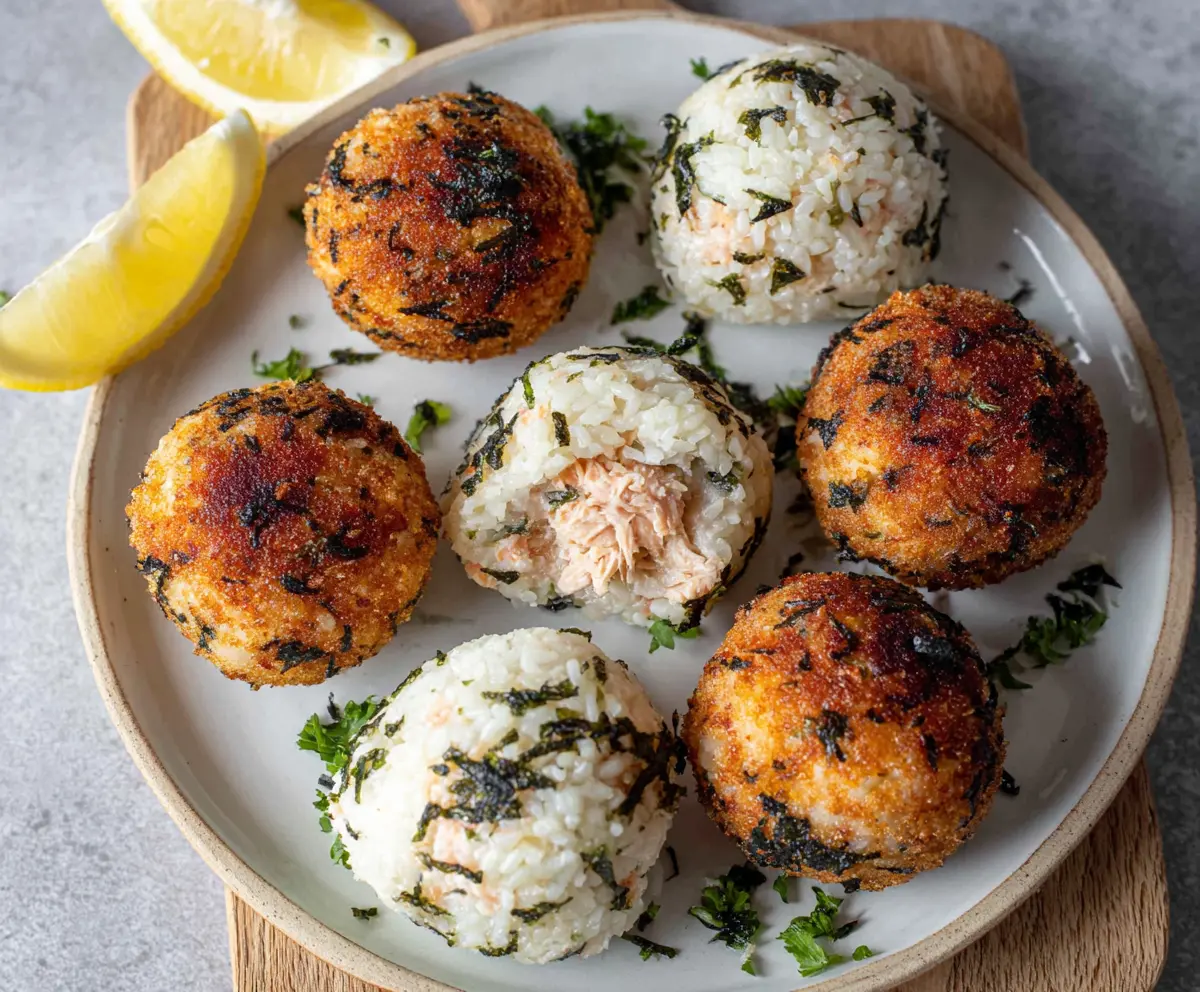
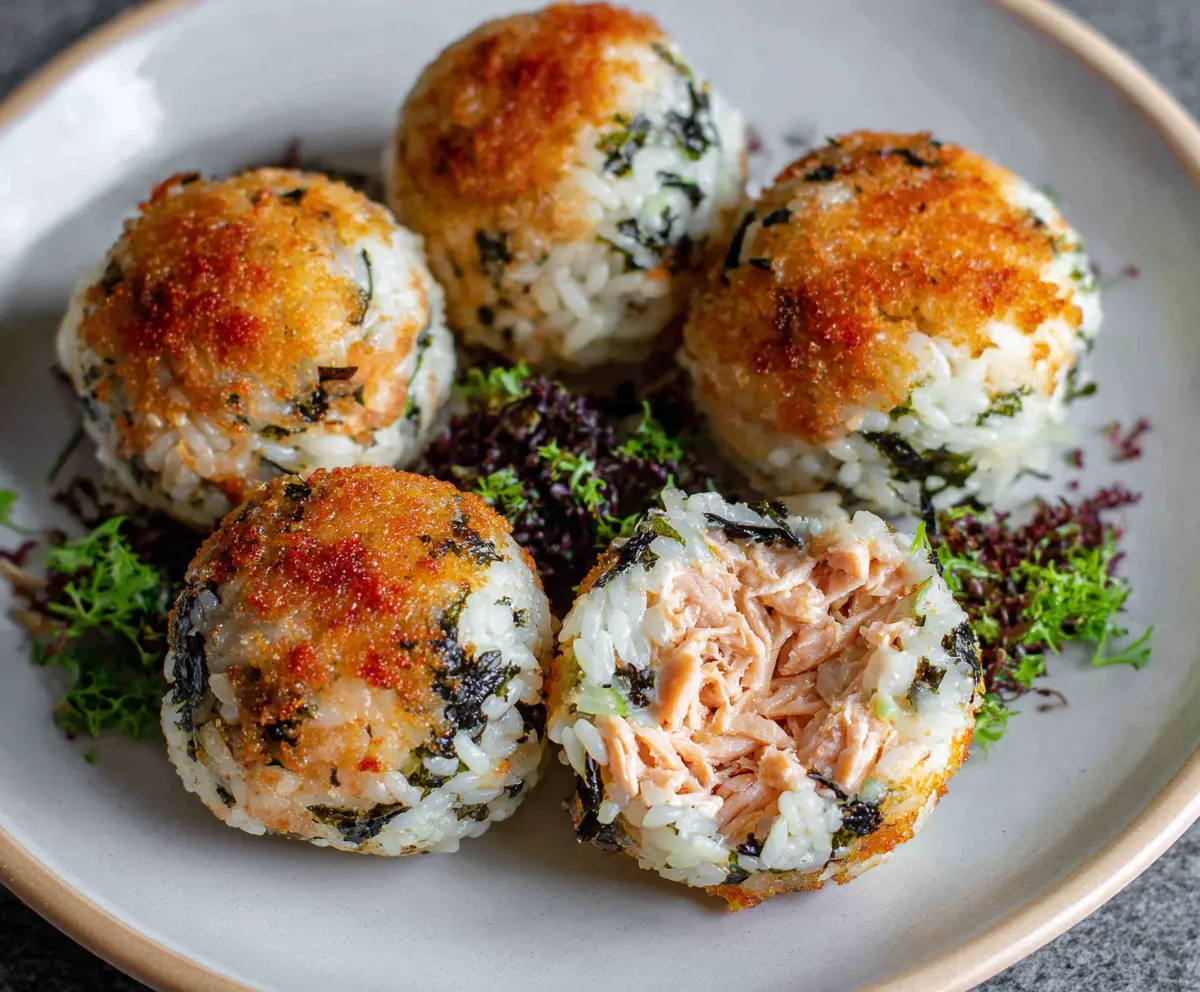
Take a small handful of the nori rice mixture and flatten it lightly in your palm. Add about 1 teaspoon of the tuna mixture in the center. Gently mold the rice around the tuna filling, forming a compact ball about 2 inches in diameter. Repeat this process for the remaining rice and tuna mixture.
4. Coat the Rice Balls:
Set up a breading station by placing the beaten egg in one bowl and the panko breadcrumbs in another. Dip each rice ball into the beaten egg, letting the excess drip off, then roll them in the panko breadcrumbs until well-coated. This helps create a crispy exterior when frying!
5. Fry the Rice Balls:
Heat a shallow pan over medium heat and add enough cooking oil to coat the bottom. Once the oil is hot, carefully place the rice balls in the pan. Fry them for about 2 to 3 minutes on each side, or until they are golden brown and crispy. Remember to be gentle when flipping them to keep their shape intact!
6. Serve and Enjoy:
Once they’re cooked, remove the rice balls from the pan and let them drain on paper towels if you like. Serve warm with lemon wedges and a sprinkle of fresh parsley for a little extra flavor. Enjoy your crispy, flavorful tuna rice balls as a perfect snack or appetizer!
Can I Use Leftover Rice for This Recipe?
Absolutely! Leftover rice works great for tuna rice balls. Just make sure it’s stored properly in the fridge and isn’t too dry. A little splash of water while reheating can help bring it back to the right consistency before mixing it with nori.
How Can I Make These Rice Balls Spicier?
If you like a kick, consider adding some sriracha or chili mayo to the tuna mixture. You can also add a sprinkle of red pepper flakes to the rice mixture for an extra layer of heat!
What Can I Use Instead of Panko Breadcrumbs?
If you don’t have panko breadcrumbs, regular breadcrumbs will work in a pinch, although they won’t be as crispy. For a gluten-free option, use crushed rice cereal or ground almonds instead.
How Do I Store Leftovers?
Store leftover rice balls in an airtight container in the fridge for up to 3 days. You can reheat them in the oven or skillet to maintain their crispy texture, or enjoy them cold!