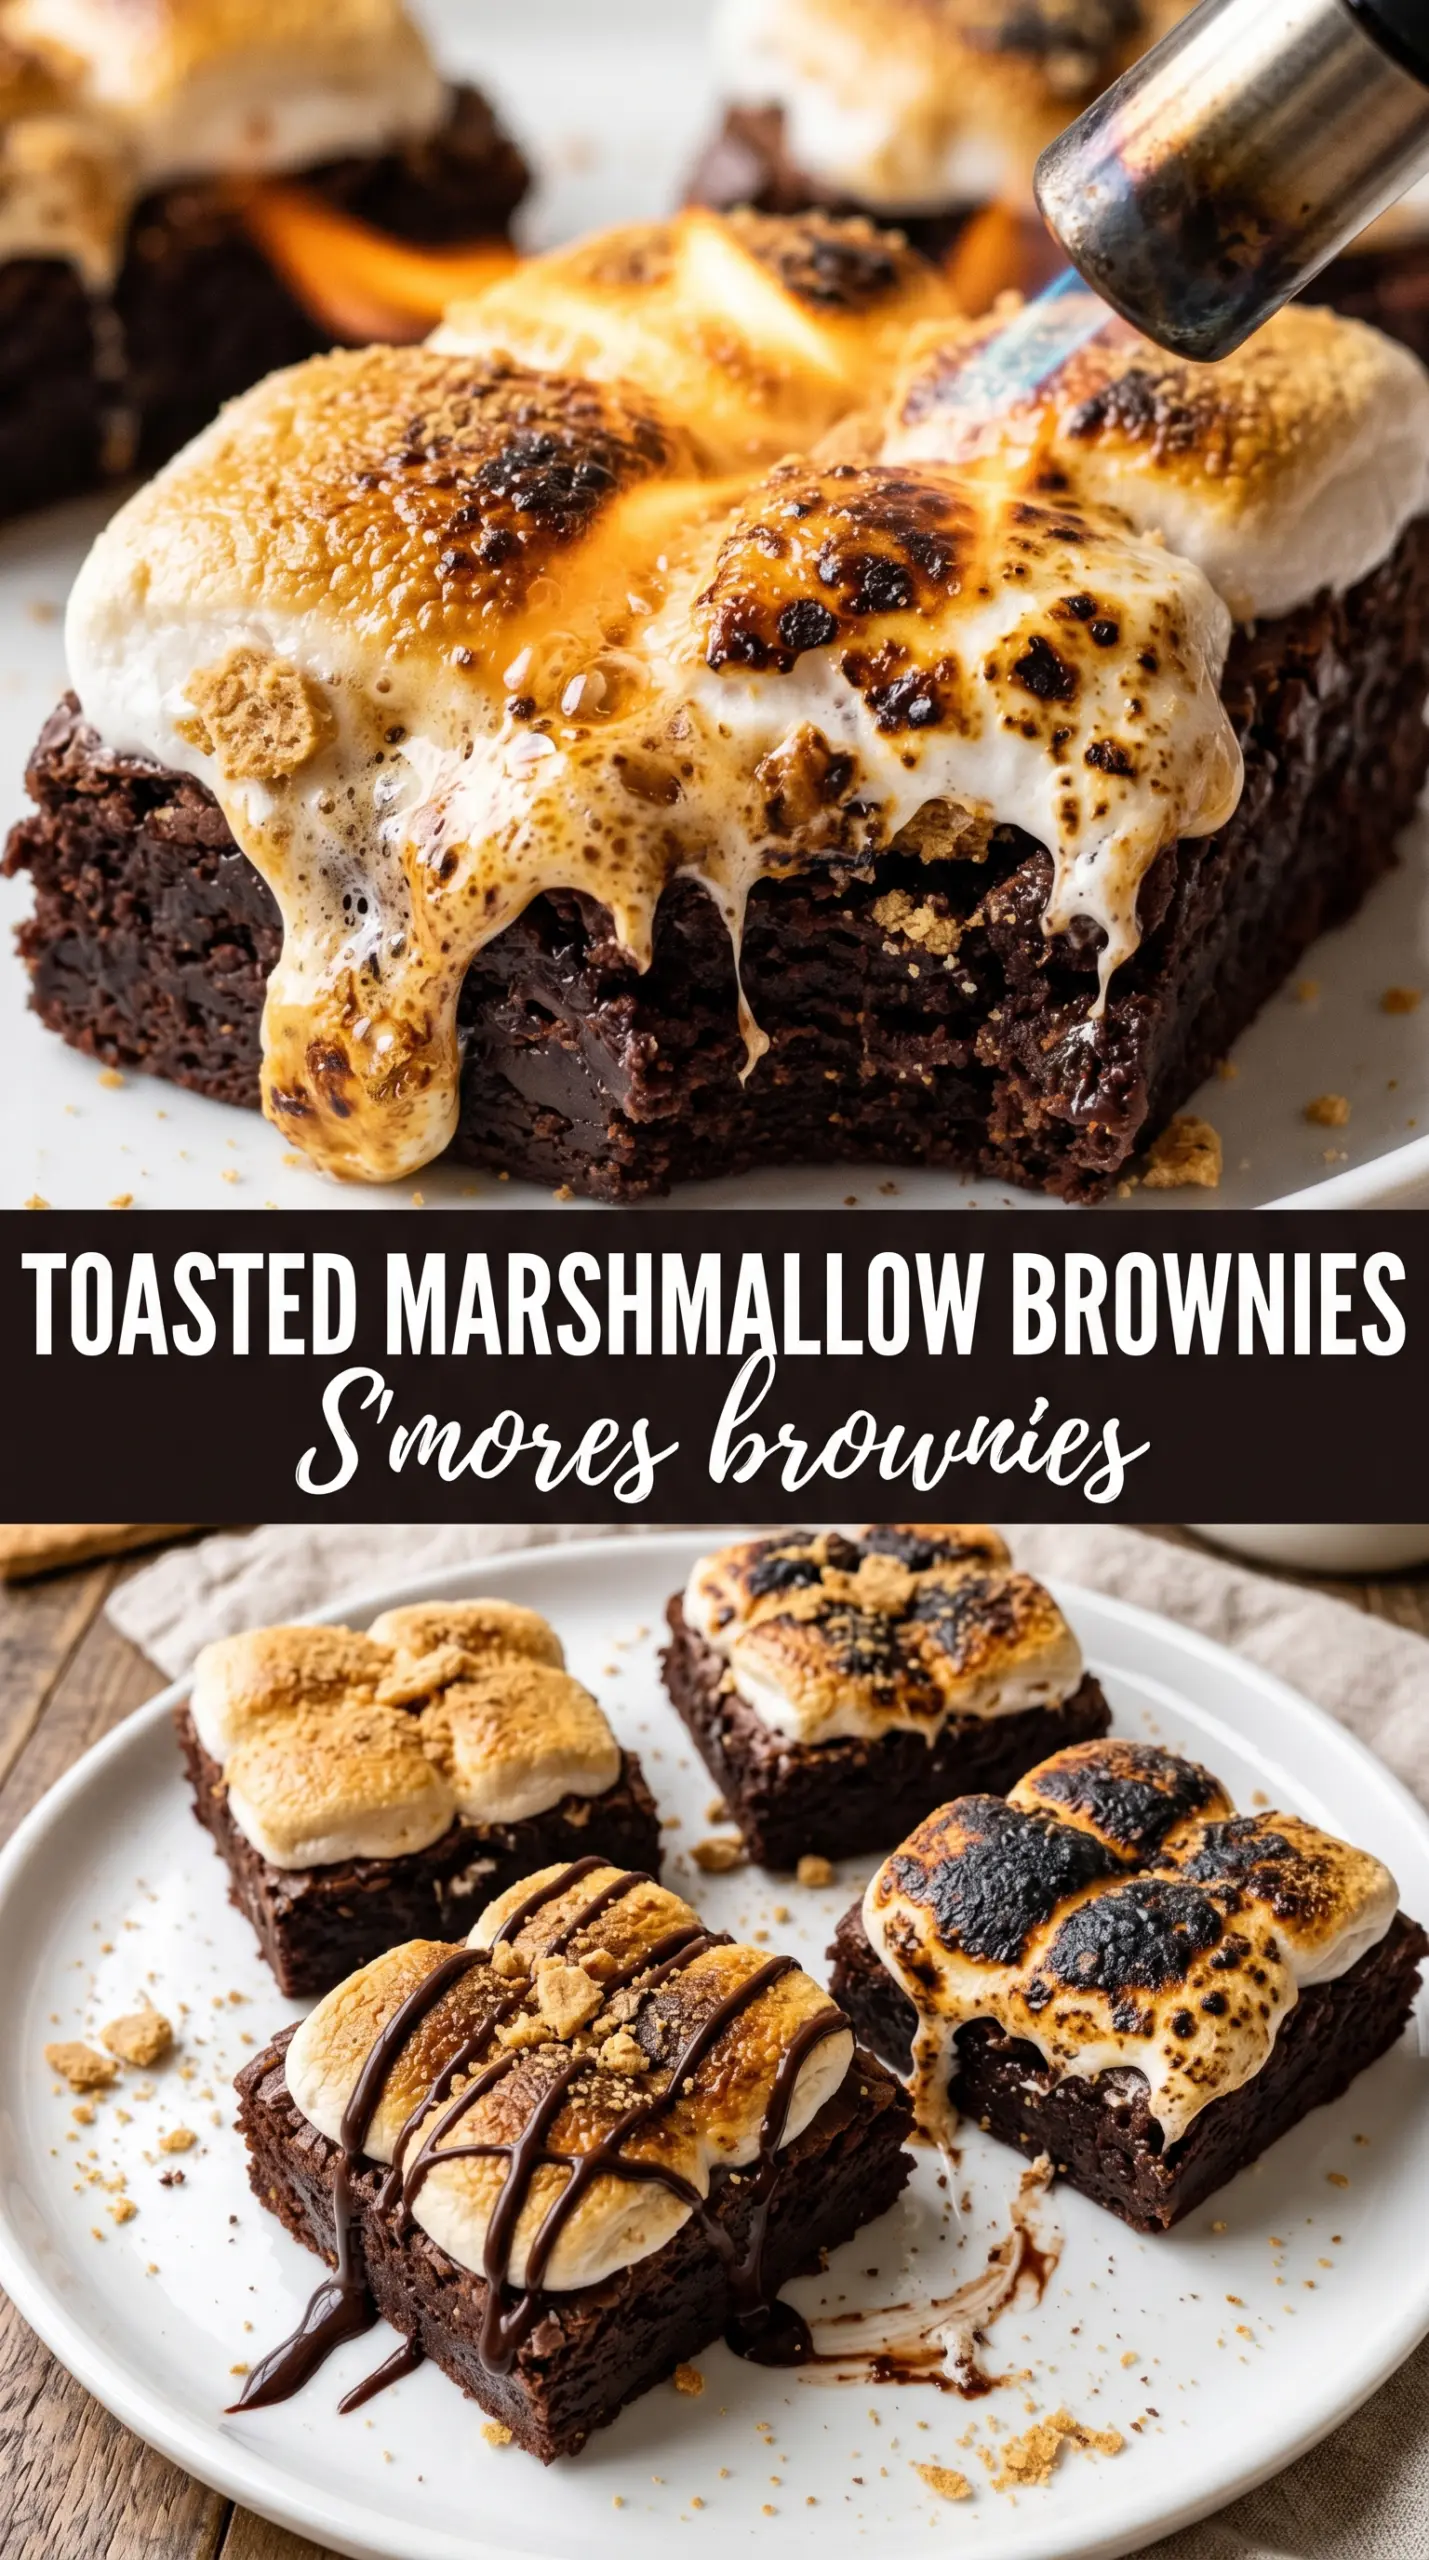
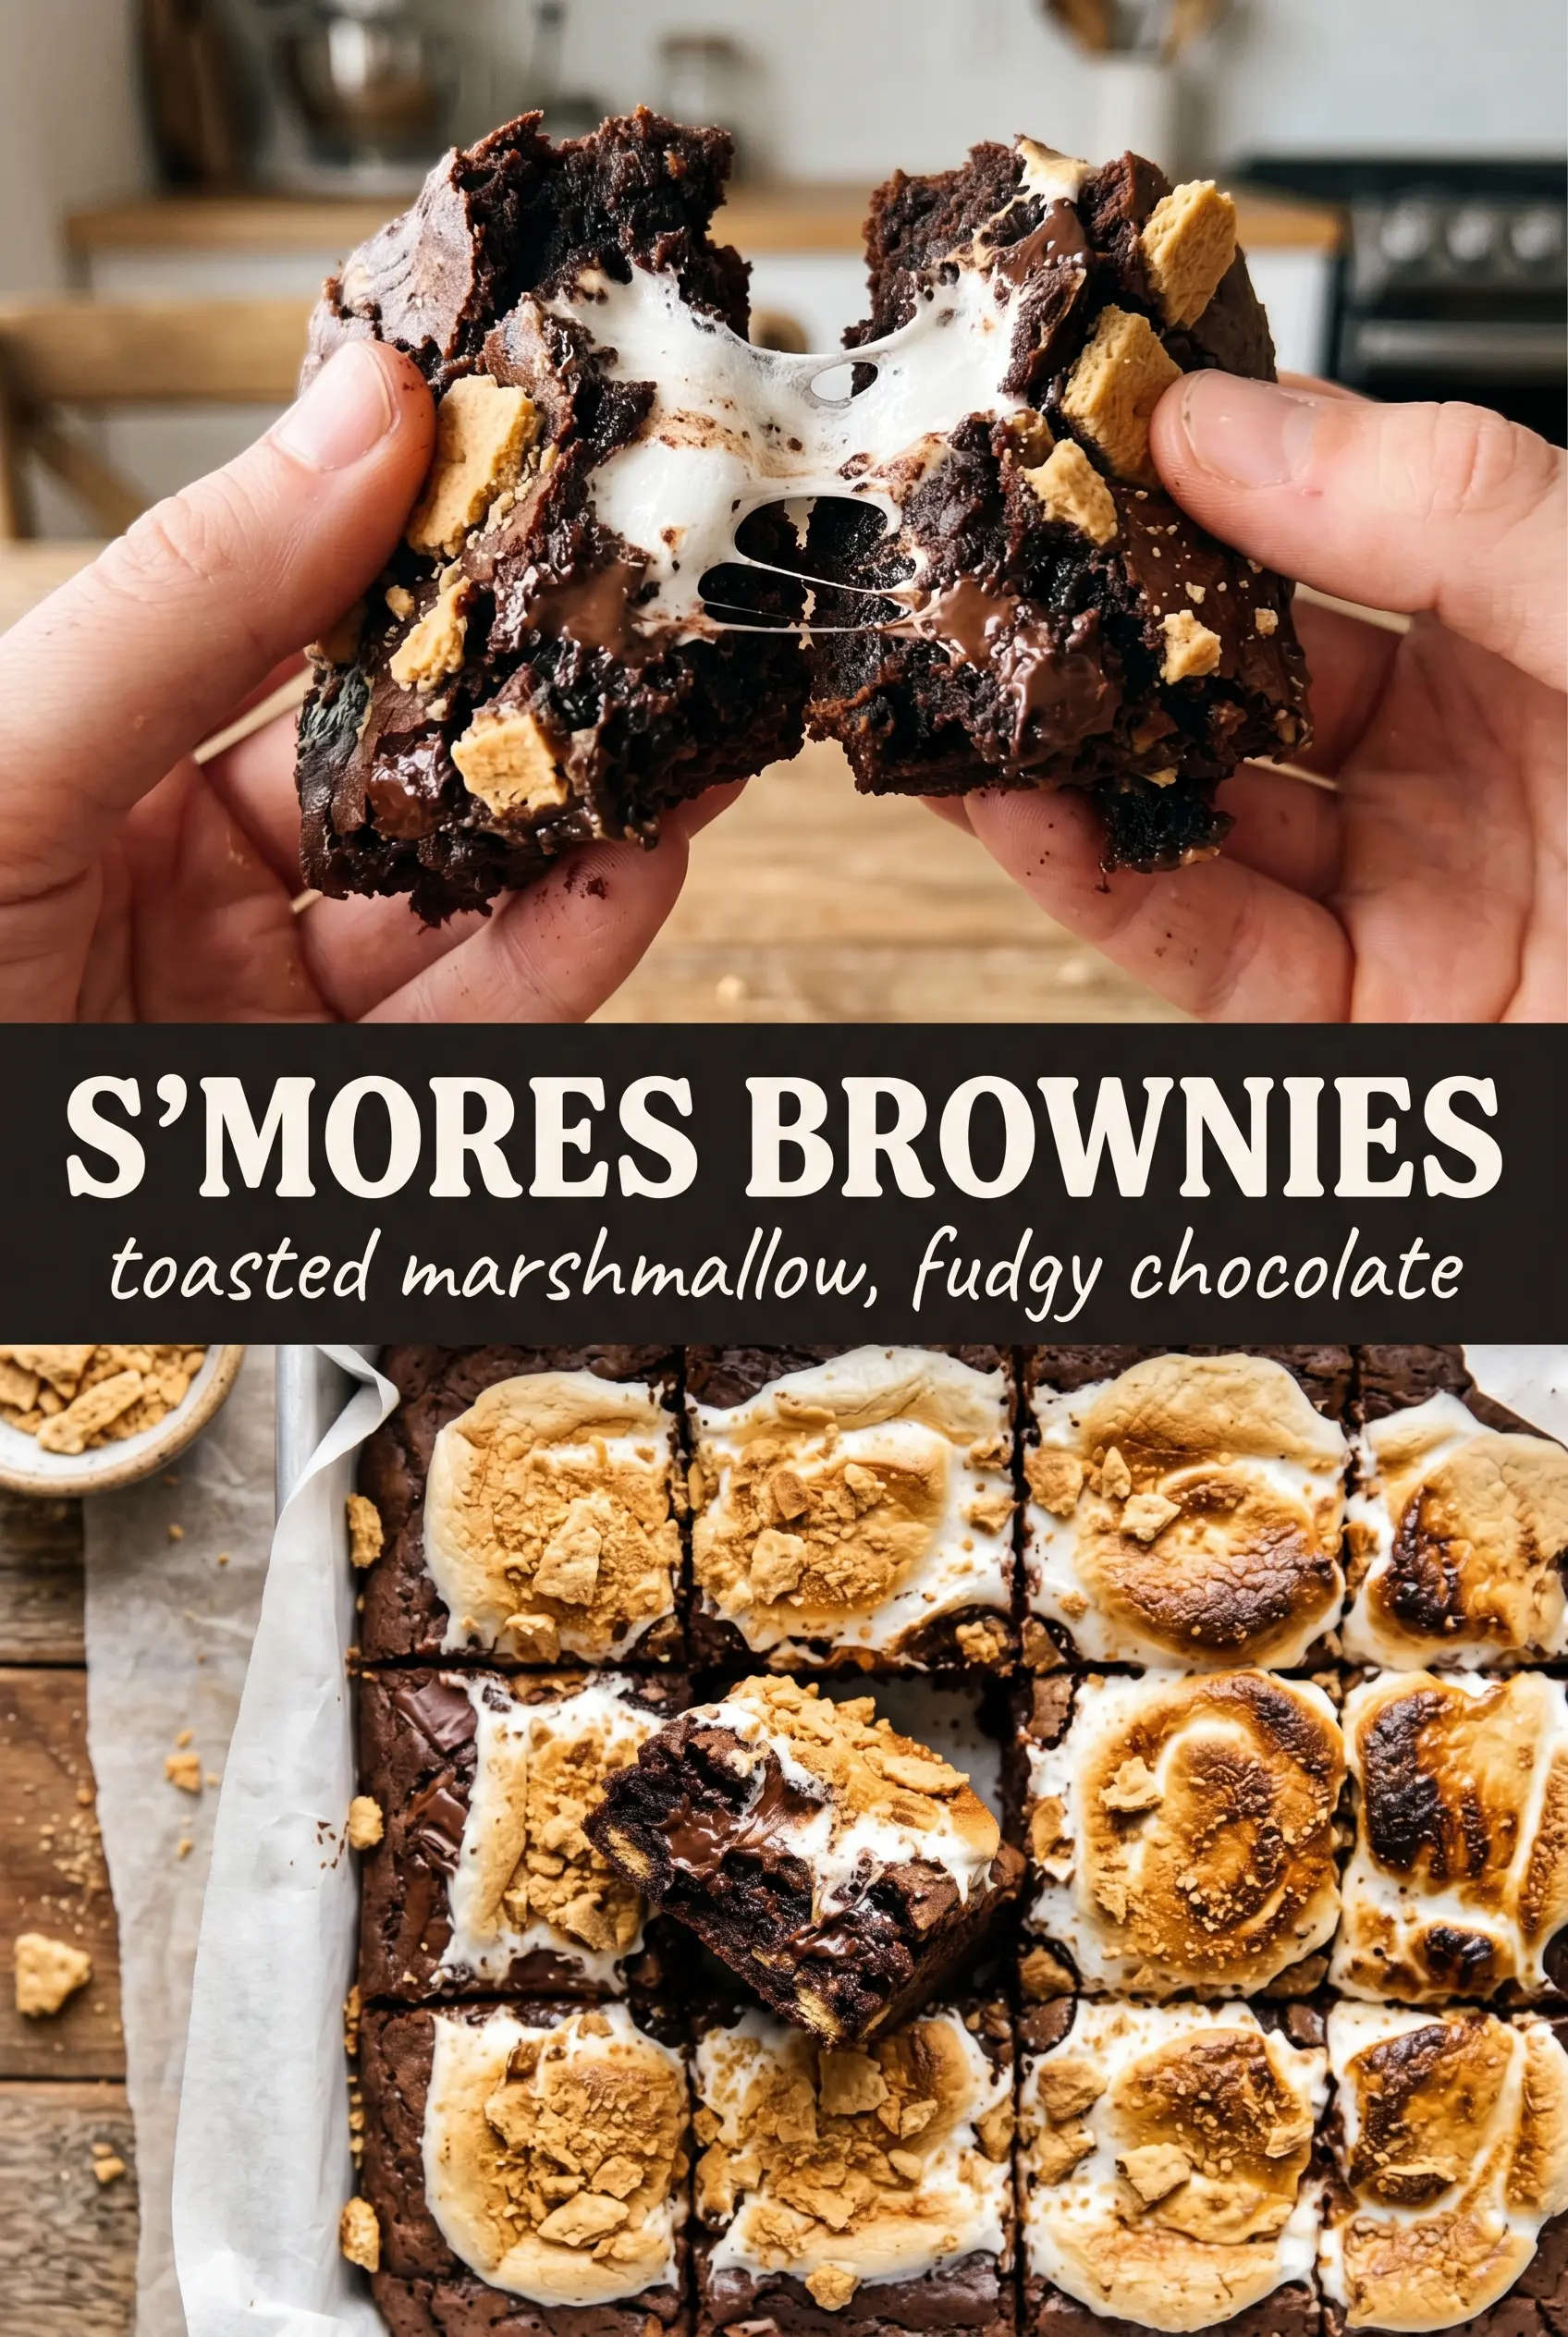
Fudgy brownies layered over a crisp graham cracker base and finished with toasted marshmallows are the kind of dessert that disappears fast and never needs extra decoration to earn attention. The bottom bakes into a sturdy, buttery crust that tastes like the best part of a campfire treat, while the brownie layer stays dense and rich instead of cakey. That contrast is what keeps every bite interesting.
The trick is treating each layer as its own job. The graham crust gets a short bake first so it stays crisp under the brownie batter instead of turning soggy. The brownie batter itself uses melted butter for that dense, glossy texture, and the marshmallows go on only after the brownies are mostly baked, then under the broiler just long enough to toast the tops without melting everything into a sticky puddle.
Below you’ll find the detail that keeps the layers clean, plus the timing that gives you soft brownies, a sturdy crust, and marshmallows with those golden blistered edges everyone reaches for first.
The graham layer baked up firm and the brownies stayed fudgy underneath. I watched the marshmallows for just over a minute and they came out perfectly toasted, not melted flat.
Save these s’mores brownies for the nights when you want gooey marshmallows, a crisp graham base, and a fudgy chocolate center in one pan.
The Layer That Keeps the Bottom Crisp Instead of Soggy
The graham cracker base needs a quick bake before the brownie batter goes on top. That first bake sets the crumbs with the butter and sugar, so the bottom turns into a firm, slightly sandy crust instead of dissolving into the brownie layer. Press it in tightly, especially into the corners, or it will crumble when you cut the squares.
The other place people go wrong is baking the brownies too long before the marshmallows go on. You want the brownie layer just set around the edges with a few moist crumbs on a tester. It finishes cooking under the broiler and during the cooling time, and that’s what keeps the center fudgy instead of dry.
What Each Layer Is Doing in These S’mores Brownies
- Graham cracker crumbs — These give you the s’mores part of the recipe without needing an actual cookie layer. Fine crumbs work best because they press into a compact crust; if yours are coarse, pulse them a little more so the base holds together neatly.
- Butter in both layers — Melted butter is what makes the crust bind and the brownie turn dense and fudgy. Use real butter here; it carries the flavor and gives the pan that rich, glossy finish you want.
- Cocoa powder — This is the main chocolate flavor in the brownies, so use one you like. Natural cocoa works well here, and it gives a deep brownie taste without needing melted chocolate in the batter.
- Mini marshmallows — Minis brown faster and more evenly under the broiler than large marshmallows. If you only have big ones, cut them into smaller pieces so the top toasts without leaving tall cold spots in the middle.
- Chocolate chips for drizzling — They finish the pan with that extra chocolate hit and help the top look like a real s’mores dessert. Any good melting chocolate works, but chips are convenient and hold their shape well before you melt them.
How to Build the Brownie Pan So the Top Stays Toasted and the Center Stays Fudgy
Pressing and Par-Baking the Crust
Mix the graham crumbs, sugar, and melted butter until every crumb looks damp, then press it firmly into a parchment-lined 9×13 pan. Bake it just until it smells toasty and looks set, about 6 minutes. If you skip this part, the crust softens under the brownie batter and loses that clean s’mores texture.
Whisking the Brownie Batter
Whisk the melted butter and sugar until they look glossy and combined, then add the eggs and vanilla. Stir in the cocoa, flour, baking powder, and salt just until the batter is smooth and thick. Overmixing here gives you tougher brownies, and you don’t need that when the goal is a dense, fudgy center.
Watching the Bake
Spread the batter over the crust and bake until the edges are set and a tester comes out with a few moist crumbs. Don’t wait for a fully clean toothpick; that means the brownies have gone too far and they’ll firm up into a drier texture as they cool. The pan should still look a little soft in the center when it comes out.
Toasting the Marshmallow Top
Scatter the mini marshmallows over the hot brownies, then broil on HIGH for 1 to 3 minutes. Stay right there and watch the top the whole time, because marshmallows can go from golden to burned in seconds. You want puffed, blistered tops with a few caramelized spots, not a melted blanket.
Cooling and Cutting Clean Squares
Let the pan cool for at least 30 minutes before you drizzle with melted chocolate and cut. A buttered knife slides through the marshmallow layer much better than a dry one, and it helps keep the top from sticking and tearing. If you cut too soon, the center smears and the brownie layer won’t hold its shape.
How to Tweak These S’mores Brownies Without Losing What Makes Them Work
Gluten-Free Version
Use gluten-free graham crackers for the crust and a 1:1 gluten-free flour blend in the brownie batter. The texture stays close to the original as long as the blend contains xanthan gum, and the crust still bakes up crisp if you press it firmly.
Dairy-Free Swaps
Use a plant-based butter that melts cleanly and dairy-free chocolate chips for the drizzle. The brownies will still be rich, though the crust may taste a little less buttery, so choose a substitute with a neutral flavor and enough fat to bind the crumbs well.
Extra Chocolate Version
Fold 1/2 cup chocolate chunks into the brownie batter before spreading it over the crust. This gives you pockets of melted chocolate in the center, but keep the amount modest or the brownies can turn heavy and bake unevenly.
Storage and Reheating
- Refrigerator: Store in an airtight container for up to 4 days. The marshmallow top will soften a bit, but the brownies stay fudgy.
- Freezer: Freeze the uncut brownies without the marshmallow topping for the best texture. Wrap tightly and freeze for up to 2 months, then thaw and add marshmallows before broiling if you want the top fresh.
- Reheating: Warm individual squares in the microwave for 10 to 15 seconds. Don’t use the broiler to reheat leftovers; it will overtoast the marshmallows before the brownie center gets warm.
Questions I Get Asked About This Recipe
S'mores Brownies
Ingredients
Equipment
Method
- Preheat the oven to 350°F and line a 9x13 pan with parchment paper.
- Mix graham cracker crumbs, sugar, and melted butter, then press firmly into the bottom of the pan; bake for 6 minutes.
- Whisk melted butter and granulated sugar, then whisk in eggs and vanilla until glossy.
- Stir in cocoa powder, all-purpose flour, baking powder, and salt until smooth, then spread the batter over the baked graham cracker crust.
- Bake at 350°F for 22-25 minutes until a toothpick comes out with a few moist crumbs.
- Scatter mini marshmallows over the top evenly.
- Broil on HIGH for 1-3 minutes, watching carefully until the marshmallows are golden and bubbly.
- Cool for 30 minutes before drizzling with melted chocolate.
- Cut into 16 squares using a buttered knife.