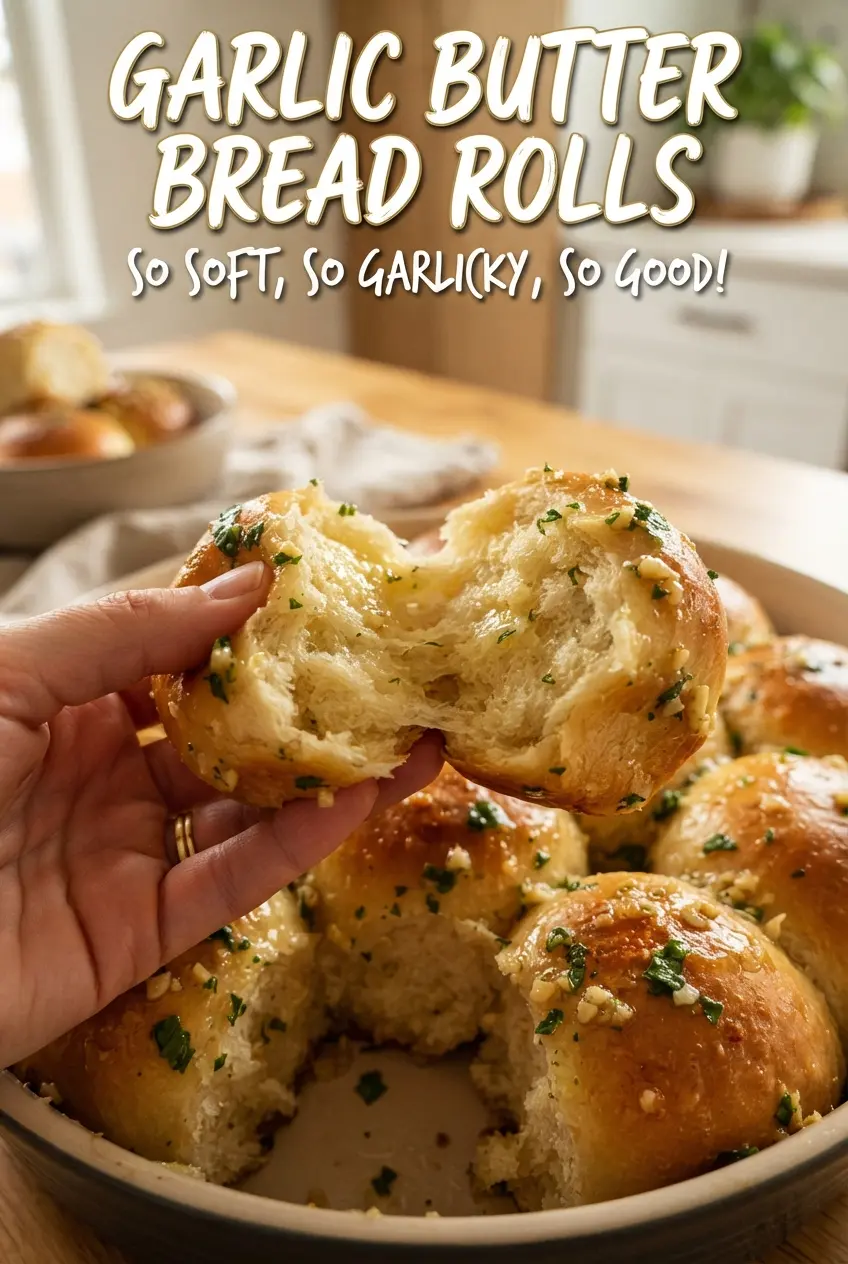
Garlic butter bread rolls come out soft, pull-apart tender, and glossy with melted butter in a way that makes a plain dinner feel finished. The tops bake up golden, the centers stay fluffy and warm, and that last brush of garlic butter sinks into every ridge. They’re the kind of rolls people reach for before the rest of the meal even hits the table.
What makes this version work is the simple timing: the dough gets one good rise until doubled, then the shaped rolls get a second rise in the pan so they bake up light instead of dense. Instant yeast keeps the process moving, and the warm milk gives the dough a softer crumb than water ever would. The garlic butter goes on hot rolls, not cooled ones, so it melts in and perfumes the whole pan instead of sitting on top.
Below I’ve included the small details that matter here — how the dough should feel when it’s kneaded enough, why the pan arrangement helps the rolls rise upward instead of outward, and how to get the butter finish without making the tops greasy.
The dough rose right on schedule and the rolls baked up so fluffy. Brushing the garlic butter over them while they were still hot made the tops shiny and the centers stayed soft.
Save these garlic butter bread rolls for the night you want soft, pull-apart rolls with a glossy garlic-parsley finish.
The Knead-and-Rise Step That Keeps These Rolls Light
The most common reason bread rolls turn out heavy is simple: the dough never gets enough strength before the first rise, or it gets too much flour and dries out. Here, the dough should feel soft, slightly tacky, and elastic after kneading. It won’t look like a dry bread dough; it should still have a little give when you press it with a fingertip.
The second trap is rushing the proof. If the dough hasn’t doubled, the rolls won’t have enough gas built into them to puff properly in the oven. The shaped balls should look puffy and touch each other lightly in the pan before they go into the oven. That contact helps them rise upward and form those soft sides everyone pulls apart first.
What the Butter, Milk, and Garlic Are Each Doing Here

- Warm milk — Milk adds a softer crumb than water and gives the rolls a richer flavor. Keep it around 110°F so it feels warm, not hot; anything much hotter can slow or kill the yeast.
- Instant yeast — This keeps the recipe moving without a separate proofing step for the yeast alone. If you only have active dry yeast, use it in the same amount but give the first rise a little more time.
- Butter — Melted butter in the dough makes the rolls tender, and the butter brushed on top is what gives that bakery-style shine. Use real butter here; margarine won’t give the same flavor or finish.
- Garlic and parsley — Fresh garlic makes the topping taste sharp and fragrant, while parsley keeps it from tasting flat and heavy. Garlic powder can work in a pinch, but the flavor will be rounder and less punchy.
- Flaky sea salt — This isn’t just decoration. The little crunch on top cuts through the butter and keeps the rolls from tasting one-note.
Building the Dough, Proofing It Twice, and Finishing With Garlic Butter
Mixing the Dough Until It Turns Smooth
Start with the warm milk, yeast, and sugar, and wait until the mixture looks foamy on top. That foam tells you the yeast is awake. Once the egg, melted butter, salt, and flour go in, knead until the dough turns smooth and stretchy, about 6 to 8 minutes by hand or with a mixer. If it tears easily or feels shaggy, it needs more kneading; if it gets stiff and dry, too much flour went in.
Letting the First Rise Build the Structure
Cover the dough and let it rise until it doubles in size, which usually takes about an hour. You’re looking for dough that feels light and a little jiggly when you move the bowl. If your kitchen is cool, the rise will take longer, and that’s fine. Don’t chase the clock here; dough rises on its own schedule.
Shaping for a Pan Pull-Apart Finish
Divide the dough into 12 equal pieces and roll each one into a smooth ball. Put them in a greased 9×13-inch pan with just a little space between them, then cover and let them puff for about 30 minutes. They should look noticeably larger and soft enough that they barely spring back when you press one gently. If they’re underproofed, they’ll bake up dense and split awkwardly instead of rising into soft, connected rolls.
Baking Until Golden, Then Brushing Hot
Bake at 375°F until the tops are deeply golden, usually 18 to 20 minutes. The rolls should smell toasty and sound slightly hollow when tapped. Mix the melted butter with the garlic and parsley while they bake, then brush it over the rolls the second they come out of the oven. That timing matters: hot rolls soak up the butter, while cool rolls just end up slick on the surface.
Three Useful Ways to Adapt These Garlic Butter Bread Rolls
Make them dairy-free without losing the soft crumb
Swap the milk for an unsweetened non-dairy milk with a neutral flavor, and use a plant-based butter that melts cleanly. The rolls will still rise and stay soft, but the flavor will be a little less rich, so the garlic topping matters even more.
Use active dry yeast if that’s what you have
Active dry yeast works here, but it usually needs a little more patience. Stir it into the warm milk and sugar, then give the dough extra time for both rises if the kitchen is cool. The result is the same tender roll, just with a slower schedule.
Turn them into herb-butter dinner rolls
Swap part of the parsley for chopped chives, dill, or rosemary for a different finish. Rosemary brings a more savory, almost roast-chicken feel, while chives keep things mild and oniony. The texture stays the same; only the top-note changes.
Storage and Reheating
- Refrigerator: Store in an airtight container for up to 3 days. The rolls will firm up a little in the fridge, but they soften again when warmed.
- Freezer: These freeze well. Wrap tightly and freeze for up to 2 months, then thaw at room temperature before reheating.
- Reheating: Warm in a 300°F oven for 8 to 10 minutes, covered loosely with foil so the tops don’t dry out. Microwaving works in a pinch, but it can make the rolls rubbery if you overdo it.
Questions I Get Asked About This Recipe
Garlic Butter Bread Rolls
Ingredients
Equipment
Method
- Whisk warm milk, yeast, and sugar together, then let sit for 5 minutes until foamy. You should see bubbling across the surface as the yeast wakes up.
- Add egg, melted butter, salt, and flour, then knead for 6-8 minutes until smooth and elastic. The dough should look cohesive and stretch without tearing.
- Cover the dough and let rise for 1 hour until doubled in size. It should puff to about twice the original volume.
- Divide the dough into 12 balls, place them in a greased 9x13-inch pan, cover, and let rise for 30 minutes until puffy. The tops should feel lighter and look fuller in the pan.
- Preheat the oven to 375F, then bake for 18-20 minutes until golden brown. The rolls should have set tops and smell toasty.
- Stir melted butter with garlic and parsley, then brush generously over the hot rolls. The surface should glisten and the garlic should smell fragrant.
- Sprinkle flaky salt over the rolls, then serve warm. The flakes should cling to the butter-slick surface.