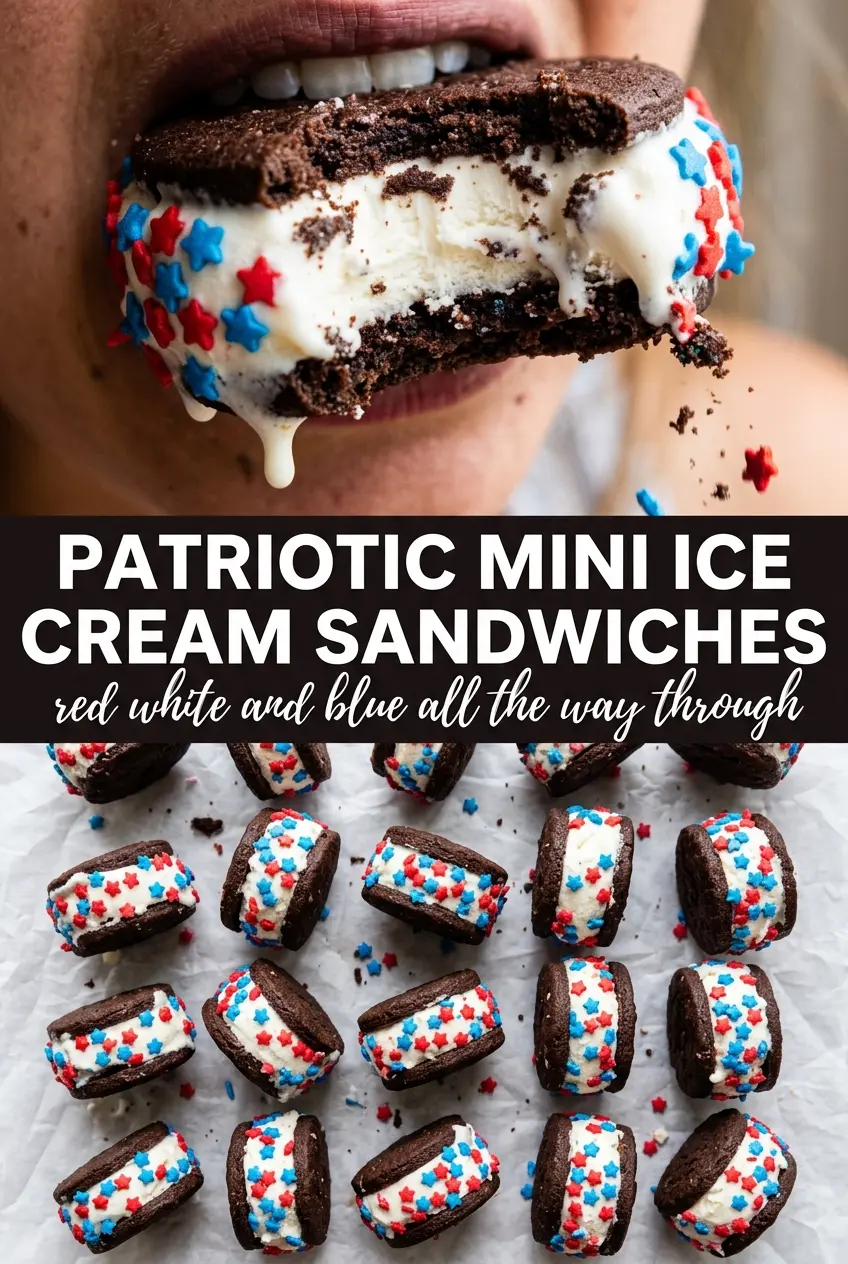
Patriotic mini ice cream sandwiches hit that sweet spot between playful and genuinely good: soft, brownie-like cookies, cold vanilla ice cream, and a sprinkle edge that gives each bite a little crunch before the ice cream melts in. The small size matters. They’re easier to assemble, easier to serve, and they freeze faster than full-size sandwiches, which means you’re not wrestling with a softened mess by the time dessert hits the table.
The cookie base starts with cake mix, which keeps the texture tender and the prep short, but the real key is not overbaking them. Pull them when they’re just set and let them cool completely before adding ice cream. A short freeze on the cookies before assembly also helps them hold their shape when you press the sandwiches together. That extra chill is what keeps the ice cream from squeezing out the sides.
Below, I’ve included the timing trick that keeps the sandwiches neat, plus a couple of easy swaps if you want to change the cake mix or the sprinkle colors. Once you’ve made these once, they’re the kind of dessert you can put together without thinking twice.
The cookies stayed soft even after freezing, and rolling the ice cream edges in the sprinkles was easier than I expected. I made them the night before, and they were still neat and easy to bite into after sitting out for a few minutes.
Patriotic mini ice cream sandwiches with sprinkle edges are the frozen treat to pin for your next red, white, and blue dessert table.
The Part That Keeps the Ice Cream From Squeezing Out
The difference between a neat sandwich and a sticky one comes down to temperature. The cookies need to be completely cool, then briefly frozen, before you add the ice cream. If they’re even a little warm, the ice cream starts to slide and the sandwich looks messy before you’ve finished assembling the tray.
Working in small batches helps here. The ice cream should be softened just enough to scoop cleanly, not melted. If it gets soupy, it turns the cookies slippery and the sprinkle coating won’t stick well. The freezer does the final set, but the first minute of assembly decides whether these look polished or awkward.
- Red velvet cake mix — This gives you a soft, tender cookie with almost no measuring. Chocolate cake mix works the same way if that’s what you have, and the flavor is slightly deeper and less sweet.
- Eggs and oil — These are what turn the mix into a dough instead of a batter. The oil keeps the cookies soft after freezing, which matters here more than a crisp edge would.
- Vanilla ice cream — Use a brand that firms up well in the freezer. A loose, airy ice cream melts faster during assembly, while a denser one gives cleaner edges and a better bite.
- Red and blue sprinkles — Nonpareils or jimmies both work, but the longer jimmies give the most obvious color border. Add them right after sandwiching so the ice cream edge is still tacky enough to catch them.
What Each Ingredient Is Actually Doing in This Recipe

- Primary ingredient (the star) — Quality matters most. Choose the best you can find.
- Cooking medium (oil, butter, or broth) — This carries flavors and prevents dryness.
- Seasonings (salt, pepper, spices, herbs) — Layer flavors so nothing overpowers. Build depth gradually.
- Aromatics (garlic, onion, herbs) — Cook with fat to bloom flavors. Become the foundation.
- Supporting ingredients — Complement the main ingredient without overpowering it.
- Sauce or liquid (if applicable) — Brings flavors together. Balance richness with acid.
- Acid (lemon, vinegar, wine, or other) — Brightens and prevents flat-tasting results.
- Final finish (garnish, glaze, or sauce) — Prevents one-dimensional taste and adds visual appeal.
Building the Cookies, Filling Them Fast, and Freezing Them Solid
Mixing the Dough
Stir the cake mix, eggs, and oil until a thick dough forms and no dry pockets remain. It should look dense and scoopable, closer to soft cookie dough than cake batter. If the mixture feels too sticky to handle, let it sit for a few minutes; the cake mix hydrates and firms up as it rests. Don’t add extra flour, or the cookies will bake up dry and lose that soft middle.
Baking Until Just Set
Scoop tablespoon-sized portions onto parchment-lined baking sheets and flatten them into small circles so they bake evenly. Pull them when the tops look set and the edges have just barely firmed up. If they go too long, they turn crumbly instead of flexible, and that makes the finished sandwiches harder to bite through after freezing.
Cooling and Chilling the Cookies
Let the cookies cool completely on a wire rack, then freeze them for 30 minutes. That short chill gives them strength, which helps when you press the ice cream between them. If you skip this, the cookies absorb too much heat from the ice cream and the filling starts to slide before you’ve finished rolling the edges.
Assembling and Rolling the Edges
Work with one sandwich at a time. Place a scoop of slightly softened vanilla ice cream on the flat side of one cookie, top with a second cookie, and press just until the ice cream reaches the edges. Roll the exposed edge in sprinkles immediately, then wrap the sandwich in plastic wrap and freeze it. The wraps keep the sandwiches from picking up freezer smells and help them hold their shape while they set.
Chocolate Cookie Version
Use a chocolate cake mix instead of red velvet for a deeper cocoa flavor and a less colorful cookie base. The sprinkle border still gives you the patriotic look, but the finished sandwich tastes a little richer and pairs especially well with vanilla bean or cherry ice cream.
Gluten-Free Shortcut
Use a gluten-free cake mix that bakes well as cookies, then follow the same egg-and-oil ratio. The texture will be a little more delicate, so chill the cookies fully before assembling and handle them gently when pressing the sandwiches together.
Dairy-Free Filling
Swap in a dairy-free vanilla ice cream that freezes firmly, not one that stays soft straight from the freezer. Coconut-based versions are usually the easiest to work with, though they do add a faint coconut note to the final flavor.
Make Them Smaller for a Crowd
Use slightly smaller dough portions and a small cookie scoop if you want bite-size sandwiches for a party tray. They freeze faster and are easier to serve, but the thinner cookies need careful baking so they don’t dry out before the centers set.
Storage and Freezer Handling
- Refrigerator: Not recommended. These soften fast and lose their shape, so keep them frozen until serving.
- Freezer: Wrap each sandwich tightly in plastic wrap and freeze for up to 2 weeks for the best texture. After that, the cookies can start to dry out a little at the edges.
- Reheating: No reheating needed. Let them sit at room temperature for 3 to 5 minutes before serving so the cookies soften just enough to bite without the ice cream melting out.
Answers to the Questions Worth Asking
Patriotic Mini Ice Cream Sandwiches
Ingredients
Equipment
Method
- Preheat the oven to 350°F and line baking sheets with parchment paper for easy release.
- Mix the red velvet cake mix, eggs, and vegetable oil until a thick dough forms.
- Scoop tablespoon-sized balls onto the baking sheets, flatten to about 1/4-inch thick circles, and keep portions evenly spaced.
- Bake for 8–10 minutes until the cookies are set, then remove them before they overbake.
- Let cookies cool completely on a wire rack, then freeze for 30 minutes to firm them up.
- Working quickly, place a scoop of slightly softened vanilla ice cream on the flat side of one cookie.
- Press another cookie on top to sandwich the ice cream.
- Roll the exposed ice cream edge in red and blue sprinkles to create a crisp red-white-blue border.
- Wrap each mini ice cream sandwich in plastic wrap and freeze for at least 2 hours until solid before serving.