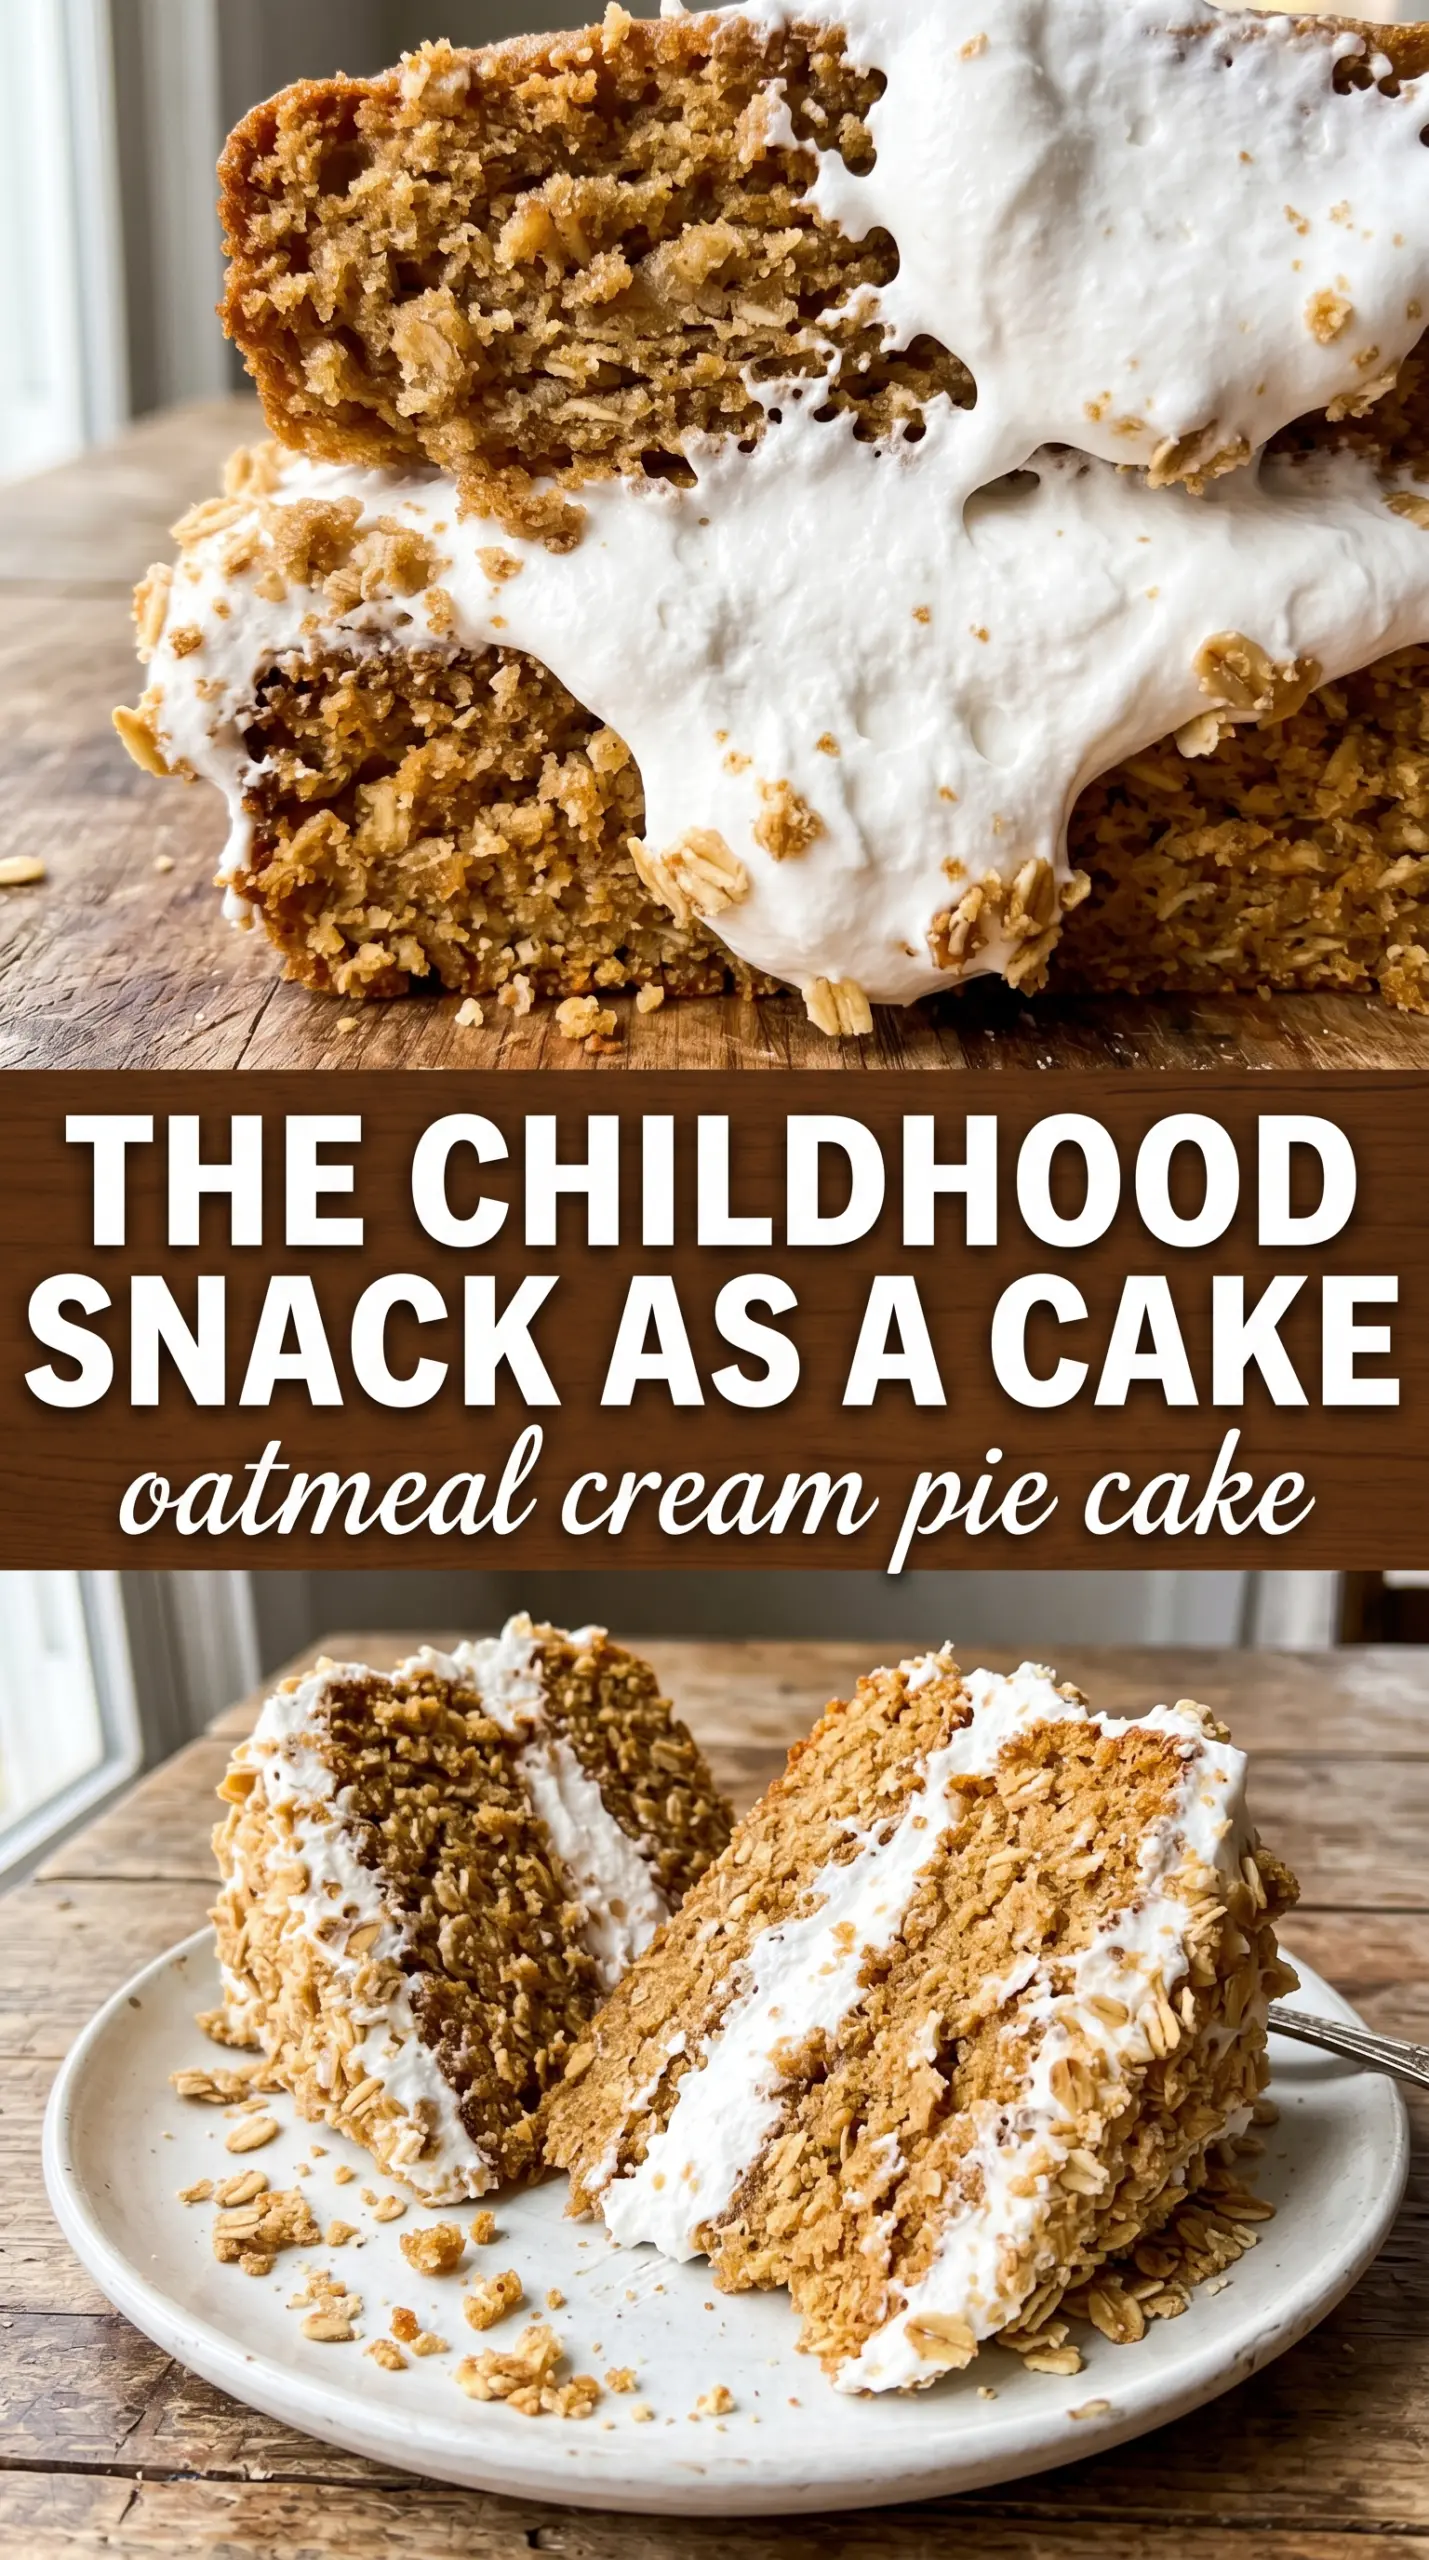
Tall, soft oatmeal cake layered with marshmallow cream filling has a way of disappearing fast, especially when the cake stays moist and the filling holds its shape between slices. This Oatmeal Cream Pie Cake tastes like the packaged snack everyone remembers, but the homemade version has better texture, deeper brown sugar flavor, and a filling that actually tastes fresh instead of cloying.
The trick is in the oatmeal. Blending the oats fine gives the cake that familiar oatmeal cookie character without turning the crumb heavy or gritty. Buttermilk keeps the layers tender, brown sugar brings the warm molasses note, and the marshmallow fluff filling stays light enough to spread cleanly while still giving you that thick, pillowy center people expect from an oatmeal cream pie dessert.
Below, I’ll show you how to keep the layers soft, how to make the filling smooth instead of grainy, and how to finish the cake so it looks as good as it tastes. If you’ve ever wanted a layer cake version of a Little Debbie classic, this one earns its place.
The cake layers stayed soft even after chilling, and the marshmallow filling spread like a dream. I used the crumbled oatmeal cookies on top and it tasted just like the snack cake, only fresher and less sweet.
Save this oatmeal cream pie cake for when you want a nostalgic layer cake with fluffy marshmallow filling and a cookie crumble finish.
The Oatmeal Texture That Keeps This Cake From Turning Heavy
The biggest mistake with oatmeal cakes is leaving the oats too coarse. You get little chewy bits that fight the crumb instead of blending into it. Blending the oats into a fine meal gives you the flavor of oatmeal cookies with the softness of a proper layer cake, which is what makes this version eat like a dessert instead of a breakfast loaf.
Brown sugar and buttermilk do a lot of the work here. Brown sugar keeps the cake moist and gives it that deep, caramel-like note that reads as oatmeal cream pie right away. Buttermilk keeps the batter tender and helps the leavening lift the layers without making them airy or dry. If your cake turns dense, it’s usually because the oats stayed too chunky or the batter was overmixed after the dry ingredients went in.
What Each Ingredient Is Actually Doing In This Cake
- Rolled oats, blended fine — This is the ingredient that gives the cake its oatmeal cookie character without making the crumb coarse. If you skip the blending step, the texture gets heavier and the layers slice less cleanly.
- Brown sugar — White sugar won’t give you the same warm, molasses-backed flavor or the same moist crumb. Light brown sugar works fine, but dark brown sugar will make the cake taste a little deeper and more bakery-style.
- Buttermilk — It softens the crumb and helps the baking soda do its job. If you don’t have it, use milk plus 1 tablespoon vinegar or lemon juice, then let it sit for 5 minutes before mixing.
- Marshmallow fluff — This is what makes the filling taste like a real oatmeal cream pie filling instead of plain vanilla frosting. Don’t try to swap in melted marshmallows; they set up differently and won’t spread the same way.
- Heavy cream — Just a small amount loosens the filling enough to make it spreadable. Add it slowly; too much and the filling can get slack and slide out the sides.
Building the Layers Without Crushing the Filling
Mix the Batter Just Until It Comes Together
Whisk the dry ingredients first so the oats, flour, leavening, and cinnamon are evenly distributed. When you add the wet ingredients, stir only until the batter looks smooth and no dry pockets remain. Overmixing develops the flour and makes the cake tough, and with blended oats in the batter, that toughness shows up fast.
Bake for Spring, Not Dryness
The cakes are done when the centers spring back lightly and a toothpick comes out clean or with a few moist crumbs. If the tops color too quickly, the oven is running hot, and you should check early rather than waiting for a darker top. A dry oatmeal cake loses the whole point of the recipe, so pull the layers the moment they’re set.
Whip the Filling Until It Spreads Cleanly
Beat the butter first until it looks pale and fluffy. Then add the powdered sugar, marshmallow fluff, vanilla, and cream, and keep beating until the filling is smooth and thick enough to hold a swoop. If it looks grainy, the butter was too cold; if it looks loose, beat in a little more powdered sugar before assembling the cake.
Assemble While the Layers Are Fully Cool
Set one cooled cake layer on your stand and spread the filling all the way to the edge in a generous layer. Add the second cake layer gently so the filling doesn’t squeeze out in one corner. Frost the outside with the remaining cream, then finish with cookie crumbs and a dusting of powdered sugar for the right snack-cake look.
How to Adapt This Oatmeal Cream Pie Cake Without Losing the Nostalgic Feel
Make it dairy-free
Use a neutral dairy-free butter in both the cake and filling, then swap the buttermilk for unsweetened plant milk plus 1 tablespoon vinegar. The cake stays soft, but the filling will be a little less rich and a touch sweeter, so taste it before adding extra powdered sugar.
Use a stronger spice note
Add a pinch of nutmeg or a little extra cinnamon if you want the cake to taste closer to an oatmeal cookie. Keep it restrained; too much spice pushes the cake away from the nostalgic snack-cake flavor and into spice-cake territory.
Turn it into cupcakes
Bake the batter in lined muffin tins and fill them with a spoonful of marshmallow cream in the center or pipe the filling on top. Cupcakes bake faster and lose some of the dramatic layer-cake look, but they make the filling-to-cake ratio even better.
Storage and Reheating
- Refrigerator: Store covered for up to 4 days. The cake stays moist, but the filling firms up a little, which actually helps clean slicing.
- Freezer: Freeze slices tightly wrapped for up to 2 months. Thaw in the refrigerator overnight; the filling softens better that way than at room temperature.
- Reheating: This cake is best served chilled or at cool room temperature, not warmed. Heat makes the marshmallow filling slump and the frosting lose its structure.
Answers to the Questions Worth Asking

Oatmeal Cream Pie Cake
Ingredients
Equipment
Method
- Preheat the oven to 350°F and grease two 9-inch round pans. Set aside so the pans are ready when the batter is mixed.
- Whisk together all-purpose flour, blended rolled oats, packed brown sugar, cinnamon, baking soda, baking powder, and salt in a mixing bowl. Whisk until the dry ingredients look evenly combined.
- Whisk together the eggs, buttermilk, vegetable oil, and vanilla extract in a separate bowl. Keep whisking until smooth and uniform.
- Pour the wet ingredients into the dry ingredients and mix until smooth. Scrape the sides and bottom of the bowl to prevent dry pockets.
- Divide the batter between the two prepared pans and bake for 28–32 minutes. Bake until a toothpick comes out clean and the tops spring back lightly.
- Cool the cakes completely in the pans, then remove and cool fully again if needed. Letting them cool prevents filling from melting or sliding.
- Beat the softened butter until fluffy. Mix on medium speed until the texture looks lighter and smooth.
- Add powdered sugar, marshmallow fluff, vanilla extract, and heavy cream. Beat until smooth and spreadable, then stop as soon as it reaches a pipeable, frosting-like consistency.
- Place one cake layer on a stand or serving plate. Spread the marshmallow cream filling generously over the top all the way to the edges.
- Set the second cake layer on top. Frost the outside with the remaining cream until covered and smooth.
- Crumble oatmeal cream pie cookies over the top for garnish. Press lightly so the crumbs adhere to the frosting.
- Dust with powdered sugar and serve. Slice after frosting for clean layers and visible cream between them.