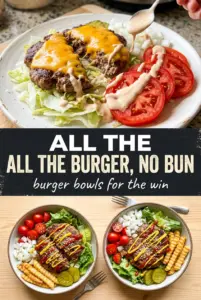
Burger bowls hit the same cravings as a cheeseburger, but they land lighter on the plate and a lot bigger on crunch. You get deeply browned beef, crisp lettuce, tangy pickles, cool tomato, melted cheddar, and those salty fries or tots pulling the whole bowl into dinner territory. The best part is that every bite can be built differently, so nothing gets soggy before you’re ready for it.
What makes this version work is timing. The sauce gets mixed first so the flavors can mellow while everything else cooks, and the beef is browned hard enough to pick up those savory edges that make a burger taste like a burger. I also like keeping the lettuce, tomatoes, and pickles cold and dry until the very end, because once hot beef and sauce hit the bowl, the clock starts ticking.
Below, I’m walking through the small details that matter: how to get the beef crumbles browned instead of steamed, how to keep the fries crisp under all the toppings, and a few smart swaps if you want to change the bowl without losing what makes it work.
The beef stayed juicy, the fries actually stayed crisp under the toppings, and the sauce tied everything together without making the lettuce wilt right away.
Burger bowls with crispy fries, browned beef, and special sauce are the kind of dinner that disappears fast.
The Trick to Keeping a Burger Bowl Tasting Like a Burger, Not a Salad
The difference between a great burger bowl and a sad pile of toppings comes down to heat and structure. The beef needs enough time in the pan to brown in spots, because that’s where the burger flavor lives. If you stir it constantly, it turns soft and gray, and the bowl loses the one thing that makes it feel like dinner instead of lunch.
The other mistake is building too early. Warm beef will wilt lettuce and soften fries fast, especially once the special sauce goes on. Keep the toppings ready, drain the beef well, and assemble at the last second so the fries stay crisp and the lettuce stays cold.
What Each Ingredient Is Actually Doing in This Recipe
- Primary ingredient (the star) — Quality matters most. Choose the best you can find.
- Cooking medium (oil, butter, or broth) — This carries flavors and prevents dryness.
- Seasonings (salt, pepper, spices, herbs) — Layer flavors so nothing overpowers. Build depth gradually.
- Aromatics (garlic, onion, herbs) — Cook with fat to bloom flavors. Become the foundation.
- Supporting ingredients — Complement the main ingredient without overpowering it.
- Sauce or liquid (if applicable) — Brings flavors together. Balance richness with acid.
- Acid (lemon, vinegar, wine, or other) — Brightens and prevents flat-tasting results.
- Final finish (garnish, glaze, or sauce) — Prevents one-dimensional taste and adds visual appeal.
What Each Ingredient Is Actually Doing in the Bowl
- 80/20 ground beef — The fat content matters here because it gives the beef enough richness to taste like a burger. Leaner beef works, but it cooks drier and needs a little extra Worcestershire or sauce to keep the bowl satisfying.
- Worcestershire sauce — This adds deep savory backbone without making the bowl taste like steak sauce. It’s a small amount, but it helps the beef read as seasoned all the way through, not just salted on the surface.
- Romaine or iceberg lettuce — Iceberg gives the most classic burger crunch, while romaine brings a little more structure and a slightly greener flavor. Either one works best when it’s shredded and kept cold until the bowl is built.
- Frozen fries or tater tots — These carry the comfort-food part of the recipe. Cook them until they’re extra crisp, not just heated through, or they’ll go soft under the sauce.
- Special sauce ingredients — Mayo gives body, ketchup and relish bring the burger-shop sweetness, mustard sharpens it, and apple cider vinegar keeps it from tasting flat. If you need a shortcut, use your favorite burger sauce, but the homemade version is fresher and usually more balanced.
- Cheddar, pickles, tomato, and red onion — These are the bright, salty, sharp pieces that keep the bowl from feeling heavy. Use a good sharp cheddar if you can, and slice the onion thin so it doesn’t bulldoze the rest of the bowl.
Building the Bowl So the Fries Stay Crisp
Mix the Special Sauce First
Whisk the mayonnaise, ketchup, mustard, relish, and apple cider vinegar together until smooth, then let it sit while you cook the rest. That rest time lets the sharp edges soften and gives the sauce a more complete burger-shop taste. If it tastes too loose, it usually just needs another minute or two to settle rather than more ingredients.
Brown the Beef Hard, Not Gently
Season the beef, then cook it in a hot skillet over medium-high heat and leave it alone long enough to brown before breaking it up. You want deep color and small crusty bits, not pale steamed crumbles. If the pan looks crowded and the meat starts simmering in its own liquid, drain off excess fat and keep cooking until the moisture cooks away.
Cook the Fries Until They’re Shatter-Crisp
The fries or tots need to be more crisp than you’d normally serve on the side, because they’re about to sit under warm beef and sauce. Bake or air-fry them until the edges are deeply golden and firm. If they’re only lightly crisp, they’ll collapse once the bowl is assembled.
Assemble at the Very End
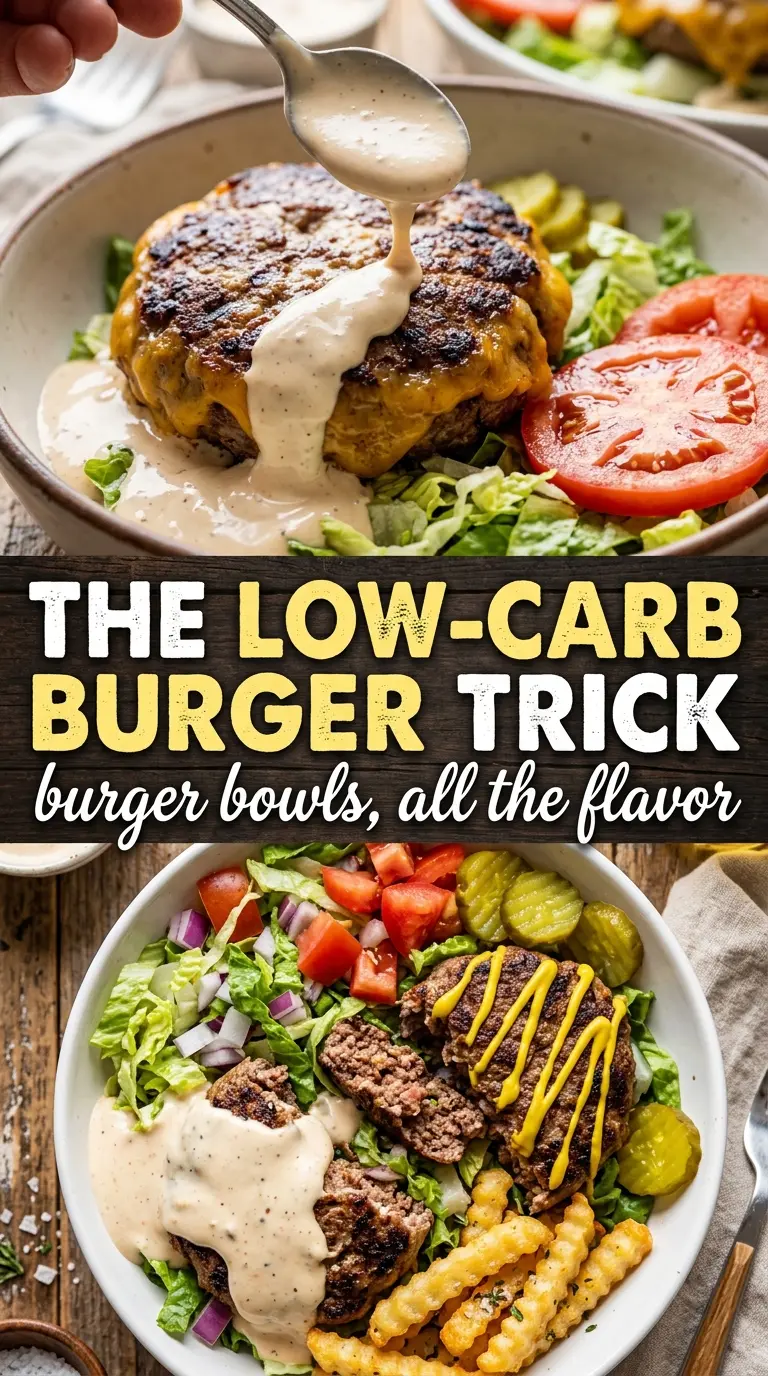
Start with the lettuce, then layer on the beef, fries, tomatoes, onion, pickles, and cheddar. Drizzle the sauce over the top instead of stirring it in, because that keeps the bowl from turning muddy and gives you better bites. Finish with sesame seeds and serve right away while the fries still have their edge.
How to Change the Bowl Without Losing the Burger Feel
Make It Low Carb
Skip the fries or tots and add extra lettuce, pickles, tomatoes, and cheddar. You still get the burger-bowl experience, just with more crunch from the vegetables and less heft from the starch. A few sliced avocado pieces also fit naturally here if you want more richness.
Swap the Beef for Ground Turkey or Chicken
Use the same seasoning, but add a tablespoon of oil to the pan so the leaner meat doesn’t dry out. You’ll lose some of the beefy depth, so the Worcestershire and sauce matter even more. This version tastes lighter, but it still scratches the burger itch.
Make It Dairy-Free
Use a dairy-free mayo and swap the cheddar for a good plant-based shred, or leave the cheese off entirely. The special sauce still works because the mayo does the heavy lifting, and the pickles and mustard keep the bowl bright. The texture stays close to the original if you keep the beef and fries crisp.
Storage and Reheating
- Refrigerator: Store the beef, toppings, sauce, and fries separately for up to 4 days. The lettuce and fries both lose texture if they sit assembled.
- Freezer: Freeze the cooked beef only for up to 2 months. The lettuce, sauce, and fries don’t freeze well for this recipe.
- Reheating: Reheat the beef in a skillet over medium heat or in the microwave just until hot. Warm the fries in the oven or air fryer so they crisp back up; the biggest mistake is microwaving them, which makes them limp fast.
Answers to the Questions Worth Asking

Burger Bowls
Ingredients
Equipment
Method
- Whisk together mayonnaise, ketchup, yellow mustard, sweet pickle relish, and apple cider vinegar until smooth.
- Refrigerate the special sauce while you cook the beef and fries, so it stays thick for the drizzle.
- Season the ground beef with salt, pepper, garlic powder, onion powder, and Worcestershire sauce.
- Cook in a cast iron skillet over medium-high heat, breaking into large crumbles, for 6-8 minutes until deeply browned, then drain fat.
- Cook frozen fries or tater tots until extra crispy according to package directions.
- Add shredded romaine or iceberg lettuce to wide bowls as the base.
- Top each bowl with the browned ground beef crumbles, then layer in the crispy fries or tots.
- Arrange cherry tomatoes, thinly sliced red onion, dill pickle slices, and shredded cheddar over the top.
- Drizzle special sauce generously over everything in a dramatic zigzag.
- Scatter sesame seeds for garnish and serve immediately.