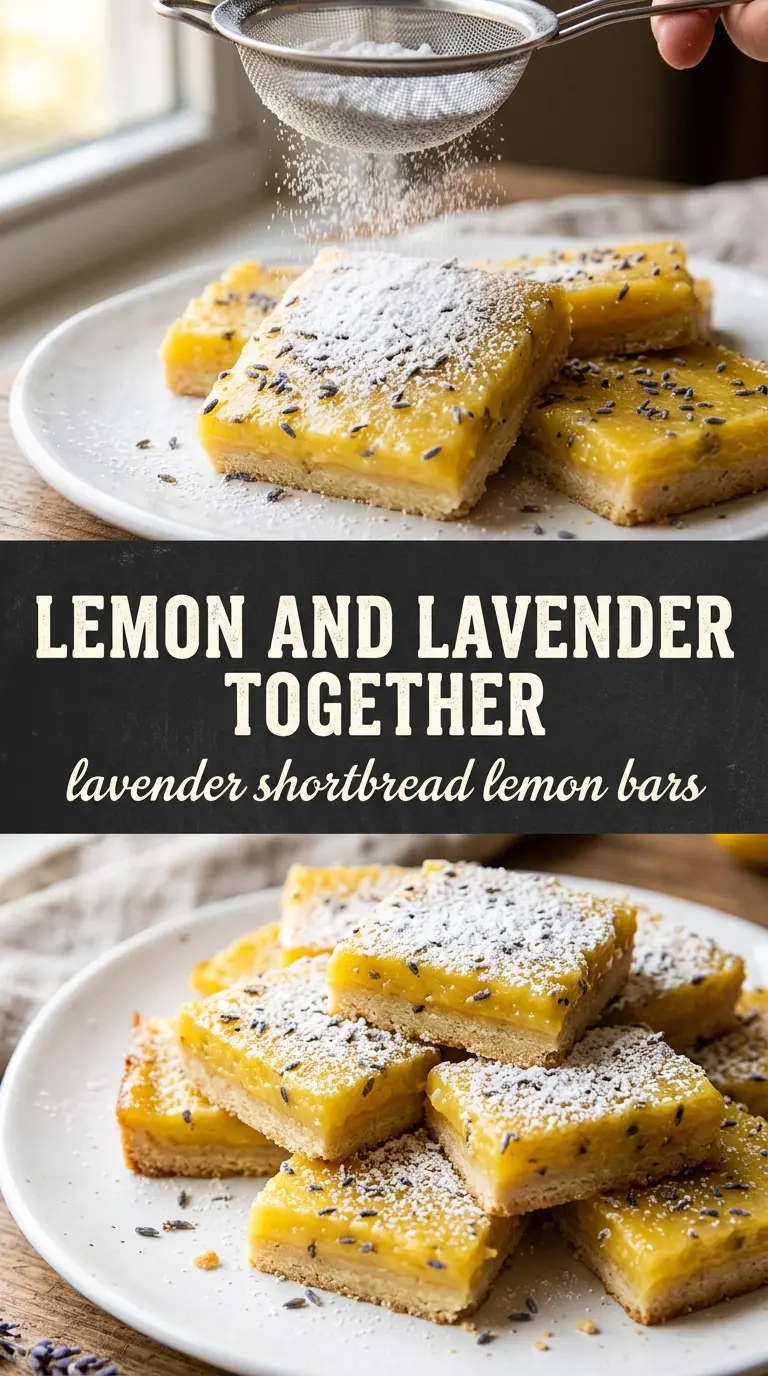
Pale yellow lemon bars with a lavender shortbread crust have a way of tasting polished without feeling fussy. The crust stays tender and sandy instead of greasy, and the lemon layer sets into a clean slice with a soft, custardy center that holds its shape when you cut it. The floral note stays in the background, which is exactly where it should be: enough to make the bars memorable, not enough to taste perfumed.
What makes this version work is balance. The lavender goes into the crust, where it gets carried by butter and stays mellow, while the filling leans bright and tart from fresh lemon juice and zest. A little flour in the curd keeps the bars from slumping, and chilling them fully is what gives you those neat bakery-style squares instead of a messy pan of lemon filling.
Below, I’ll walk through the one place people usually go wrong with lemon bars, the ingredient details that matter most, and a few smart variations if you want to adjust the citrus or make them gluten-free.
The crust stayed perfectly tender and the lemon layer set up cleanly after chilling overnight. The lavender was subtle, and my slices came out neat instead of gooey.
Save these lavender shortbread lemon bars for the kind of dessert that cuts cleanly, tastes bright, and looks elegant on the plate.
The Mistake That Makes Lemon Bars Soupy Instead of Clean-Sliced
The most common problem with lemon bars is rushing the filling before the crust is ready and the center has had time to set. A warm crust is fine; a filling that bakes until the middle still jiggles like liquid is not. You want the edges to look matte and the center to move only slightly when you nudge the pan.
The other thing that changes the texture is the flour in the filling. It doesn’t make the bars cakey; it gives the lemon layer just enough structure to slice cleanly once chilled. If your bars crack or weep after cooling, they usually needed a little more time in the oven or a longer chill before cutting.
- Lavender: Use culinary lavender and grind it finely before adding it to the crust. Whole buds can taste woody and feel distracting, while finely ground lavender perfumes the butter in a softer, more even way.
- Butter: Cold butter is what keeps the shortbread crisp-tender instead of greasy. If you only have salted butter, reduce the added salt a touch and keep everything else the same.
- Lemon juice and zest: Fresh juice matters here. Bottled juice tastes flatter and less vivid, and the zest carries the strongest citrus aroma, so don’t skip it.
- Flour in the filling: This is the quiet stabilizer. It helps the custard set with a neat slice, especially after chilling, and there’s no swap that gives the same result as well as all-purpose flour does.
What Each Ingredient Is Actually Doing in This Recipe
- Primary ingredient (the star) — Quality matters most. Choose the best you can find.
- Cooking medium (oil, butter, or broth) — This carries flavors and prevents dryness.
- Seasonings (salt, pepper, spices, herbs) — Layer flavors so nothing overpowers. Build depth gradually.
- Aromatics (garlic, onion, herbs) — Cook with fat to bloom flavors. Become the foundation.
- Supporting ingredients — Complement the main ingredient without overpowering it.
- Sauce or liquid (if applicable) — Brings flavors together. Balance richness with acid.
- Acid (lemon, vinegar, wine, or other) — Brightens and prevents flat-tasting results.
- Final finish (garnish, glaze, or sauce) — Prevents one-dimensional taste and adds visual appeal.
Building the Shortbread First, Then Letting the Lemon Set
Making the Lavender Crust
Pulse the flour, powdered sugar, salt, lavender, and cold butter just until the mixture looks like damp sand with a few larger crumbs. If you overwork it, the crust turns tough instead of tender. Press it firmly and evenly into the pan so the base bakes into a flat, stable layer; thin spots are the ones that brown too fast and get brittle. Bake it until the top looks pale golden and the surface feels set when you touch it lightly.
Whisking the Lemon Filling
Whisk the eggs, yolks, sugar, lemon juice, zest, and flour until the mixture is smooth and no flour streaks remain. Don’t whip in a lot of air; bubbles can make the top pockmarked instead of glossy. Pour the filling over the warm crust right away so the layers bond instead of separating after baking. If the crust has cooled completely, the bars still work, but the filling won’t cling as seamlessly to the base.
Watching for the Right Set
Bake until the filling is just set around the edges and the center gives only the slightest wobble. The bars will continue to firm up as they cool, so pulling them when the middle is fully firm usually means overbaking. Overbaked lemon bars turn dry and can form a thin, crackly top that breaks when you cut them. Let the pan cool completely before chilling, or condensation can collect on the surface and blur the finish.
Chilling and Cutting Clean Squares
Refrigerate the bars for at least two hours, then lift them out using the parchment and cut them with a sharp knife. Wipe the blade between cuts if you want the neatest edges. Dust with powdered sugar only after the bars are fully cold, because sugar melts into the surface if you add it too soon. Finish with a few dried lavender buds and lemon zest curls so the topping matches the flavor underneath.
How to Adjust These Bars Without Losing the Balance
Gluten-Free Version
Swap the all-purpose flour in both the crust and filling for a cup-for-cup gluten-free baking blend that includes xanthan gum. The crust may bake up a little more delicate, so press it firmly and chill the finished bars well before cutting. The texture stays close to the original, though the shortbread will be slightly more sandy.
More Citrus, Less Floral
If you want the lavender to fade into the background, cut the ground lavender back to 3/4 teaspoon. You’ll still get a faint floral note in the crust, but the lemon takes over in a brighter, sharper way. This is the version I reach for when I want the bars to taste more like classic lemon bars with a whisper of something different.
Make-Ahead for a Party Tray
Bake the bars a day ahead, chill them overnight, and dust with powdered sugar just before serving. That keeps the top clean and bright instead of damp. If you want sharper edges for a platter, cut them straight from the refrigerator while they’re cold and firm.
Storage and Reheating
- Refrigerator: Store covered for up to 5 days. The crust stays best in the first two days, then softens slightly from the filling.
- Freezer: Freeze cut bars in a single layer until solid, then wrap tightly and store for up to 2 months. The texture holds up well, though the powdered sugar should be added after thawing.
- Reheating: These bars aren’t meant to be reheated. Thaw in the refrigerator or at room temperature, then serve cold for the cleanest texture. Warm bars turn soft and lose the sharp slice that makes them look polished.
Questions I Get Asked About This Recipe

Lavender Shortbread Lemon Bars
Ingredients
Equipment
Method
- Preheat the oven to 350°F and line a 9x13 pan with parchment paper.
- Pulse all-purpose flour, powdered sugar, salt, dried culinary lavender, and cold butter in a food processor until the mixture just comes together.
- Press the crust firmly and evenly into the prepared pan.
- Bake for 18-20 minutes, until lightly golden.
- Whisk together large eggs, egg yolks, granulated sugar, fresh lemon juice, lemon zest, and all-purpose flour until smooth.
- Pour the lemon curd mixture over the warm crust.
- Bake for 18-22 minutes, until the filling is just set with no jiggle in the center.
- Cool completely before chilling.
- Refrigerate for at least 2 hours until firm.
- Dust generously with powdered sugar, creating a light white blanket over the bars.
- Scatter dried lavender buds and lemon zest curls over the top for a floral finish.
- Cut into 16 bars using clean, straight slices.