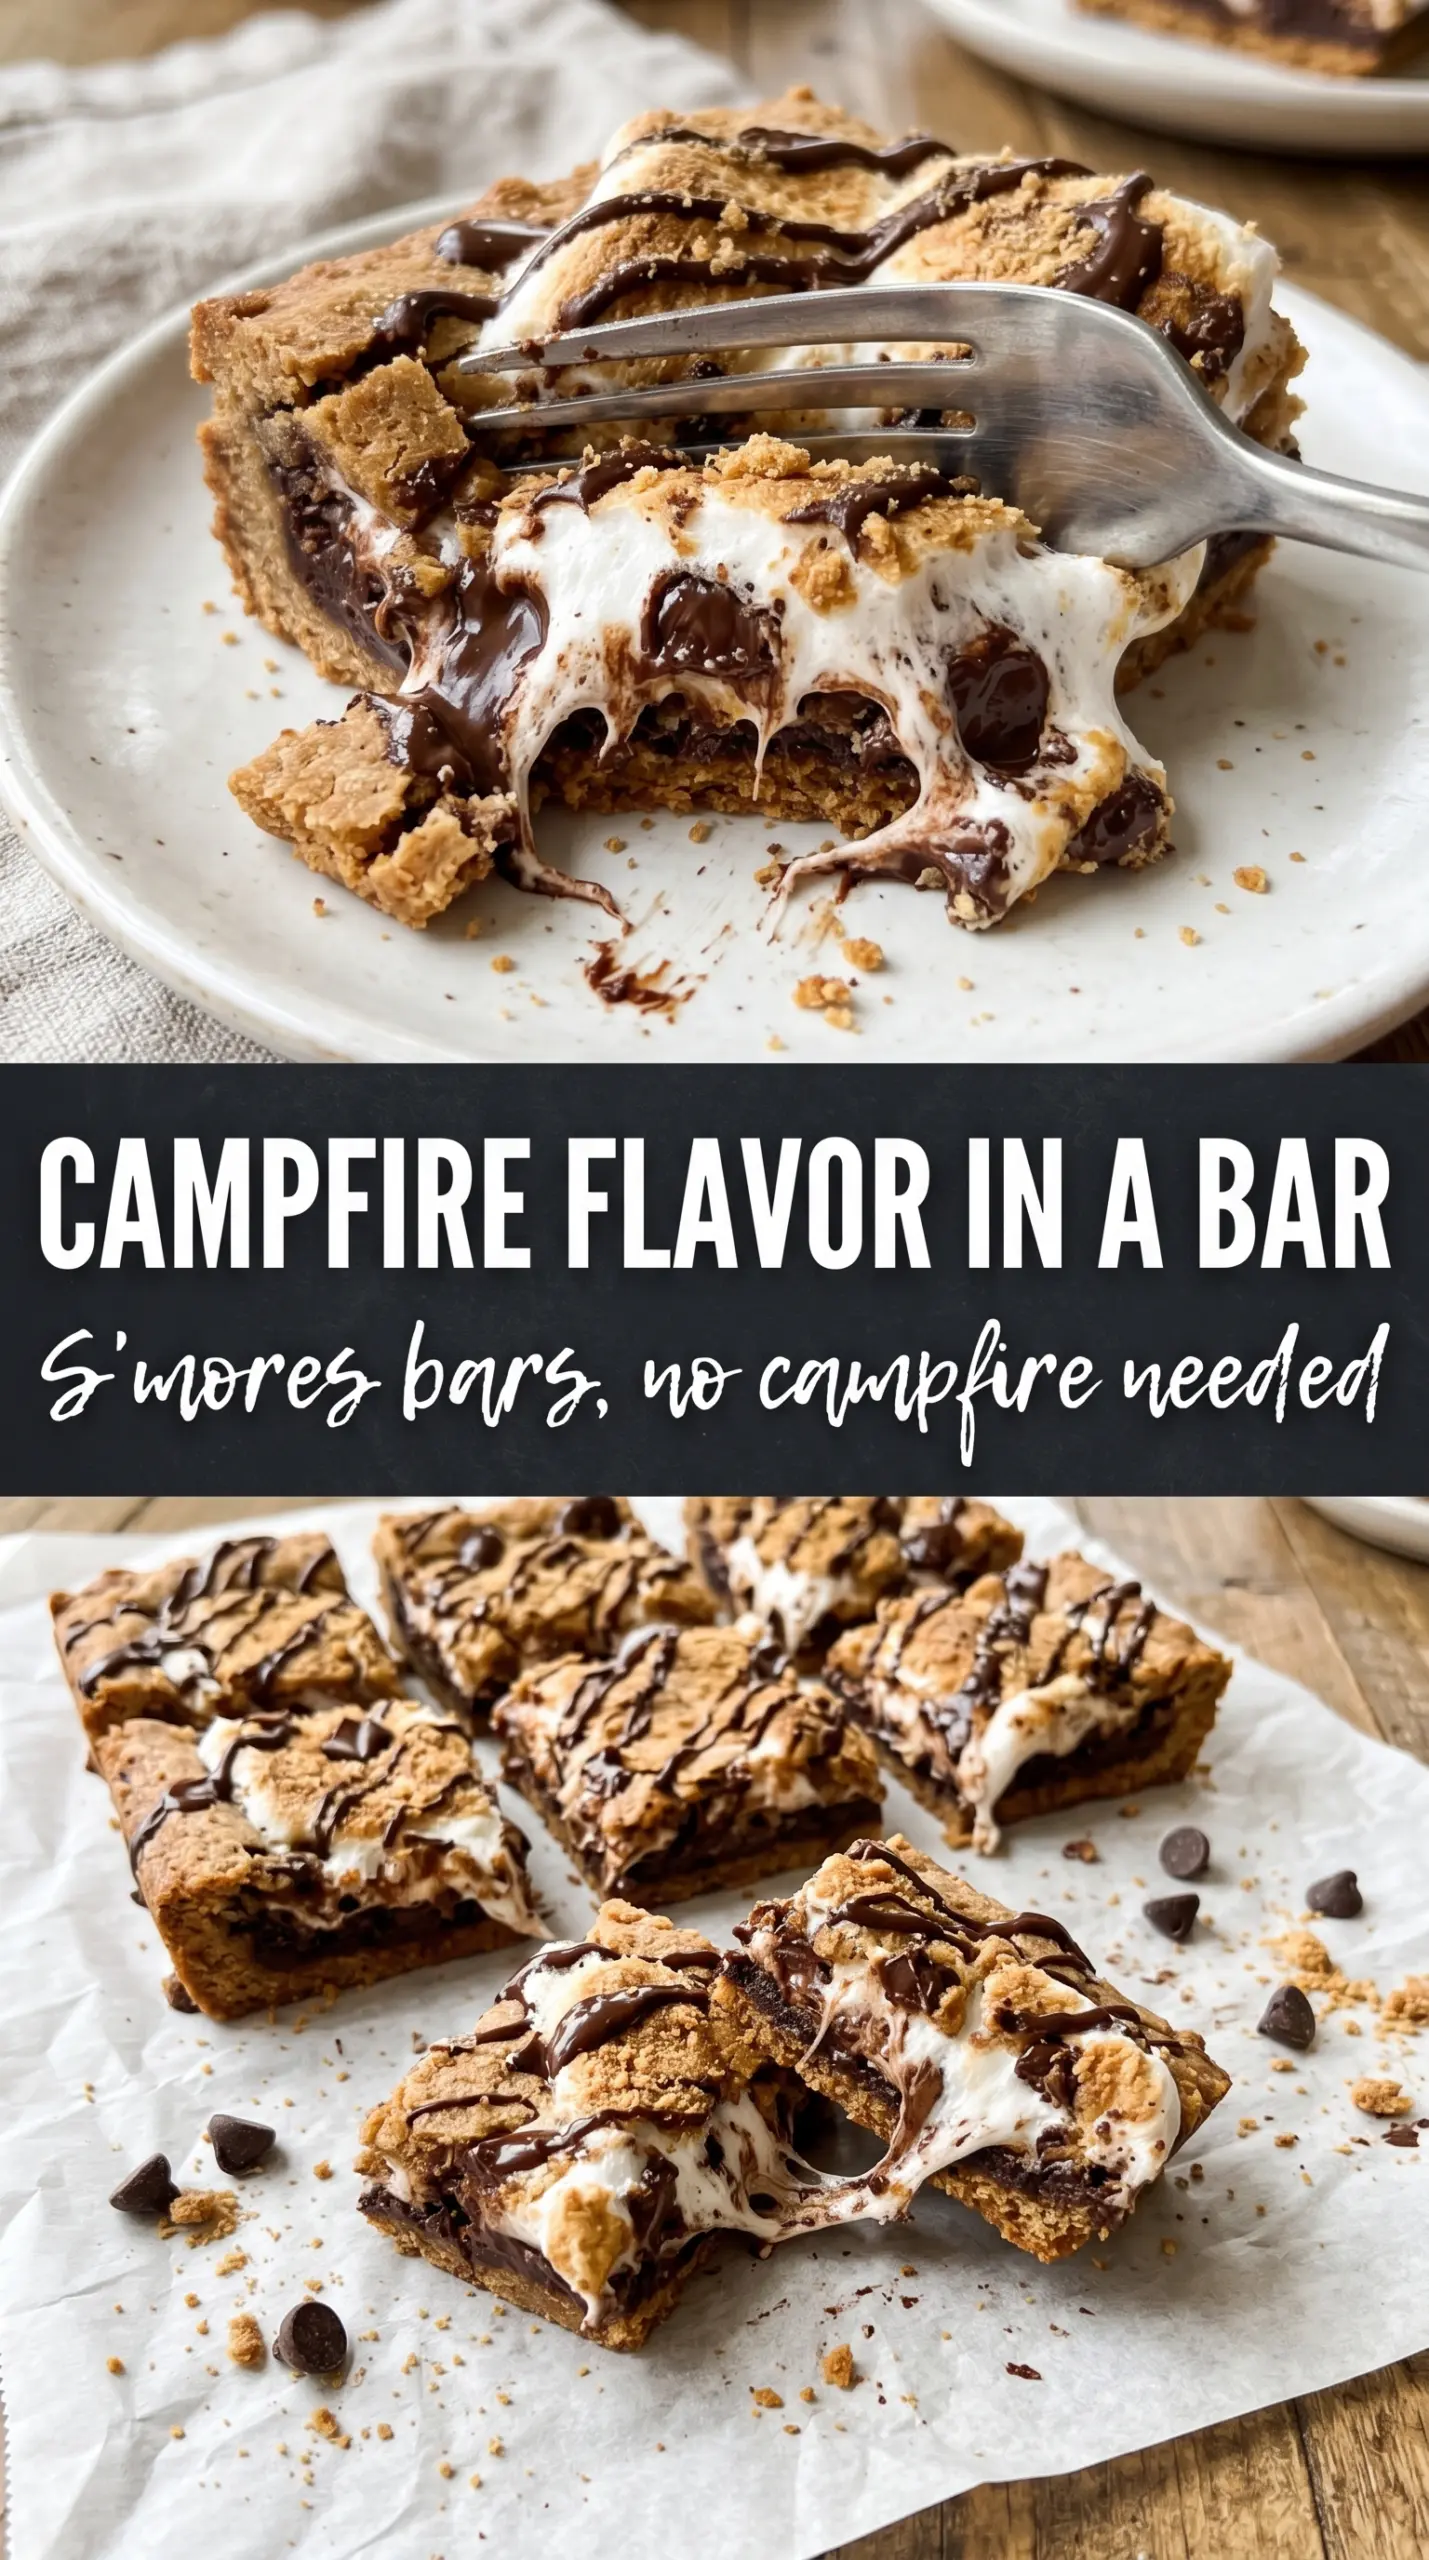
Thick s’mores bars hit all the right notes: a crisp graham cracker base, a dense chocolate layer that bakes up fudgy instead of dry, and a toasted marshmallow top that turns glossy and sticky the second the bars are cut. They’re the kind of dessert that disappears fast because every layer tastes like it was built to stand on its own, then somehow gets even better together.
The trick is keeping the chocolate layer just under fully set before the marshmallows go on. That short bake keeps the center rich and chewy, not cakey, and it gives the marshmallows a chance to puff without overbaking the bars underneath. The crust gets a quick pre-bake, which keeps it from turning soft once the chocolate batter goes over the top.
Below, I’ll walk through the small details that keep the layers distinct, how to get the marshmallows browned without scorching them, and the best swaps if you want to make these bars with what you already have in the pantry.
The chocolate layer stayed fudgy all the way through, and the marshmallows browned in that perfect toasted way without melting into the bars. I cut them after a short cool and they held their shape beautifully.
Love these gooey s’mores bars? Save them to Pinterest for the nights when you want a fudgy chocolate center and a toasted marshmallow top.
The Marshmallow Topping Won’t Save an Underbaked Center
The biggest mistake with s’mores bars is rushing the chocolate layer because you’re focused on the marshmallows. If the center is still loose when it comes out of the oven, the top will brown before the middle has enough structure, and you’ll end up with a collapsed mess once it cools. The bars should look just set in the center, with a little wobble left only in the very middle.
The graham crust matters more than it gets credit for. A firm pre-bake gives you a base that cuts cleanly and keeps its crunch under the chocolate layer. Press it down hard with the bottom of a measuring cup or glass so it bakes into a tight layer instead of a sandy one that crumbles when you slice it.
- Graham cracker crumbs — These give the bars their signature campfire base. Fine crumbs pack better than chunky ones, so if you crush them yourself, keep going until they look like damp sand.
- Butter — This is what turns both the crust and the chocolate layer rich and cohesive. In the crust, melted butter binds everything; in the chocolate layer, it helps create that dense, brownie-like texture.
- Cocoa powder — Use unsweetened cocoa, not hot cocoa mix. Cocoa gives the chocolate layer real depth instead of just sweetness, and it’s what keeps the bars tasting like chocolate instead of sugar.
- Mini marshmallows or halved large marshmallows — Mini marshmallows spread faster and give you more even coverage. If you use large marshmallows, cut them in half so they melt and toast in the short broil time without burning on top before the centers soften.
Building the Layers So Each One Keeps Its Own Texture
The crust and chocolate batter need to be treated like two separate jobs, not one big dump-and-stir situation. The crust gets baked first so it can set into a base that won’t absorb the batter, and the chocolate layer goes on only after that crust has cooled slightly. If the crust is too hot, the batter can start loosening the top and make the layers blur together.
The chocolate layer is where people usually overthink things. Stir until smooth, but don’t keep beating the batter once the flour goes in, or you’ll build a tougher texture than these bars need. The goal is a glossy, thick batter that spreads with a spatula and settles into the pan without needing to be forced.
- Eggs — These set the chocolate layer into a chewy bar instead of a pudding-like filling. Add them while the butter mixture is warm, not hot, so they blend smoothly without scrambling.
- Flour — All-purpose flour gives the bars their structure. A gluten-free 1:1 baking blend usually works here if you want to make them gluten-free, but the texture will be a little softer and less chewy.
- Vanilla — Vanilla rounds out the cocoa and keeps the bars from tasting flat. It doesn’t need to be fancy, but it does need to be there.
- Salt — The salt keeps the chocolate from tasting one-note and balances the sweetness of the marshmallows. Don’t skip it; this is one of those desserts that gets noticeably better with it.
The Broil Window That Gives You Toasted Marshmallows Without Burnt Spots
Setting the Chocolate Layer
Bake the chocolate layer until the center looks just set and the edges no longer jiggle when you gently tap the pan. It should still look a little soft in the middle, because it will firm up as it cools and as the marshmallows go on. If it looks completely firm in the oven, it’s already gone too far and will bake up dry.
Adding the Marshmallows Fast
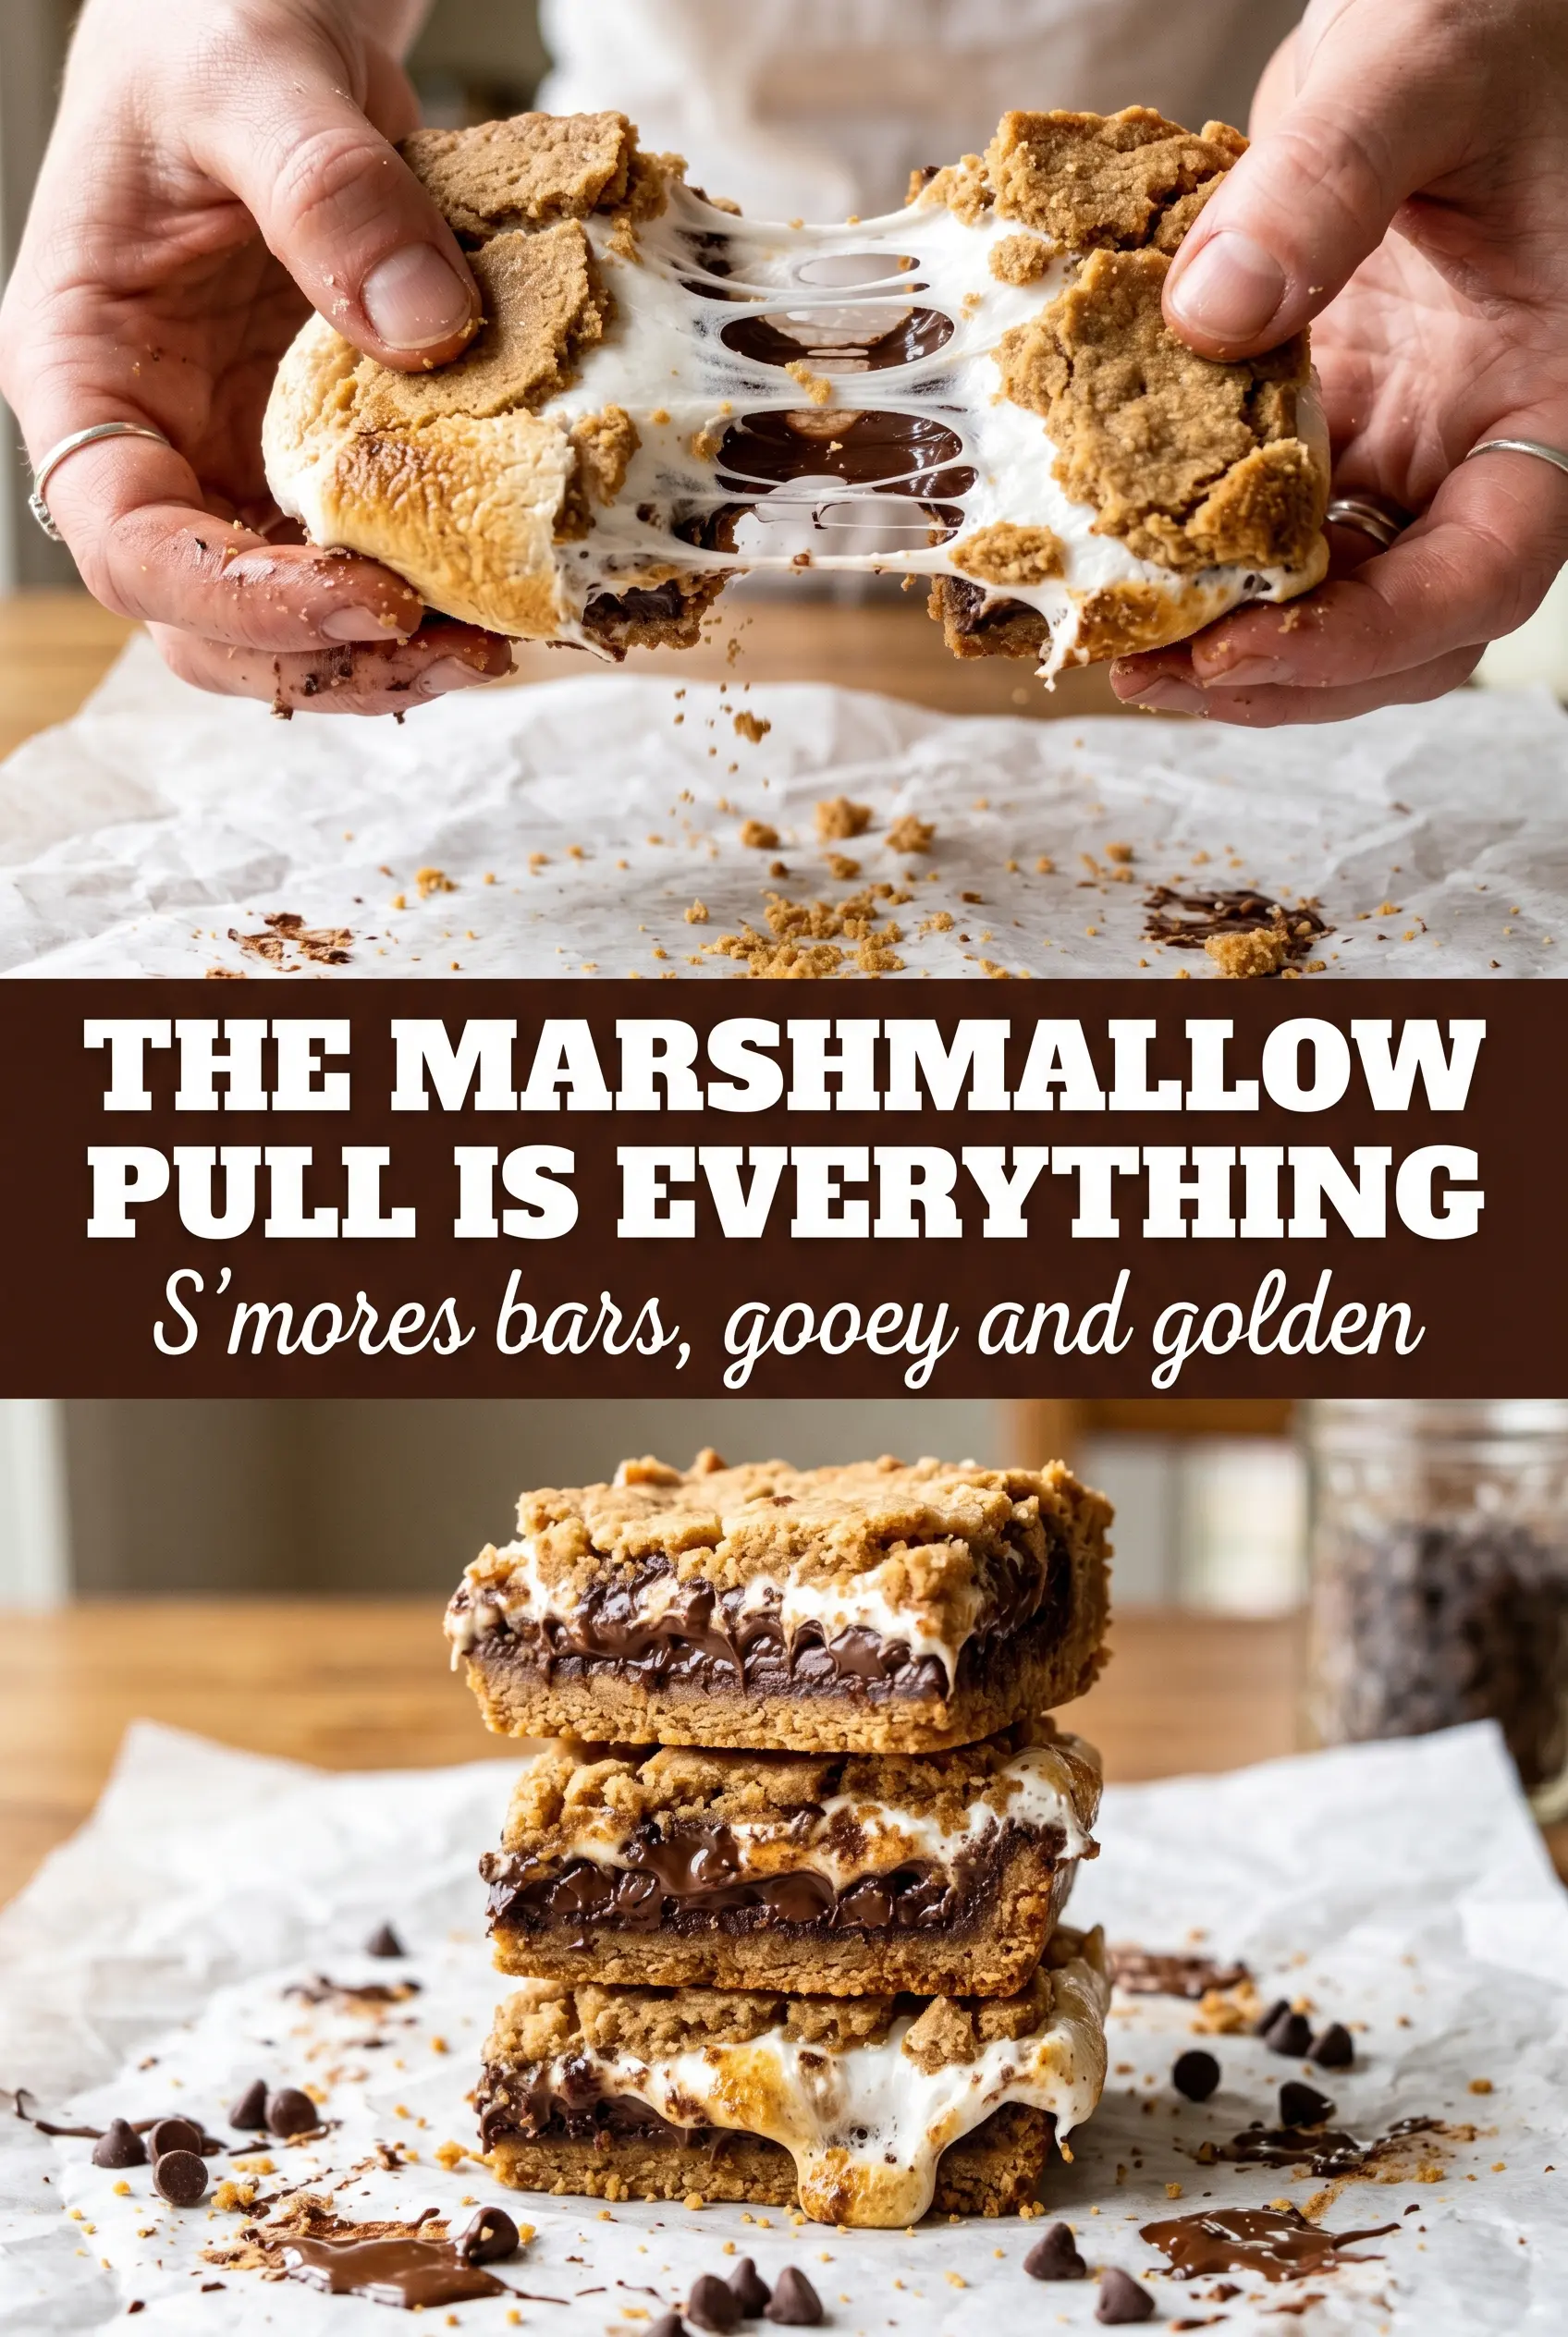
The marshmallows go on the second the pan comes out of the oven. Cover the entire surface while the chocolate is still hot so the bottoms start to melt and bond to the top layer. Leave no open patches, or you’ll end up with uneven browning and bare spots that make the bars harder to slice neatly.
Finishing Under the Broiler
Broil just until the marshmallows pick up color at the peaks and turn golden around the edges. Stay close to the oven, because the line between toasted and burned is short here. If your broiler runs hot, crack the oven door and check every 15 to 20 seconds so the tops don’t blacken before the centers puff.
Cooling Before the First Cut
Let the bars cool for at least 30 minutes before slicing. If you cut them too soon, the chocolate layer will smear and the marshmallow will drag instead of holding that dramatic top. A buttered knife slides through the sticky top better than a dry one and helps the slices stay cleaner.
How to Adapt These Bars for Different Pantries and Different Crowds
Gluten-Free S’mores Bars
Swap the all-purpose flour for a good 1:1 gluten-free baking blend. The bars will still be fudgy and sliceable, though they may be a touch more delicate when warm, so give them the full cooling time before cutting.
Extra-Chocolate Version
Fold 1 cup of chocolate chips into the batter before spreading it over the crust. You’ll get pockets of melted chocolate inside the bars, but the bars will cut a little messier while warm because the chips stay soft longer than the baked batter around them.
Dairy-Free Version
Use a good plant-based butter that’s meant for baking, not a tub spread. The crust still binds well, and the chocolate layer stays rich, but the flavor will be slightly less buttery, so the toasted marshmallow top matters even more for that classic s’mores finish.
Storage and Reheating
- Refrigerator: Store covered for up to 4 days. The marshmallow top will soften a bit, but the bars stay tasty and sliceable.
- Freezer: These freeze well without the marshmallow top getting perfect again, so freeze cut bars in a single layer, then wrap and store for up to 2 months. The topping will be a little less puffed after thawing.
- Reheating: Warm individual bars for 10 to 15 seconds in the microwave if you want the chocolate layer soft again. Don’t overheat them or the marshmallow will collapse into a sticky puddle.
Answers to the Questions Worth Asking
S'mores Bars
Ingredients
Equipment
Method
- Preheat oven to 350°F and line a 9x13 pan with parchment paper.
- Mix graham cracker crumbs, granulated sugar, and melted butter, then press firmly into the bottom of the pan.
- Bake the crust for 8 minutes, then cool slightly before adding the filling.
- Melt butter in a saucepan.
- Stir in granulated sugar, eggs, and vanilla extract until combined.
- Mix in cocoa powder, all-purpose flour, baking powder, and salt until smooth.
- Spread the chocolate batter evenly over the graham cracker crust.
- Bake at 350°F for 18-20 minutes until just set in the center.
- Remove from the oven and immediately cover the entire top with marshmallows.
- Return to the oven for 3-4 minutes until marshmallows puff and start to turn golden.
- Switch to broil for 1-2 minutes until marshmallows are golden brown and visibly toasted.
- Cool for 30 minutes before cutting with a buttered knife so the bars hold together.