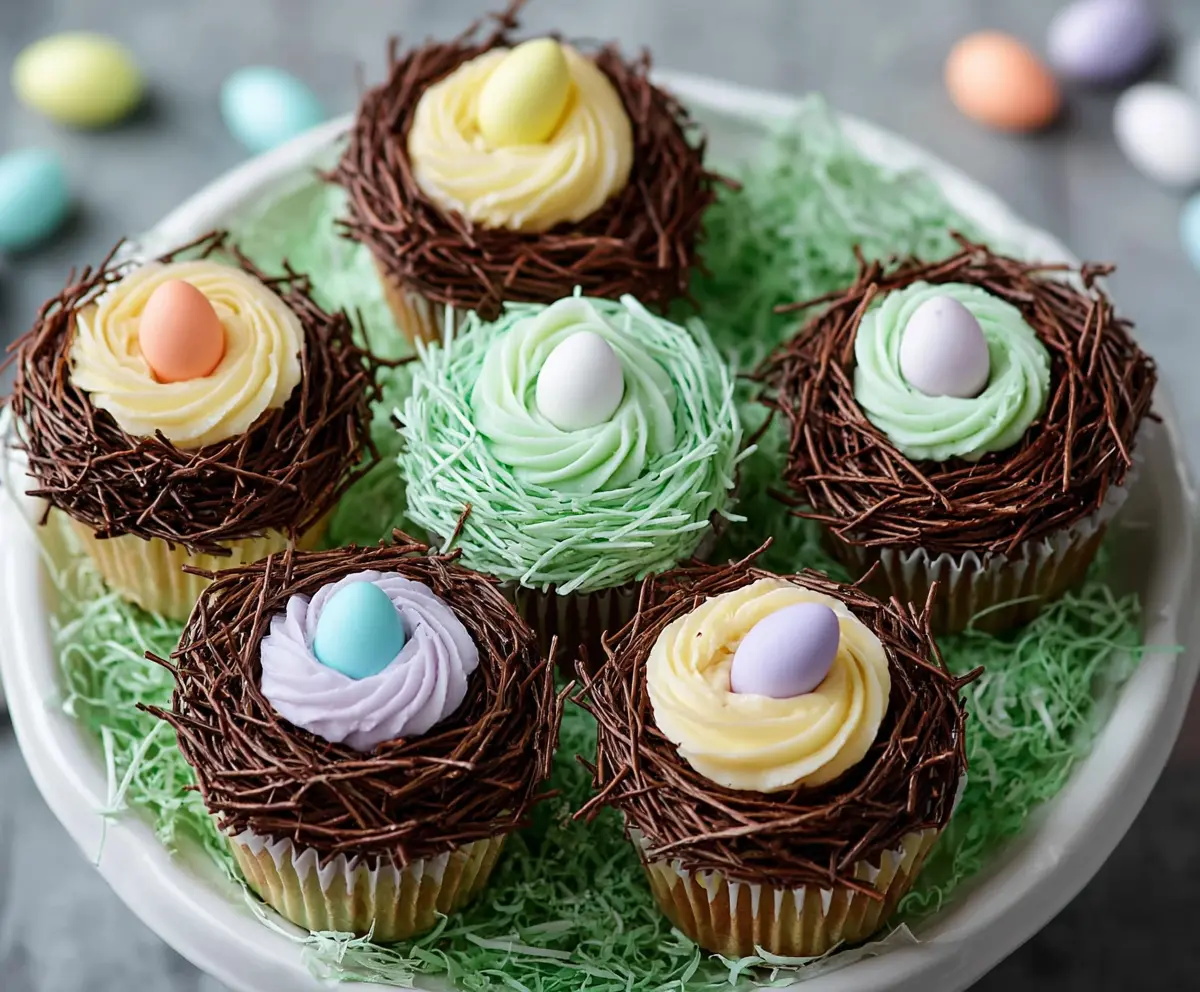
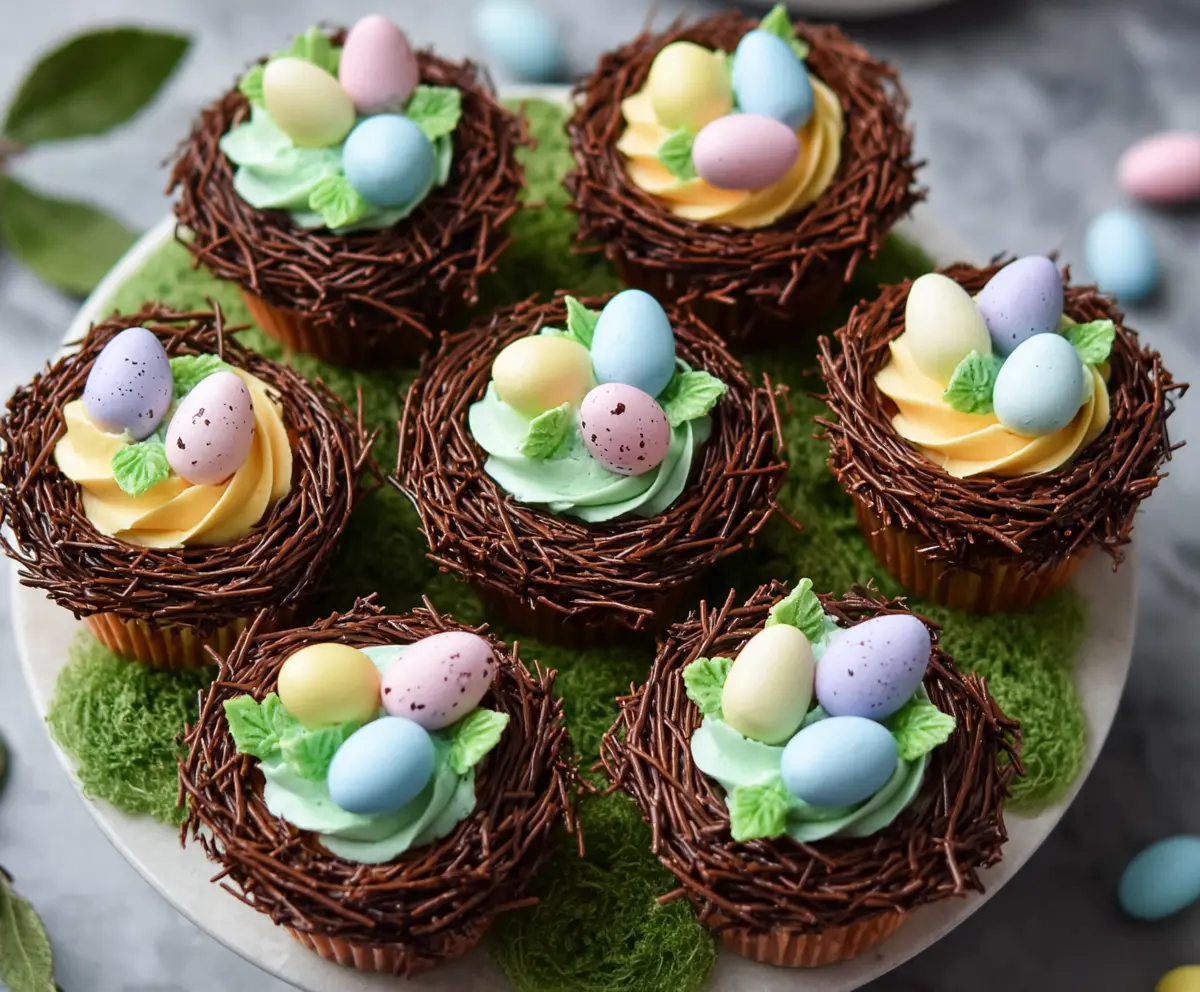
These adorable Easter Egg Nest Cupcakes are a fun treat for the holidays! Made with fluffy chocolate cupcakes topped with sweet, creamy frosting, they look just like little nests.
The best part? You can customize them with your favorite candy eggs! I love letting the kids help decorate. It turns into a tasty craft project that’s perfect for springtime celebrations!
Key Ingredients & Substitutions
All-Purpose Flour: This is the backbone of the cupcake. For a lighter texture, you can use cake flour instead. If you’re gluten-free, a 1:1 gluten-free flour blend works well too!
Butter: Unsalted butter is best, as it allows you to control the saltiness in your cupcakes. If you’re dairy-free, try using coconut oil or a dairy-free butter substitute.
Sugar: Granulated sugar gives the cupcakes a sweet and tender crumb. You could use brown sugar for extra moisture and a hint of caramel flavor, or coconut sugar for a healthier twist.
Milk: Whole milk adds richness, but you can swap it for any milk alternative, like almond milk or oat milk, if you’re looking for a dairy-free option.
Coconut Oil: This is optional, but it makes your chocolate smoother and gives it a nice shine. If you don’t have it, you can skip it or use butter instead.
How Do You Make Perfect Buttercream Frosting?
The frosting really makes these cupcakes shine! Start by beating your butter until it’s creamy and light. Gradually add in the powdered sugar, which helps prevent clumping. Beat well between each addition to achieve that fluffy texture.
- Beat in the vanilla extract and a splash of milk or cream to loosen it up.
- For vibrant pastel colors, divide the frosting into bowls and use food coloring to create the various shades.
- Mix well but don’t over-mix, as the frosting can lose its fluffiness.
What’s the Best Way to Create Chocolate Nests?
Crafting the chocolate nests is fun and easy! After melting the chocolate, use a piping bag or a plastic bag with a small hole to create your nests. This lets you control the shape better.
- Pipe twig shapes by moving the bag around to form the nest’s base. Overlapping helps create a nest-like look.
- Let them set at room temperature or pop them in the fridge briefly to speed up hardening.
These nests add a lovely touch to your cupcakes, making them cute and festive!
How to Make Easter Egg Nest Cupcakes
Ingredients You’ll Need:
For the Cupcakes:
- 1 ½ cups all-purpose flour
- 1 ½ tsp baking powder
- ¼ tsp salt
- ½ cup unsalted butter, room temperature
- 1 cup granulated sugar
- 2 large eggs
- 2 tsp vanilla extract
- ½ cup whole milk
For the Buttercream Frosting:
- 1 cup unsalted butter, room temperature
- 4 cups powdered sugar, sifted
- 2-3 tbsp milk or heavy cream
- 2 tsp vanilla extract
- Food coloring (yellow, green, lavender, mint or pastel colors of your choice)
For the Nest Decoration:
- 1 ¼ cups semi-sweet chocolate chips or chocolate melts
- 1 tbsp coconut oil (optional, for smoother chocolate)
Additional Decoration:
- Small candy-coated chocolate eggs or pastel-colored candy eggs (about 1 per cupcake)
For the Base/Presentation:
- Shredded green paper or edible green coconut flakes to resemble grass (optional)
How Much Time Will You Need?
This delightful recipe will take about 30 minutes of preparation time, plus an additional 18-22 minutes for baking. After that, allow time for cooling and decorating, making it a total of roughly 1.5 to 2 hours, especially if you let your cupcakes chill before serving. Perfect for a spring celebration!
Step-by-Step Instructions:
1. Prepare the Cupcakes:
Begin by preheating your oven to 350°F (175°C). Line a muffin tin with cupcake liners. In a medium bowl, whisk together the flour, baking powder, and salt, and set this aside. In a large bowl, cream the room temperature butter with the granulated sugar until the mixture is light and fluffy. Next, add the eggs one at a time, making sure to beat well after each addition. Stir in the vanilla extract.
Now, alternate adding the flour mixture and milk to the butter mixture, starting and ending with the flour. Mix until just combined; be careful not to overmix! Divide the batter evenly among the cupcake liners and bake in the oven for 18-22 minutes, or until a toothpick inserted into the center comes out clean. Let the cupcakes cool completely on a wire rack.
2. Make the Buttercream Frosting:
While the cupcakes cool, you can prepare the frosting. In a large bowl, beat the room temperature butter until it’s creamy. Slowly add the sifted powdered sugar one cup at a time, beating well after each addition to ensure it’s smooth. Add the vanilla extract and the milk or cream, continuing to beat until the frosting is light and fluffy. If you’d like different colors, divide the frosting into bowls and tint each with your chosen pastel food coloring.
3. Make the Chocolate Nest Decorations:
To make the chocolate nests, microwave the chocolate chips and coconut oil (if using) in 20-30 second intervals, stirring after each until the mixture is completely smooth. Next, transfer the melted chocolate into a piping bag or a plastic sandwich bag with a small hole cut in one corner. On a parchment-lined baking sheet, pipe thin “twig” shapes back and forth to resemble twigs, and form circular nests by overlapping these chocolate twigs. Allow the nests to harden completely at room temperature, or pop them in the fridge for a quicker set.
4. Assemble the Cupcakes:
Once the cupcakes are completely cool and the chocolate nests are set, it’s time to put everything together! Using a piping bag fitted with a star or round tip, swirl the colored buttercream frosting on top of each cupcake. Carefully place a chocolate nest on top of the frosting, and then nestle one candy egg in the center of each nest.
5. Presentation:
For a lovely presentation, arrange your finished cupcakes on a plate lined with shredded green paper or edible green coconut flakes to create a grass-like bed. This adds a festive touch and makes them really pop!
6. Serve and Enjoy:
Your Easter Egg Nest Cupcakes are now ready to be enjoyed! Keep them refrigerated if they’re not served immediately, and remember to take them out about 15-20 minutes before serving for the best texture. Enjoy the sweet delight and cheerful aesthetic they bring to your celebration!
Can I Use Different Types of Flour?
Absolutely! You can substitute all-purpose flour with cake flour for a lighter texture. If you’re gluten-free, a 1:1 gluten-free flour blend will also work well!
How Do I Store Leftover Cupcakes?
Store any leftover cupcakes in an airtight container in the refrigerator for up to 3 days. For best taste and texture, let them sit at room temperature for about 15-20 minutes before serving.
Can I Make the Cupcakes Ahead of Time?
Yes! You can bake the cupcakes a day or two in advance and store them in an airtight container. Just frost and decorate them on the day of your event for the freshest look!
Can I Use Different Decorations?
Definitely! Feel free to get creative with your toppings. You can use different types of candy, sprinkles, or even edible flowers to fit the theme of your celebration!