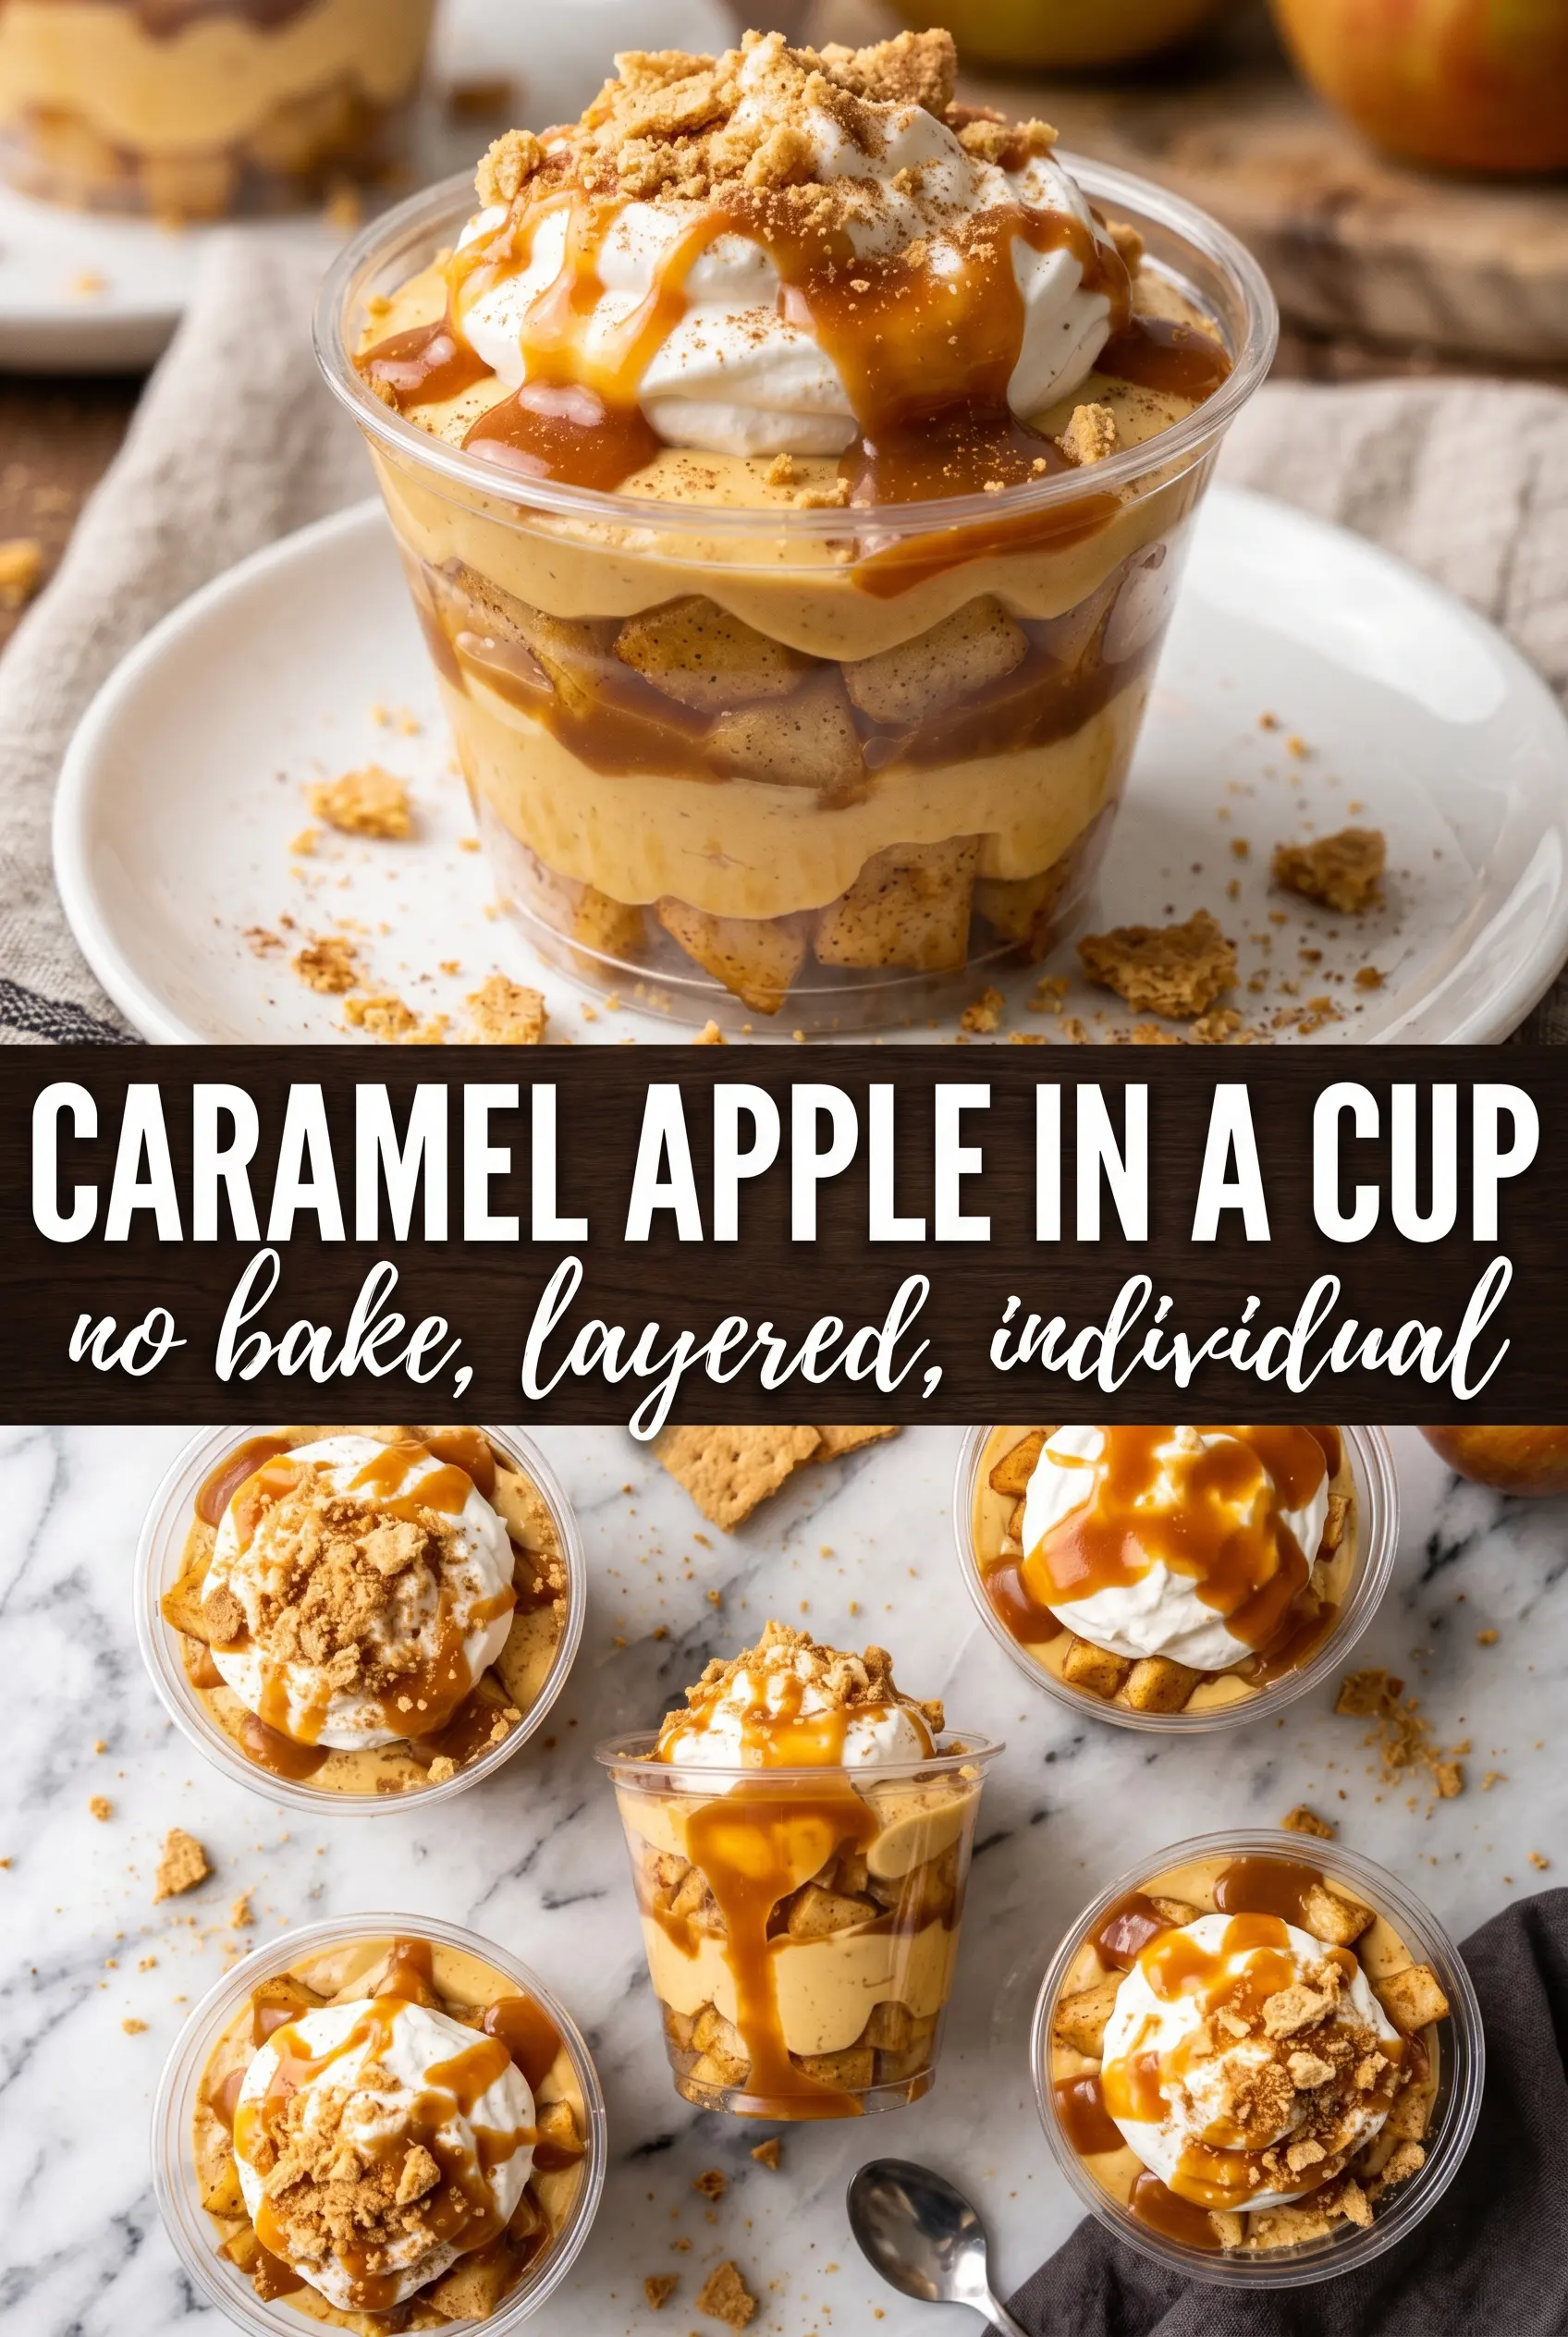
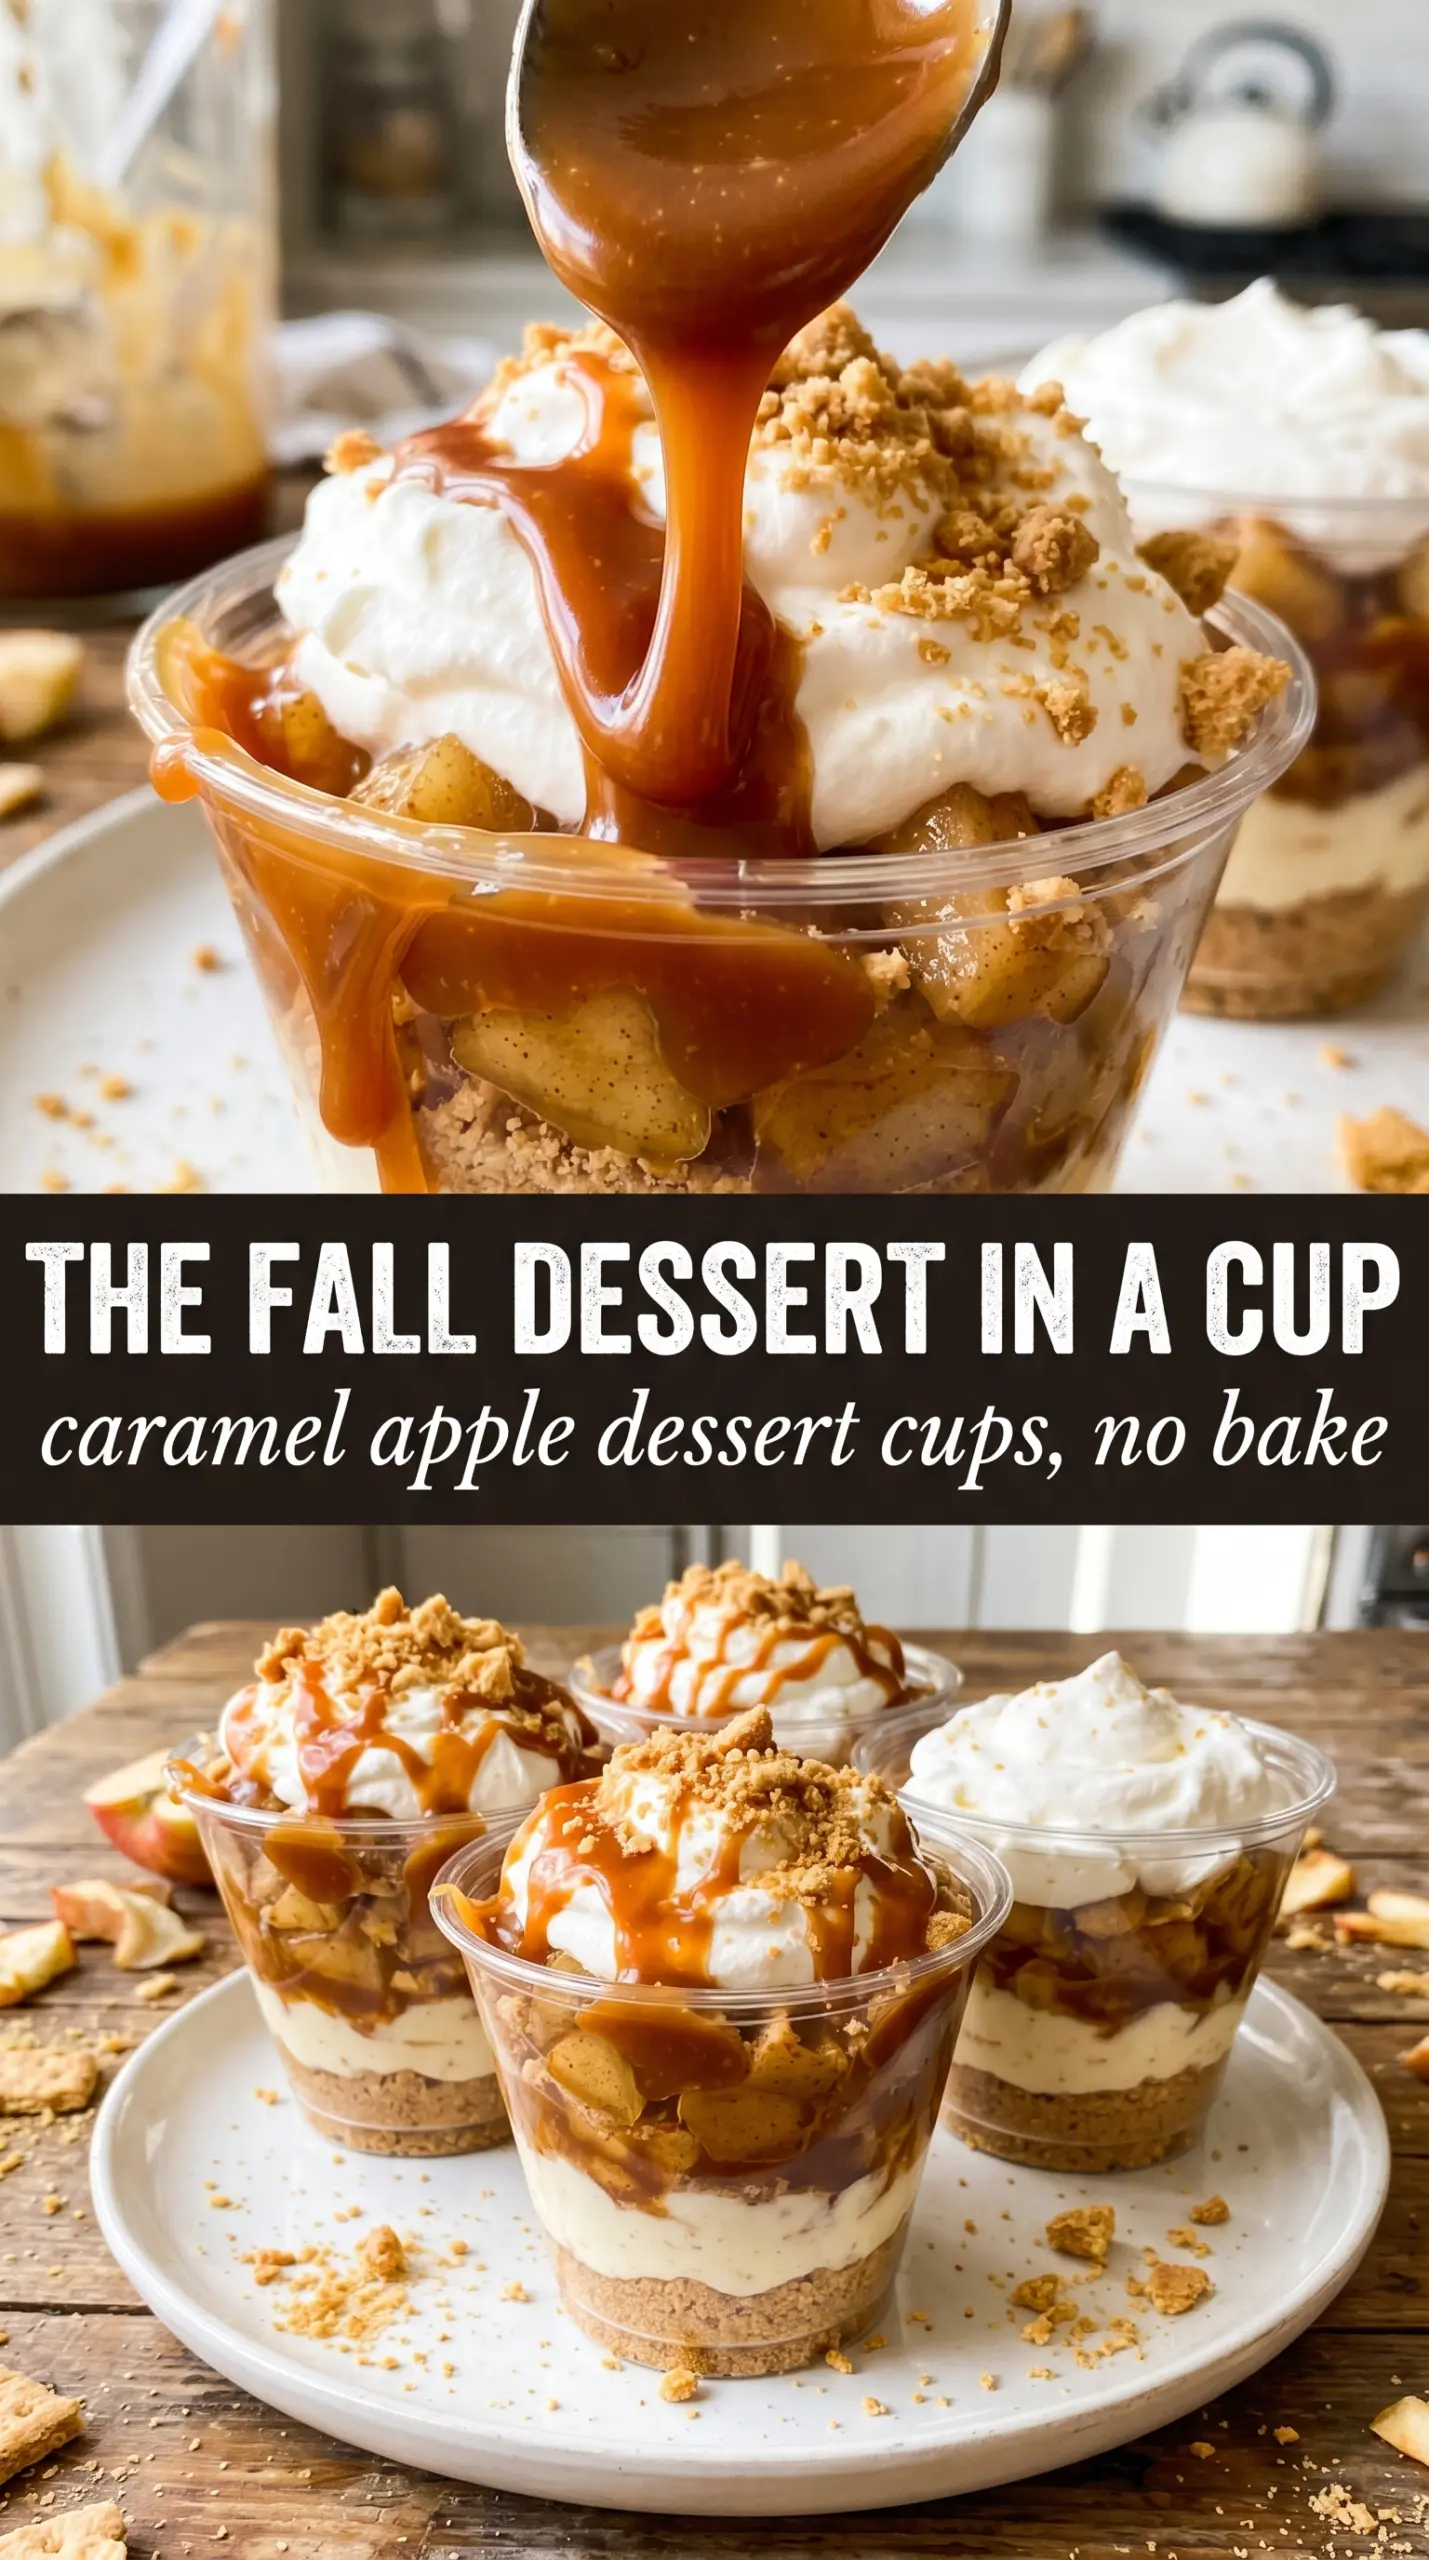
Caramel apple dessert cups hit that sweet spot between nostalgic and polished: crisp graham layers, a cool cinnamon cream layer, and warm-tasting apples cooked just until they soften and gloss over with brown sugar. Each spoonful gives you crunch, creaminess, and that sticky caramel finish without needing to slice a pie or fuss with a crust.
What makes this version work is the contrast. The crust gets packed firmly enough to hold its shape in a glass, the cream cheese layer is lightened with whipped topping so it pipes cleanly, and the apples are cooked briefly so they stay tender without turning into sauce. A little chill time pulls everything together, which matters more here than any long bake ever would.
Below, I’ve included the small details that keep the layers distinct, plus a few swaps for making these ahead or adjusting them for different diets. If you’ve ever had a dessert cup collapse into a soft jumble, the timing notes here will save you from that.
The apples stayed tender without getting mushy, and the cinnamon cream layer held its shape after chilling. I served them in little glass cups and they looked bakery-level with almost no effort.
Save these caramel apple dessert cups for the dessert table when you want layered cups with crisp crumbs, cinnamon cream, and glossy caramel apples.
The Part That Keeps the Layers from Going Soft
The biggest mistake with dessert cups is rushing the assembly before each layer is ready for the next one. If the apples are still warm, the cream layer loosens. If the crust is packed loosely, it turns sandy the second a spoon hits it. The goal here is structure: a firm base, a smooth filling, and apples that have cooled enough to sit on top instead of sinking in.
The graham crust also matters more than people think. A little extra butter helps it hold together in a glass, but too much and it turns greasy instead of crisp. The cinnamon in the filling and topping gives the dessert a through-line so it tastes balanced, not just sweet on sweet.
- Graham cracker crumbs — Fine crumbs press down more evenly than coarse ones, which helps the base hold when you spoon through it. If you’re crushing whole crackers yourself, pulse them until they look like damp sand.
- Butter — This is the glue for the crust and the cooking fat for the apples. Salted or unsalted both work; just don’t reduce it too much or the crust won’t pack tightly.
- Cream cheese — Softened cream cheese beats smooth without lumps. Cold cream cheese leaves little bits behind, and those stay grainy even after folding in the whipped topping.
- Whipped topping — This lightens the filling and helps it pipe cleanly into cups. Homemade whipped cream can work, but it softens faster, so these cups won’t hold as long in the fridge.
- Apples — Use a firm baking apple or a mix of sweet-tart apples so the topping keeps some texture. Dice them small so they cook quickly and sit neatly in the cups instead of sliding off in chunks.
- Caramel sauce — Drizzle it on at the end for shine and extra sweetness. Thick caramel gives the prettiest finish, but a thinner sauce works fine if that’s what you have.
What Each Ingredient Is Actually Doing in This Recipe
- Primary ingredient (the star) — Quality matters most. Choose the best you can find.
- Cooking medium (oil, butter, or broth) — This carries flavors and prevents dryness.
- Seasonings (salt, pepper, spices, herbs) — Layer flavors so nothing overpowers. Build depth gradually.
- Aromatics (garlic, onion, herbs) — Cook with fat to bloom flavors. Become the foundation.
- Supporting ingredients — Complement the main ingredient without overpowering it.
- Sauce or liquid (if applicable) — Brings flavors together. Balance richness with acid.
- Acid (lemon, vinegar, wine, or other) — Brightens and prevents flat-tasting results.
- Final finish (garnish, glaze, or sauce) — Prevents one-dimensional taste and adds visual appeal.
Building the Cups Without Losing the Texture
Pressing the Crust
Stir the graham crumbs, melted butter, and sugar until every crumb looks evenly moistened, then press the mixture firmly into the bottom of each cup. Use the bottom of a small glass or measuring spoon to pack it down; loose crumbs fall apart as soon as you add the filling. The crust should look compact and slightly darker where the butter has soaked through.
Whipping the Cinnamon Filling
Beat the cream cheese, powdered sugar, vanilla, and cinnamon until the mixture is completely smooth before folding in the whipped topping. If you start with lumpy cream cheese, the lumps stay there, and no amount of folding fixes them. The finished filling should look thick, airy, and spreadable, not runny.
Cooking the Apples Just Long Enough
Cook the diced apples with butter, brown sugar, and cinnamon over medium heat for 5 to 6 minutes until they soften and the pan looks glossy. You want the apples tender at the edges but still holding their shape in the center. If the heat runs too high, the sugar can scorch before the apples soften, so keep the mixture moving and pull it off the burner as soon as the pieces look lightly caramelized.
Assembling and Chilling
Spoon or pipe the cream layer over the crust, then add the cooled apples and finish with caramel sauce. Keep the layers distinct instead of stirring them together; that’s what gives each cup its clean look and balanced bite. Chill for at least 1 hour so the crust firms up and the filling sets enough to support the topping.
How to Adjust These for Different Crowds and Diets
Make-Ahead Party Cups
Assemble the cups with the crust and cream layer a few hours ahead, then top with apples and caramel closer to serving. That keeps the topping from weeping into the filling and preserves the clean layers. If you want the best texture, hold the caramel drizzle until the last minute.
Dairy-Free Version
Use a dairy-free cream cheese and whipped topping, then swap in plant-based butter for both the crust and apple topping. The dessert still layers well, though the filling will taste a little softer and less tangy than the original.
Gluten-Free Crust Swap
Use gluten-free graham-style crumbs or crushed gluten-free cookies in the same amount. The texture stays close to the original as long as the crumbs are fine and the butter is measured accurately. If the crumb mix feels dry, add another teaspoon of melted butter rather than guessing.
Storage and Reheating
- Refrigerator: Store covered for up to 3 days. The crust softens a little by day two, but the cups still taste great.
- Freezer: Not ideal. The cream layer and apples change texture after thawing, and the cups can turn watery.
- Reheating: Don’t reheat the assembled cups. If you want the apples warm, rewarm just the topping in a skillet, cool it slightly, then spoon it over chilled cups.