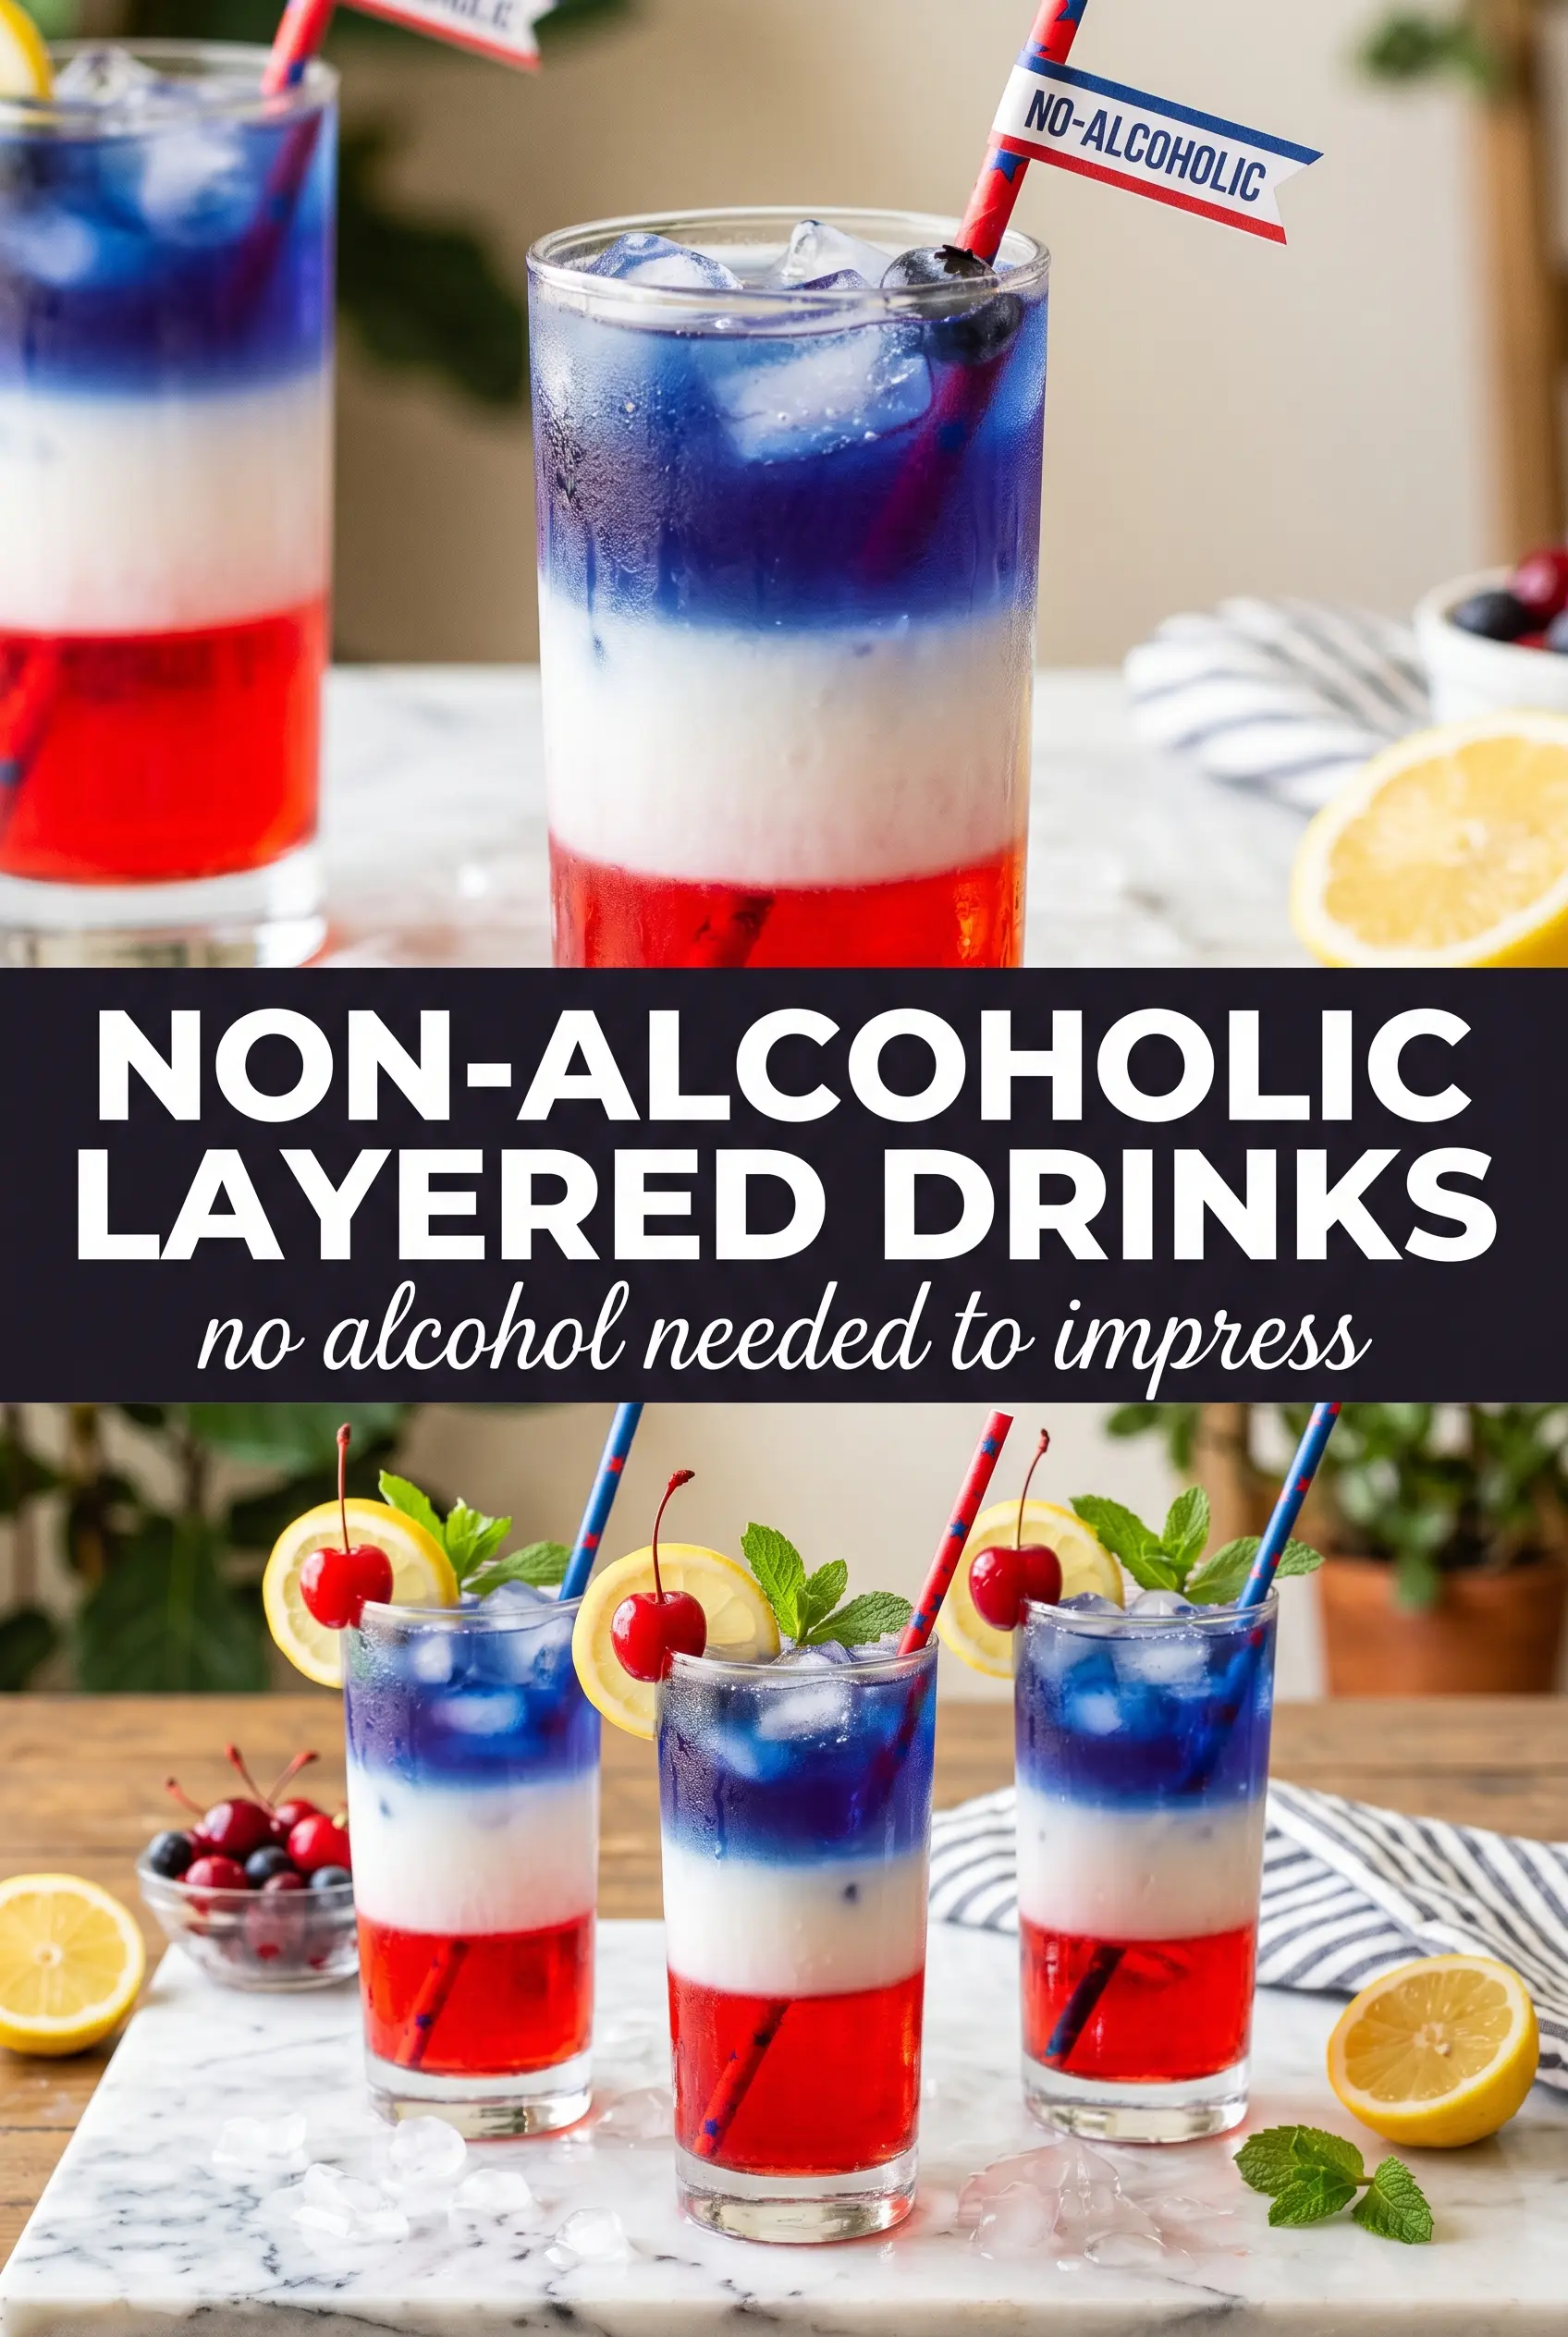
Three-layer drinks get all the attention for a reason: when the colors stay separate, the glass looks polished before anyone takes a sip. This version gives you a deep red bottom, a bright golden middle, and a vivid blue top, and the payoff is bigger than the effort. The trick is keeping every liquid cold and pouring slowly enough that the layers settle without smashing into each other.
That part matters more than fancy ingredients. Grenadine is heavier than the other liquids, so it drops straight through the ice and anchors the drink. The lemonade and blue raspberry drink need to be chilled so they move more gently, and the spoon helps break the pour just enough to protect each layer. If the glass is packed with ice and the pours are patient, the colors stay crisp instead of turning into one murky shade.
Below, you’ll find the small details that make a layered mocktail look intentional instead of rushed, plus a few easy ways to swap flavors without losing the effect.
The layers stayed separated all the way to the table, and the spoon trick kept the lemonade from mixing into the grenadine. My kids thought it looked like a drink from a restaurant.
Like this layered mocktail? Save it for the next party when you want a red, white, and blue-looking drink without any alcohol.
The Pour Order That Keeps the Colors Sharp
Layered drinks fail for one of two reasons: the liquids are too warm, or they hit the glass with too much force. Both problems make the colors collapse into each other. Chilling the lemonade and blue raspberry drink first gives you more control, and pouring over a spoon slows the stream enough that each layer lands gently on top of the last one.
The ice is doing a lot of quiet work here, too. It helps break the pour and gives each liquid something to slide over instead of crashing straight down. Keep the glass nearly full of ice so the layers have less room to mix, and pour the grenadine first because it naturally sinks to the bottom. If you rush the middle layer, that pretty boundary disappears fast.
What Each Ingredient Is Doing in the Glass
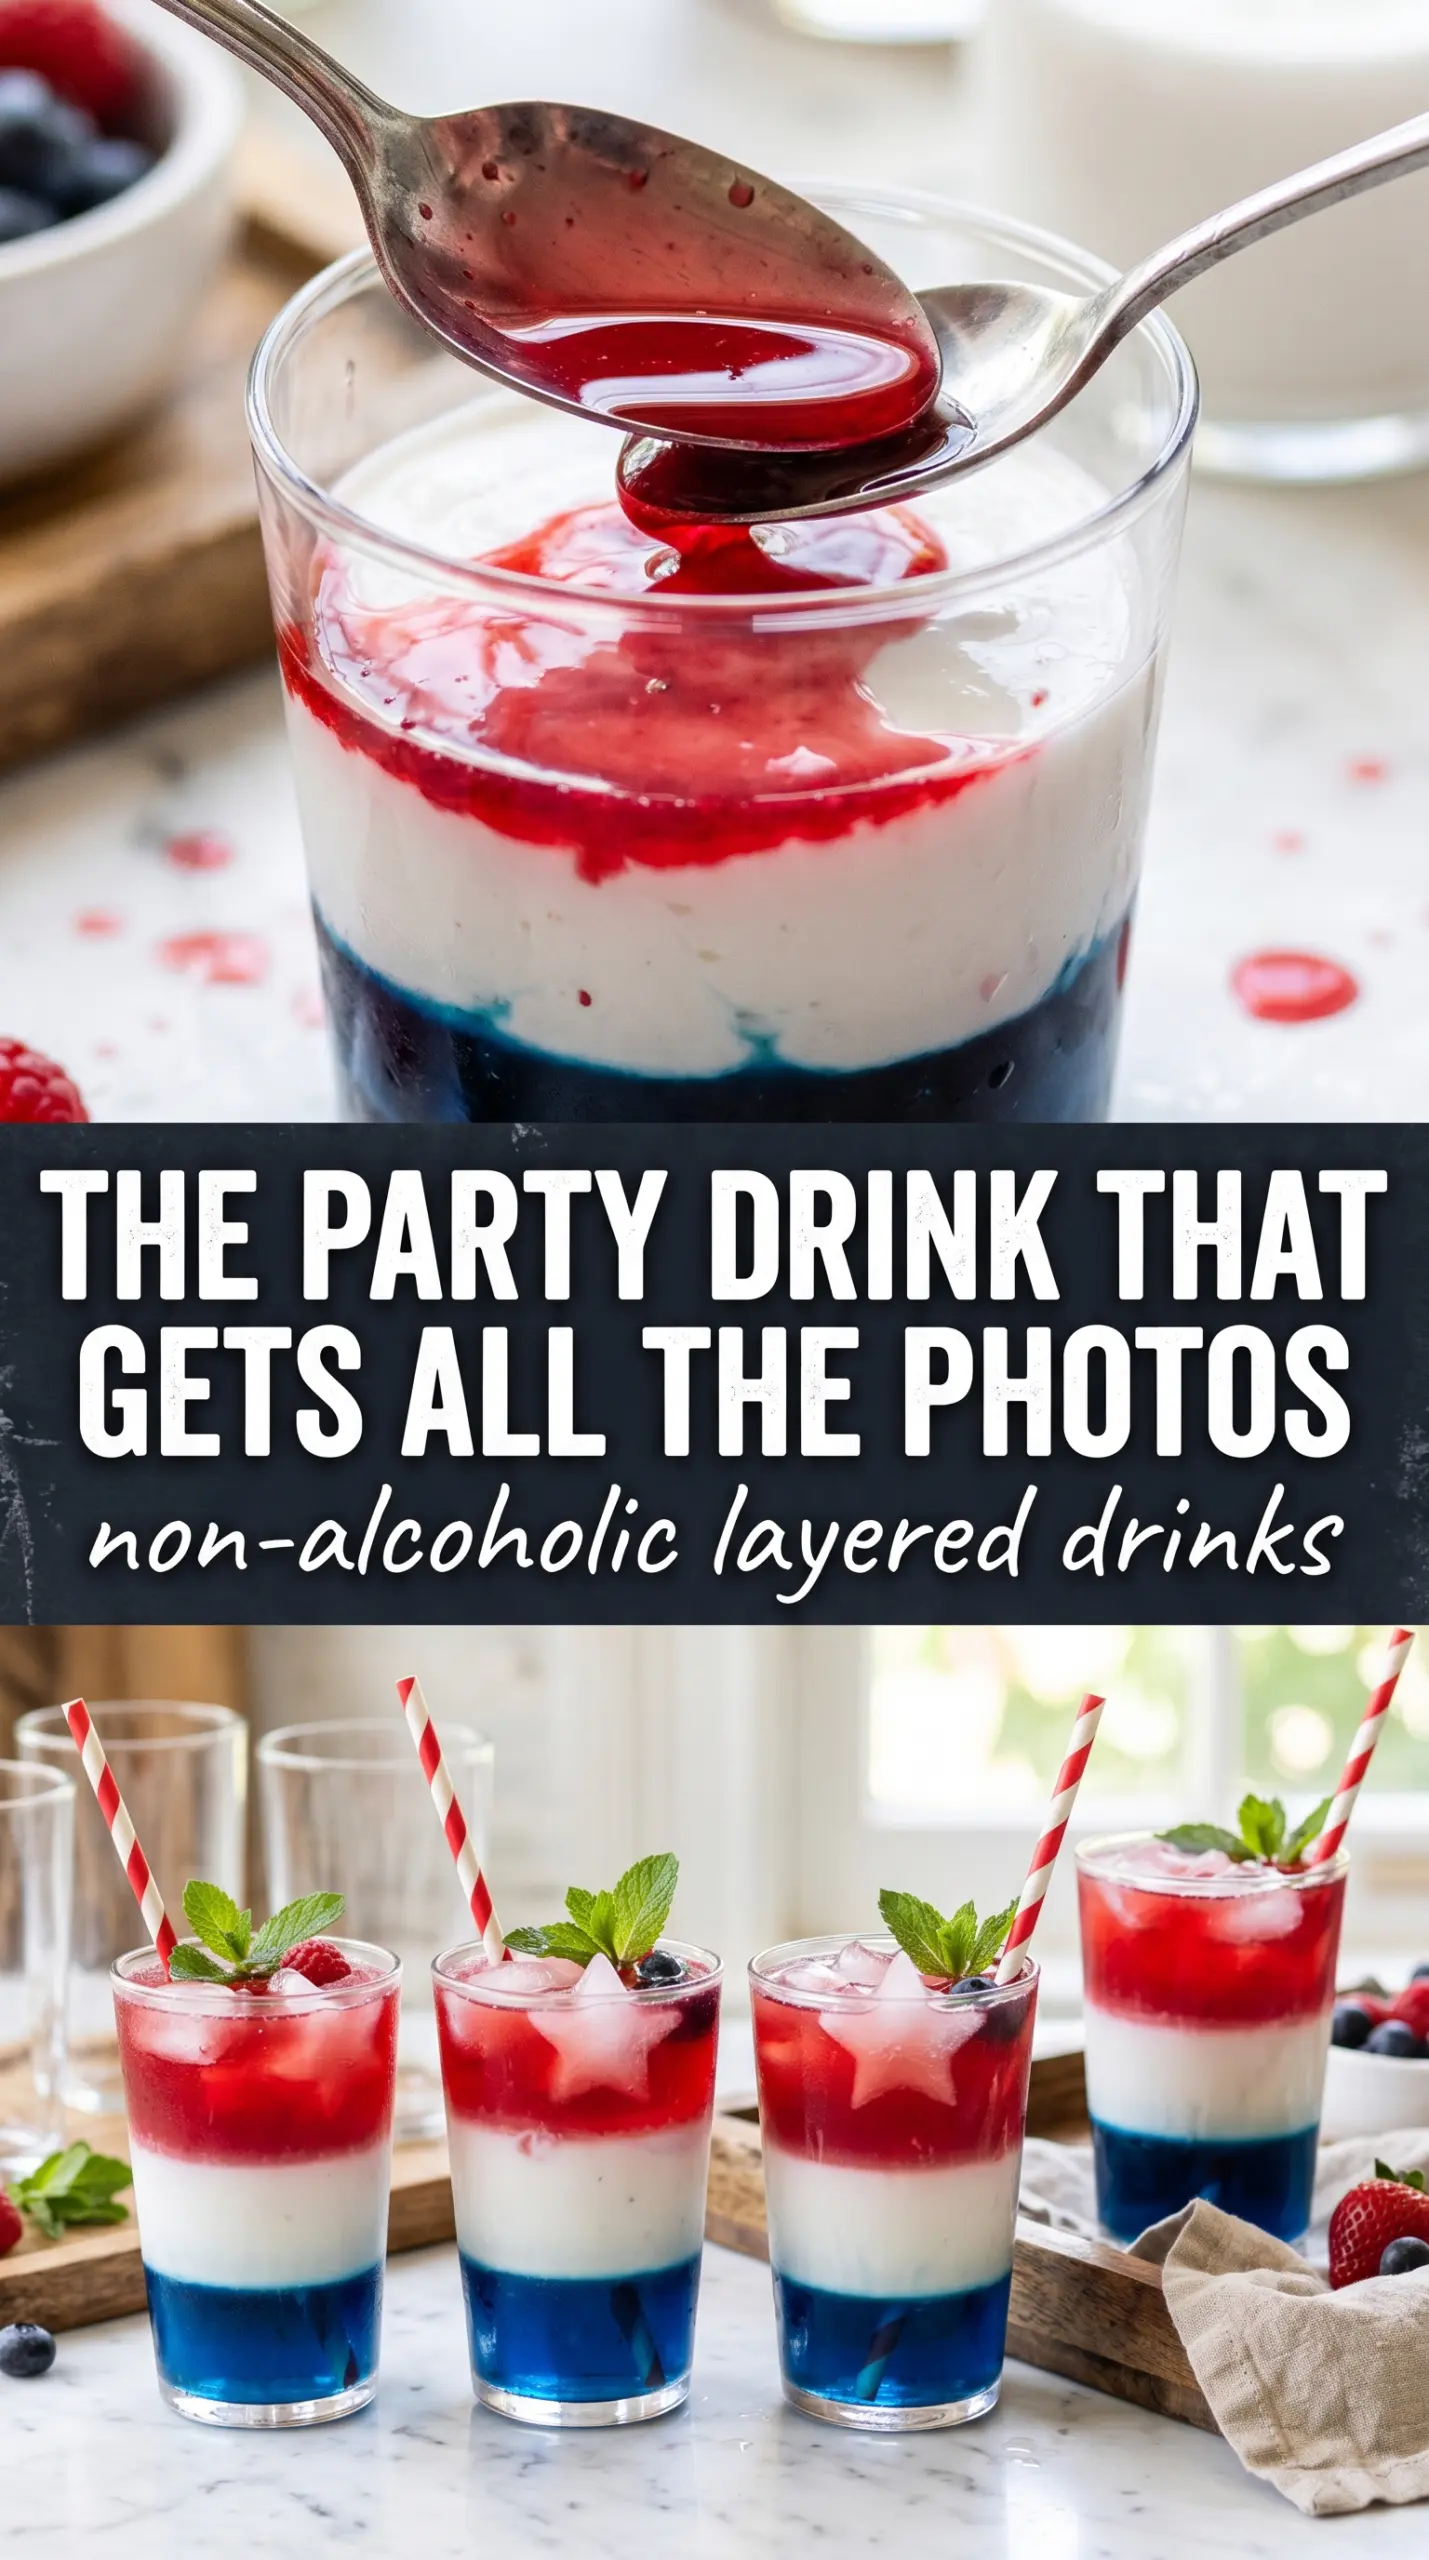
- Grenadine syrup — This gives you the deepest color and the heaviest layer, which is why it belongs on the bottom. Any decent grenadine works here because the job is structure, not complexity.
- Lemonade — Use it cold so it pours cleanly and stays bright in the middle. Freshly made lemonade tastes better, but store-bought is fine as long as it isn’t overly pulpy.
- Blue raspberry sports drink or blue raspberry lemonade — This creates the top layer and the strongest color contrast. Blue raspberry sports drink is usually a little lighter and easier to float; blue raspberry lemonade adds more citrus bite if you want less sweetness.
- Ice cubes — Don’t skip the ice or the layers will blend faster. Fill the glass almost all the way so the pour has less distance to travel.
- Maraschino cherries and striped straws — These don’t change the drink, but they finish it with the kind of look that makes the layering worth the effort.
Building the Layers Without Stirring the Colors Together
Starting With the Bottom Layer
Fill a tall clear glass with ice until it’s almost packed to the top. Pour the grenadine in slowly, aiming at the ice rather than the side of the glass, and watch it slide down and settle beneath everything else. If you pour too fast, it can splash up through the ice and muddy the middle later.
Floating the Middle Layer
Hold a spoon just above the ice and pour the chilled lemonade over the back of it. That breaks the stream and helps the lemonade rest on top of the grenadine instead of punching through it. Keep the pour steady, not hurried, because a sudden dump will blend the colors at the seam.
Adding the Blue Top
Use the same spoon trick for the blue raspberry drink and pour it over the top so it sits above the lemonade. Stop as soon as the blue layer reaches the rim or starts to crowd the glass. Garnish right away with a cherry and straw, then serve immediately without stirring so the colors stay clean until the first sip.
How to Change the Colors Without Losing the Layered Look
Make it lower sugar
Use a light grenadine or a smaller pour of syrup, then swap in sugar-free lemonade and a zero-sugar blue raspberry drink. The layering still works, but the flavors come across a little sharper and less candy-sweet.
Turn it into a crowd pitcher
You can scale the ingredients, but the drink only keeps its stripes if you build it in individual glasses. A pitcher blends everything as soon as it’s moved, so use the same ingredients and assemble each serving one at a time.
Change the color theme
Swap the blue layer for another brightly colored chilled drink, like purple grape or green lime soda, if you want a different party look. The only rule is that the last layer should be lighter or at least no heavier than the middle one, or the stack will collapse.
Storage and Reheating
- Refrigerator: Best assembled right before serving. The layers will start to blend as the ice melts.
- Freezer: Not a good freezer drink; the texture and layers fall apart when thawed.
- Reheating: Not applicable. If you need to prep ahead, chill the liquids and garnish separately, then build the drink at the last minute.
Answers to the Questions Worth Asking
Non-Alcoholic Layered Drinks
Ingredients
Method
- Fill a tall clear glass with ice cubes almost to the top to create a stable base; keep the glass cold and ready for layering.
- Pour grenadine syrup slowly over the ice so it sinks to the bottom as the first layer, aiming for an even red pool.
- Gently pour chilled lemonade over the back of a spoon held just above the ice to form a clean middle layer; move slowly to prevent mixing.
- Pour the blue raspberry drink over the spoon in the same way to float it as the top layer, stopping once the blue layer reaches the desired height.
- Garnish with a maraschino cherry and a striped straw, then serve immediately.
- Do not stir, so the three colors stay distinctly layered in the clear glass.