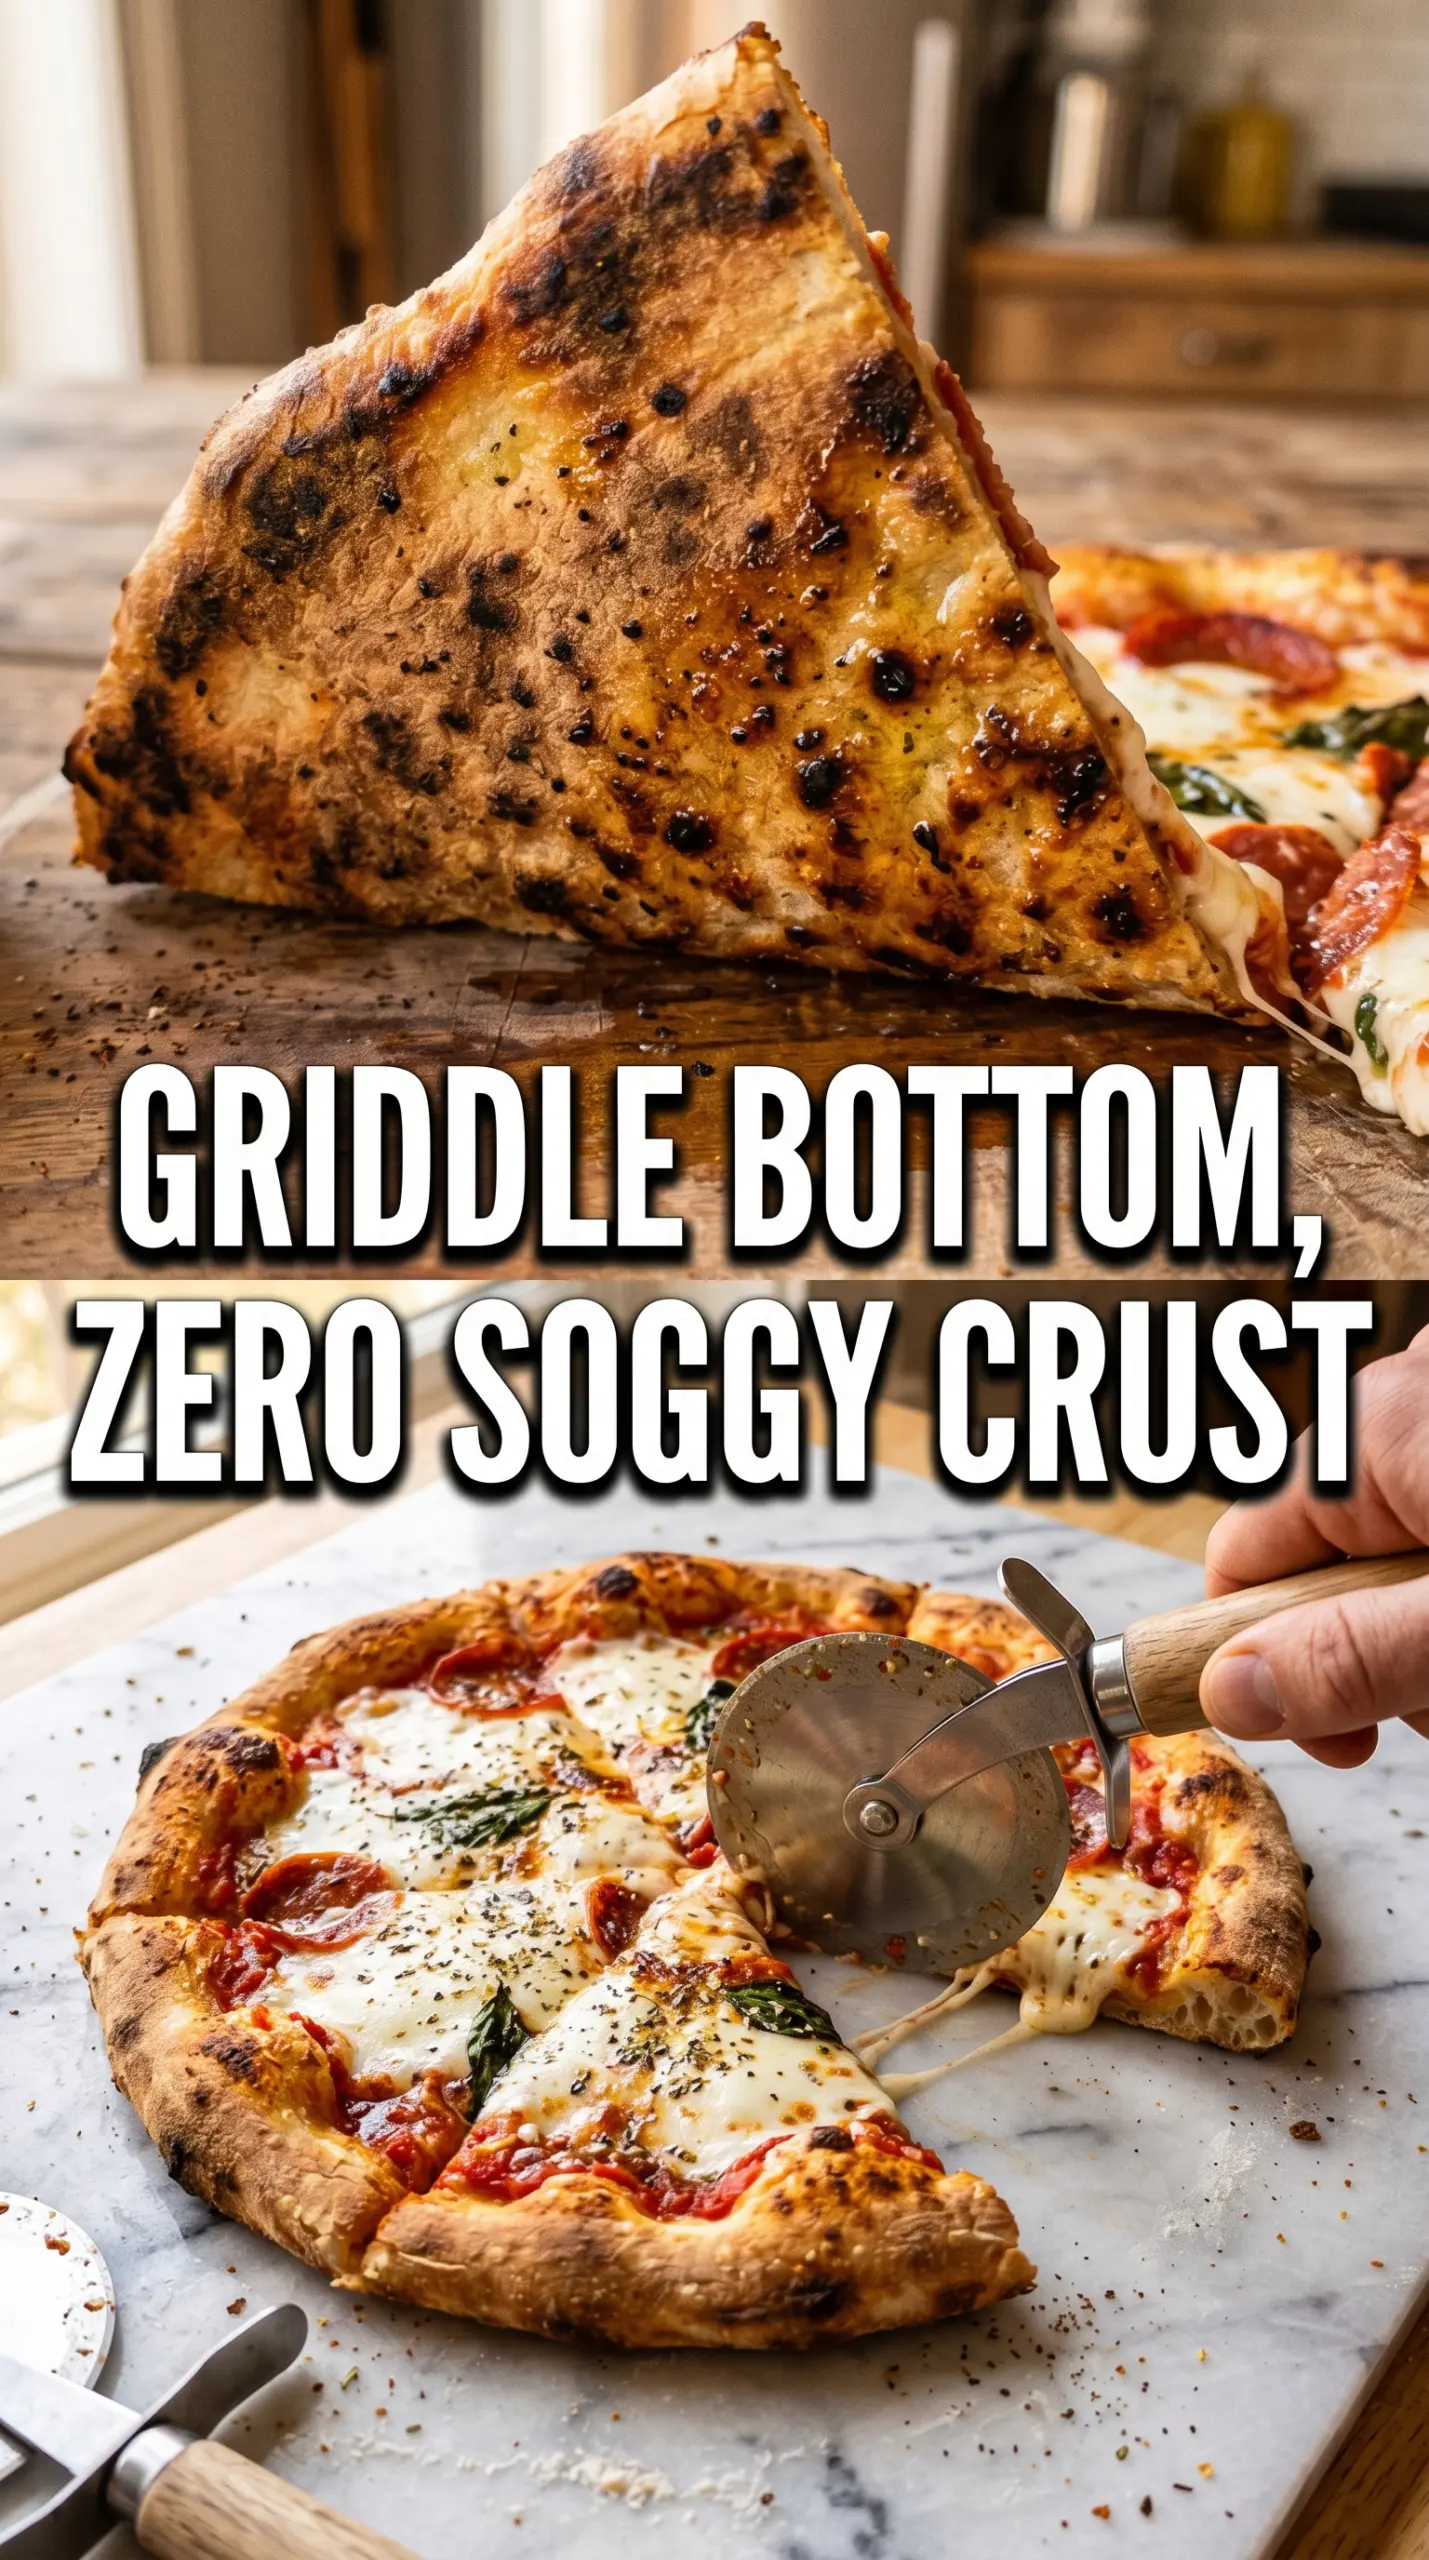
Pizza on a Blackstone griddle gives you the kind of crust that keeps people hovering near the cooktop: crisp on the bottom, light in the middle, and spotted with those deep toasted patches that taste like a real pizzeria finish. The cheese melts fast, the sauce stays bright, and the whole thing comes together without heating up the oven.
The trick is cooking the dough first, then flipping it before the toppings go on. That quick first side sets the structure, so the crust can support sauce and cheese without turning soggy. Medium heat matters here, too. Too hot and the bottom scorches before the cheese has time to melt; too cool and you lose the char that makes griddle pizza worth making.
Below, you’ll find the timing that keeps the dough workable, the topping order that prevents a wet center, and a few swaps that make this just as easy for a meat lover’s pie or a vegetarian one.
The crust got crisp underneath but still stayed tender in the middle, and flipping it before the toppings went on kept the sauce from soaking through. My kids each asked for their own personal pizza next time.
Love the blistered Blackstone crust and melted cheese finish? Save this griddle pizza for the nights when you want outdoor pizza with a fast, crisp payoff.
The Flip That Keeps the Crust Crisp Instead of Soggy
The biggest mistake with griddle pizza is piling sauce onto raw dough and expecting the center to hold up. It usually doesn’t. The bottom steams, the middle goes soft, and by the time the cheese melts you’ve got a floppy mess instead of a sliceable pie. Cooking the first side plain gives the dough a set surface, which is what lets it survive the sauce and toppings.
That flip also changes the texture in a good way. The side that started out against the griddle becomes your topping side, and it starts heating immediately under the sauce and cheese while the new bottom side keeps building a crust. If the dough tears when you flip it, the griddle was too cool or the dough was stretched too thin in the center.
What Each Ingredient Is Actually Doing in This Pizza
- Pizza dough — This is the structure, so use a dough that stretches without snapping back. Store-bought dough works fine here, but it should sit at room temperature long enough to relax or it will keep shrinking on the griddle.
- Olive oil — Oil keeps the dough from sticking and helps the surface take on those brown, crisp spots. You don’t need a fancy bottle, but you do need enough to lightly coat the griddle.
- Pizza sauce — A thicker sauce matters more than an expensive one. Runny sauce floods the crust, so if yours is loose, simmer it for a few minutes first or spoon on less than you think you need.
- Mozzarella — Shredded low-moisture mozzarella melts evenly and gives you that classic stretch. Fresh mozzarella tastes great, but it releases more water, so the pizza can get wet unless you pat it dry and use it sparingly.
- Flour — A light dusting keeps the dough from sticking while you stretch and move it. Too much flour burns on the griddle, so brush off the excess before the dough goes down.
- Fresh basil and Parmesan — Add these after cooking. Basil turns dull if it cooks too long, and Parmesan gives you a salty finish without adding more moisture.
How to Build the Pizza So the Griddle Stays on Your Side
Heating the Surface
Set the Blackstone to medium heat and let the surface come up evenly before the dough touches it. If the griddle is still patchy-hot, one part of the crust will brown before another part even sets. A thin film of oil should shimmer, not smoke. If it smokes, the griddle is too hot and the first side will scorch before you can flip.
Stretching and Setting the Dough
Divide the dough into four portions and stretch each one into a thin round with flour underneath and on your hands. Don’t chase perfect circles; an even thickness matters more than the shape. The dough should hit the griddle and start to firm up within a minute. If it shrinks back hard, let it rest for a few minutes so the gluten relaxes.
Flipping and Topping Fast
Cook the first side for 2 to 3 minutes until the bottom is golden, then flip it so the cooked side faces up. Work quickly on that second side: sauce first, then cheese, then toppings. Leaving the dough bare after the flip gives the top side time to keep crisping instead of steaming under a wet pile of ingredients.
Melting Under Cover
Cover the pizza with a dome or large pan for 3 to 5 minutes until the cheese melts and the toppings heat through. The cover traps heat and finishes the top without overcooking the crust. Pull the pizza when the cheese is fully melted and the edges look browned and set. If you wait until the cheese is dark, the bottom usually goes too far first.
How to Adapt This for Different Toppings and Diets
Gluten-Free Crust
Use a gluten-free pizza dough that can be stretched without cracking, then handle it gently because it won’t have the same elasticity as wheat dough. It may need a little more oil on the griddle and a slightly shorter first cook, since many gluten-free doughs brown faster on the bottom.
Dairy-Free Version
Use your favorite meltable dairy-free cheese and keep the layer a little thinner than you would with mozzarella. Some substitutes soften instead of stretching, so covering the pizza helps them melt through without needing extra time that could overbrown the crust.
Meat Lover’s Pizza
Use cooked meats only, especially if you’re adding sausage, bacon, or chicken. Raw toppings won’t finish in the short covered cook, and they can leak extra fat or moisture that softens the crust.
Make It a Margherita
Keep it simple with sauce, mozzarella, basil, and a little Parmesan at the end. With fewer toppings, the crust has a better chance to crisp evenly, and the fresh basil tastes brighter because it’s not fighting a heavy topping layer.
Storage and Reheating
- Refrigerator: Store leftovers in an airtight container for up to 3 days. The crust softens a little, but it still reheats well.
- Freezer: Freeze slices wrapped individually if you want, though the texture won’t be quite as crisp after thawing. It’s best for emergency leftovers, not a make-ahead freezer meal.
- Reheating: Reheat in a dry skillet or back on the griddle over medium-low heat until the bottom crisps and the cheese melts. The common mistake is using the microwave first, which turns the crust rubbery before you ever get the chance to crisp it again.
Questions I Get Asked About This Recipe

Pizza on a Blackstone Griddle
Ingredients
Equipment
Method
- Heat the Blackstone griddle to medium heat, then lightly oil the surface so it’s slick but not pooling. Visual cue: the surface looks glossy and ready to sizzle when dough touches down.
- Divide pizza dough into 4 portions and stretch each into a thin round, dusting with flour as needed. Visual cue: rounds should be thin enough to see slight translucency at the edges.
- Place the dough rounds directly on the griddle and cook for 2-3 minutes, until the bottom is golden. Visual cue: bubbles form and the underside looks browned with charred specks.
- Flip the crust and quickly add pizza sauce, mozzarella cheese, and your choice of toppings to the cooked side. Visual cue: toppings settle immediately without sliding off.
- Cover with a dome or large pan and cook for 3-5 minutes until the cheese fully melts. Visual cue: cheese turns glossy and bubbly, and toppings look heated through.
- Remove the pizza from the griddle and top with fresh basil leaves and grated Parmesan cheese, then slice and serve. Visual cue: basil looks bright green against the melted cheese.